How to Achieve Perfect Inpainting Results in Stable Diffusion (SDXL)
This is a detailed step-by-step guide to achieve perfect inpainting results in Stable Diffusion XL (SDXL).

SDXL 1.0 Inpaint model is an advanced latent text-to-image diffusion model designed to create photo-realistic images from any textual input. It boasts an additional feature of inpainting, allowing for precise modifications of pictures through the use of a mask, enhancing its versatility in image generation and editing.
Inpainting allows you to alter specific parts of an image. It works by using a mask to identify which sections of the image need changes. In these masks, the areas targeted for inpainting are marked with white pixels, while the parts to be preserved are in black. The model then processes these white pixel areas, filling them in accordance with the given prompt.
How to use SDXL Inpainting?
SDXL inpainting process involves several key steps, each playing a vital role in transforming an image.
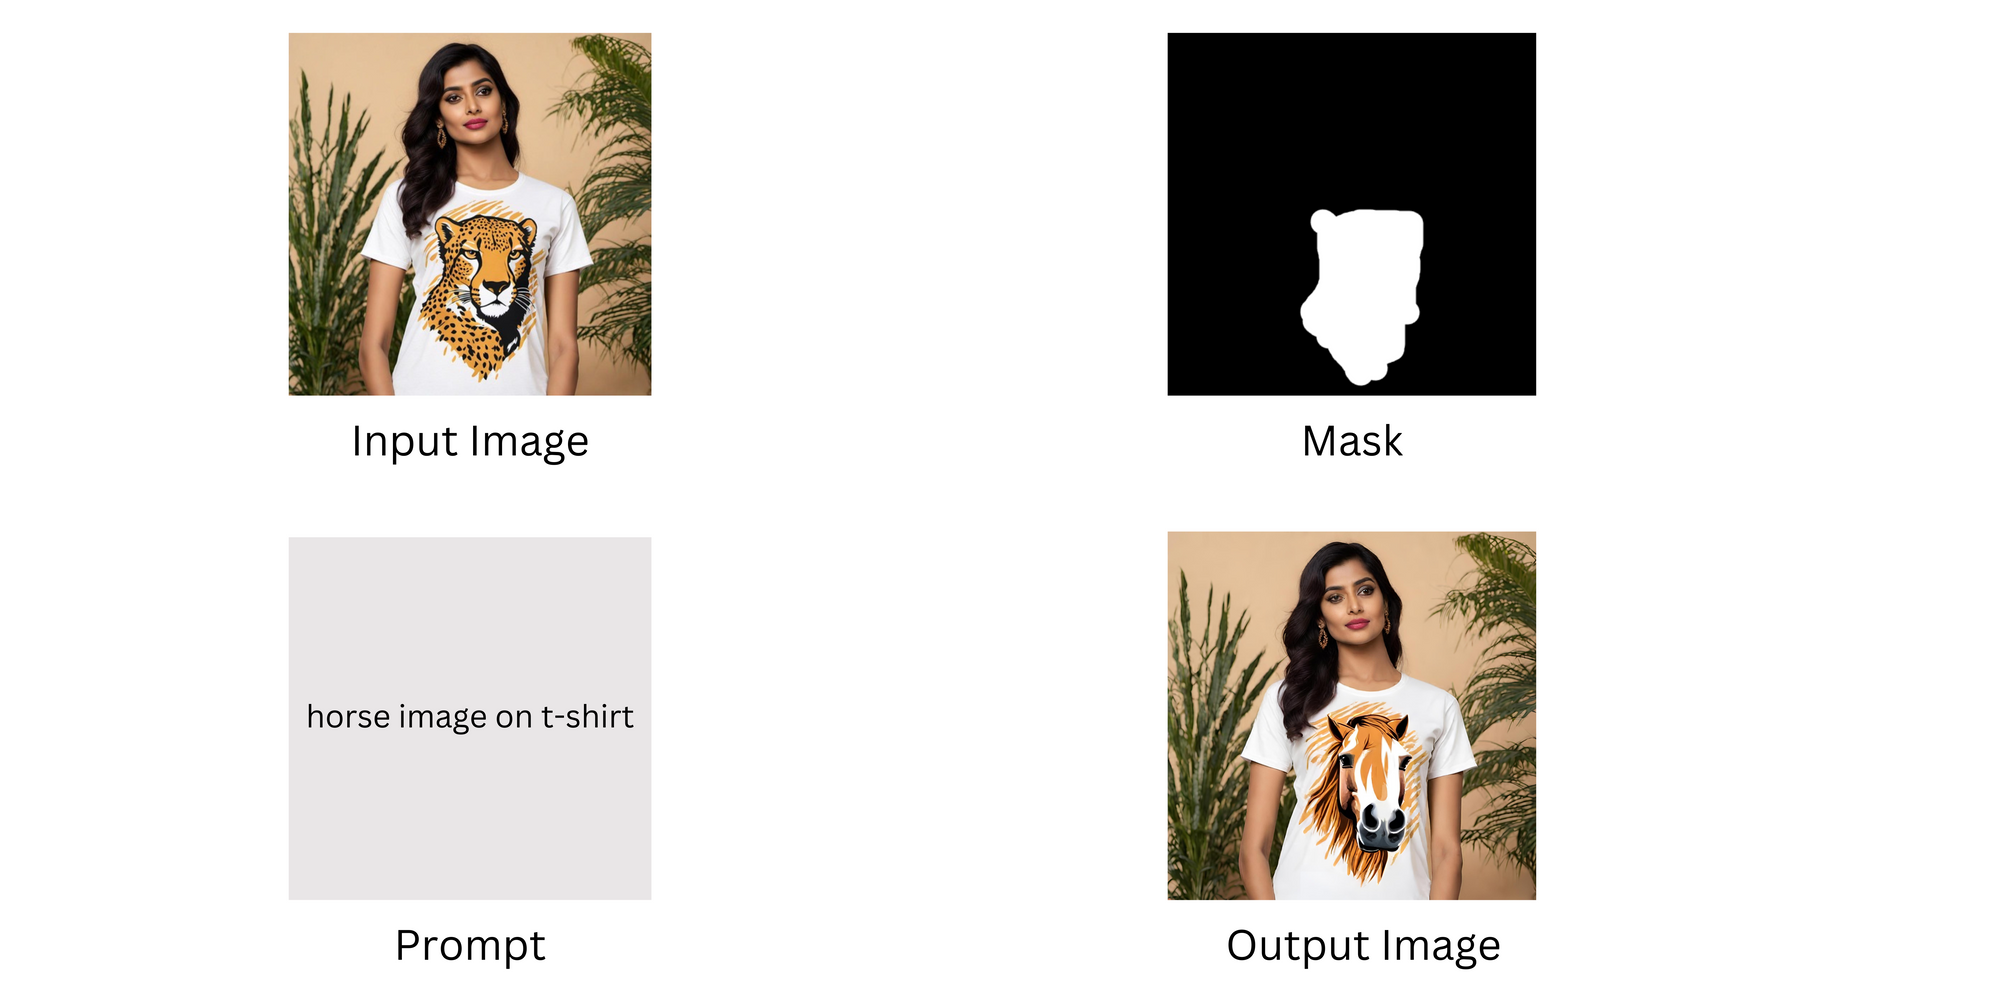
- Input Image: This is the original image that needs alteration or restoration. The quality and resolution of the input image can significantly impact the final result. The image could be anything from a photograph, a digital painting, to a scan of a physical document.
- Mask Image: In this mask, the areas designated for inpainting are usually marked with white pixels, and the areas to be left unchanged are marked with black pixels. This binary mask guides the model in understanding the scope of the work required.
- Prompt: The prompt consists of textual descriptions or instructions that guide the model in determining what to generate in the masked areas. For example, if a part of an image is masked and the prompt says "a lush green forest," the model will attempt to fill the masked area with imagery that matches the description of a lush green forest.
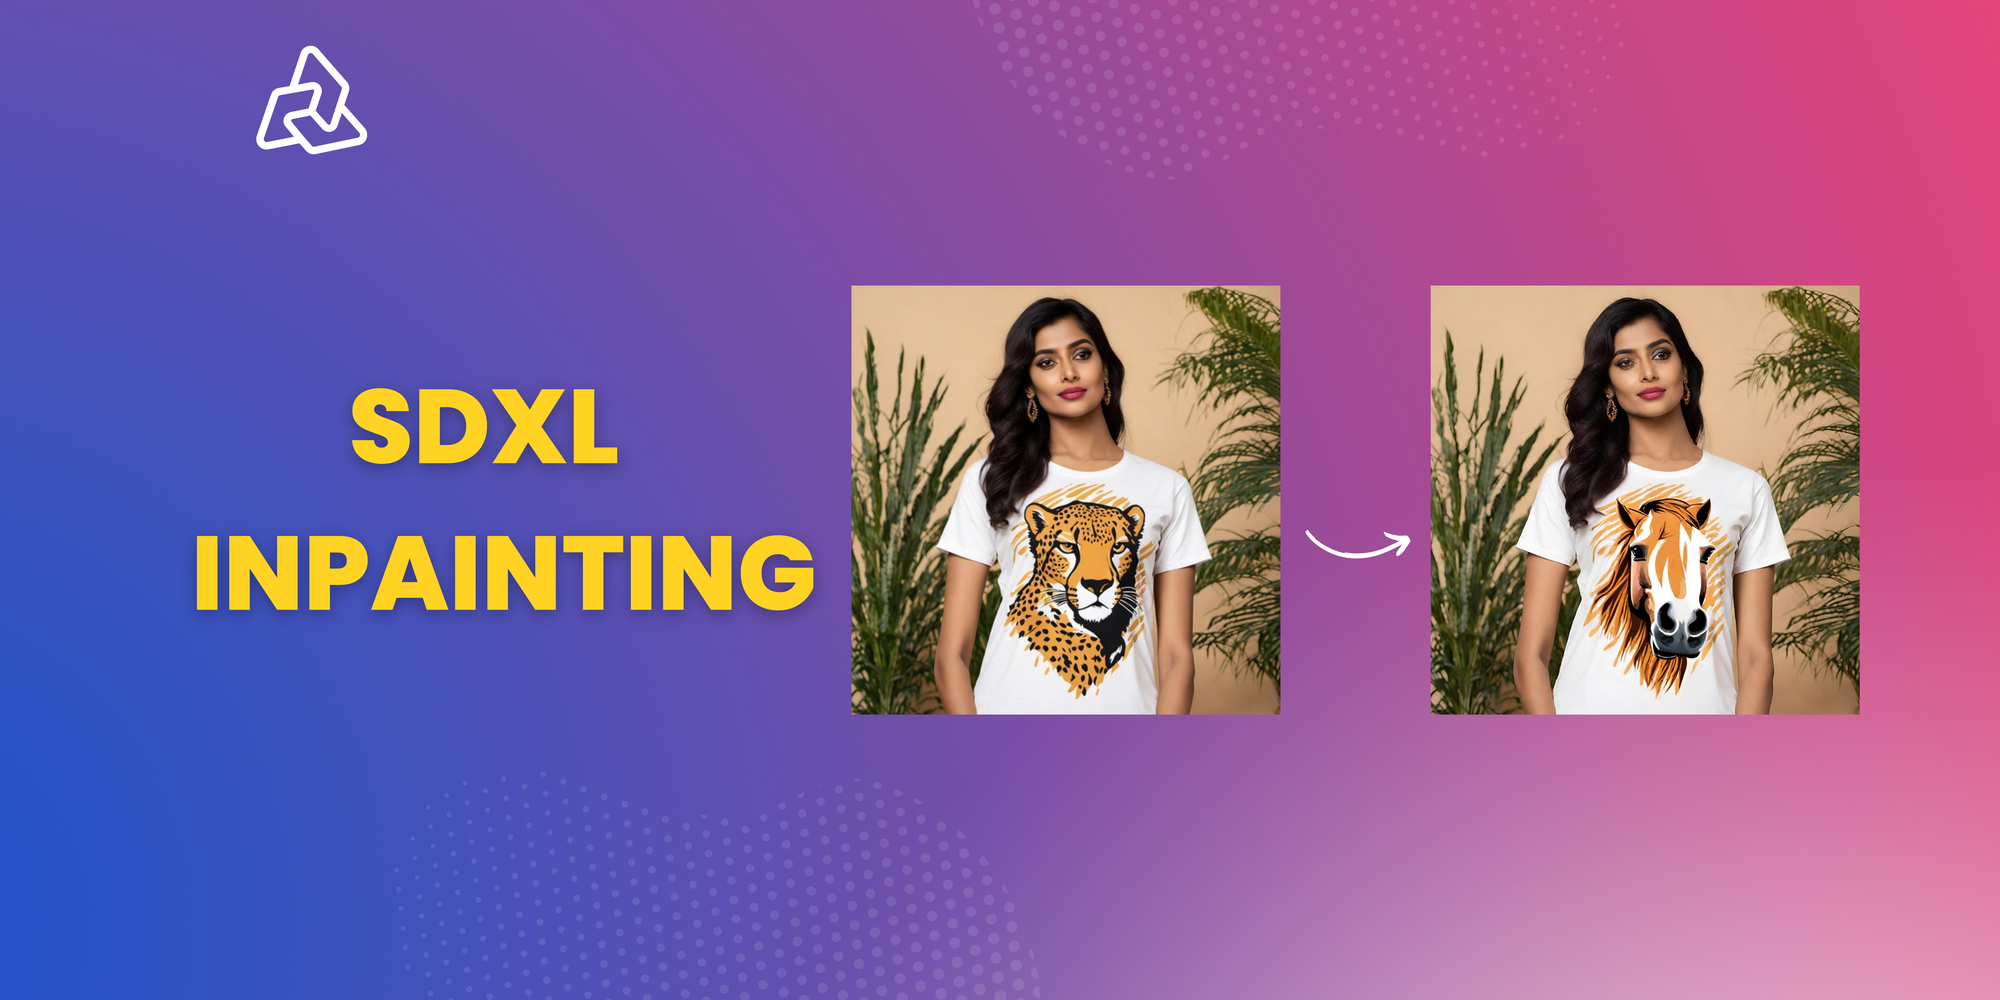
In the below example, we change the image on a t-shirt worn by a model. The image of cheetah is changed to an image of a horse using inpainting.
How to create Mask Image for Inpainting?
With our user-friendly Inpainting tool, creating a mask image becomes a straightforward and efficient process, allowing for precise control over the areas of your image you wish to modify or enhance.
Inpaint brush: Mask the area of the image you want to be altered using inpaint brush. You can adjust the stroke width of this brush to suit the size of the area you need to mask. A larger stroke width covers more area, making it faster to mask large sections, while a smaller width allows for more precision and is ideal for detailed work.
Mask the Image: Use the brush to paint over the areas of the image you want to alter or remove. As you paint, these areas will be marked, typically shown in a contrasting color to the image (often white or another easily visible color).
Use Undo if Necessary: If you accidentally mask a part of the image you didn't intend to, use the 'Undo' feature. This allows you to revert the last action(s) and correct any mistakes, ensuring that only the desired areas are masked.
Extract the Mask: Once you are satisfied with the masked areas, you can extract the mask. Upon extraction, the masked areas (the parts you painted over) will typically appear white, indicating that they are the regions to be inpainted. The unmasked areas (the parts of the image you want to keep) will appear black.
What are the Best Settings for Inpainting in SDXL?
Let's explore the key settings and examine how altering them impacts the final output in inpainting.
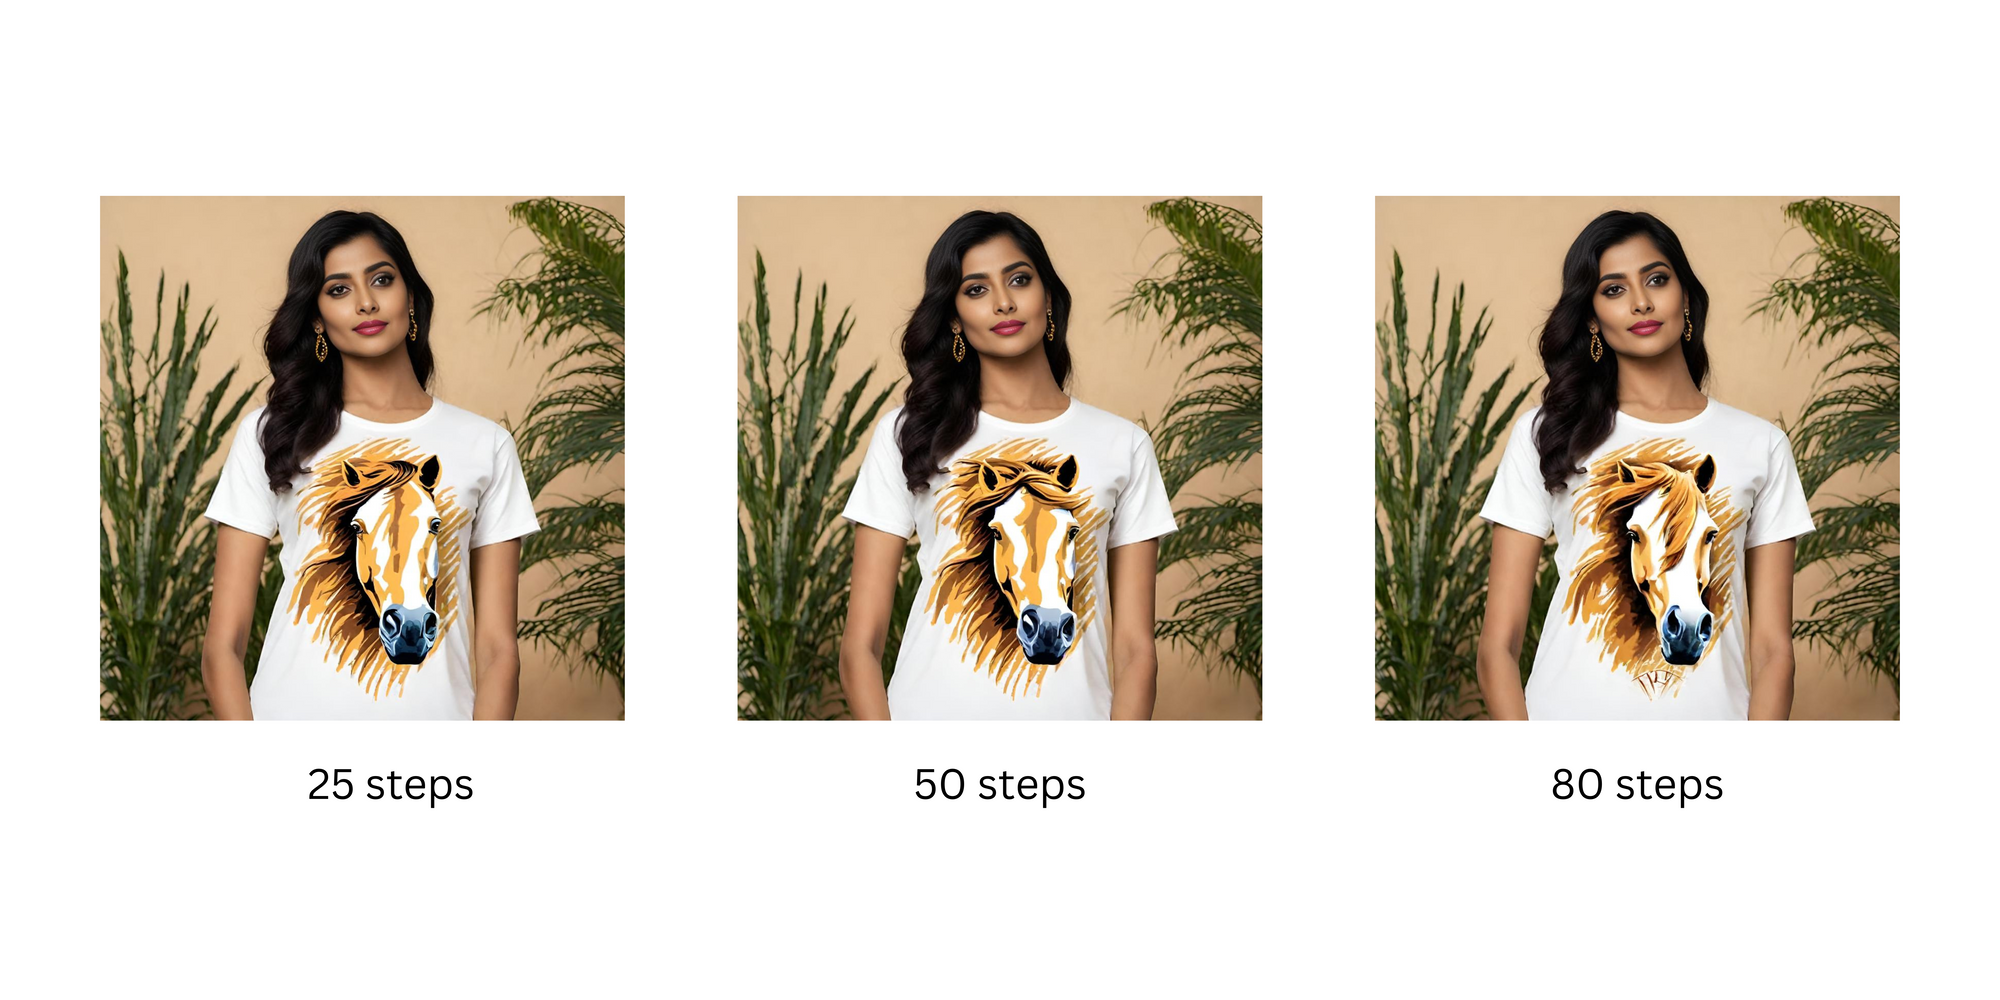
1. Steps
Steps controls the number of denoising steps during image generation.
- Increasing the
stepstypically results in higher quality images, as the model has more iterations to refine the output. - Be mindful that more steps will increase the response time, so there's a trade-off between image quality and processing speed.
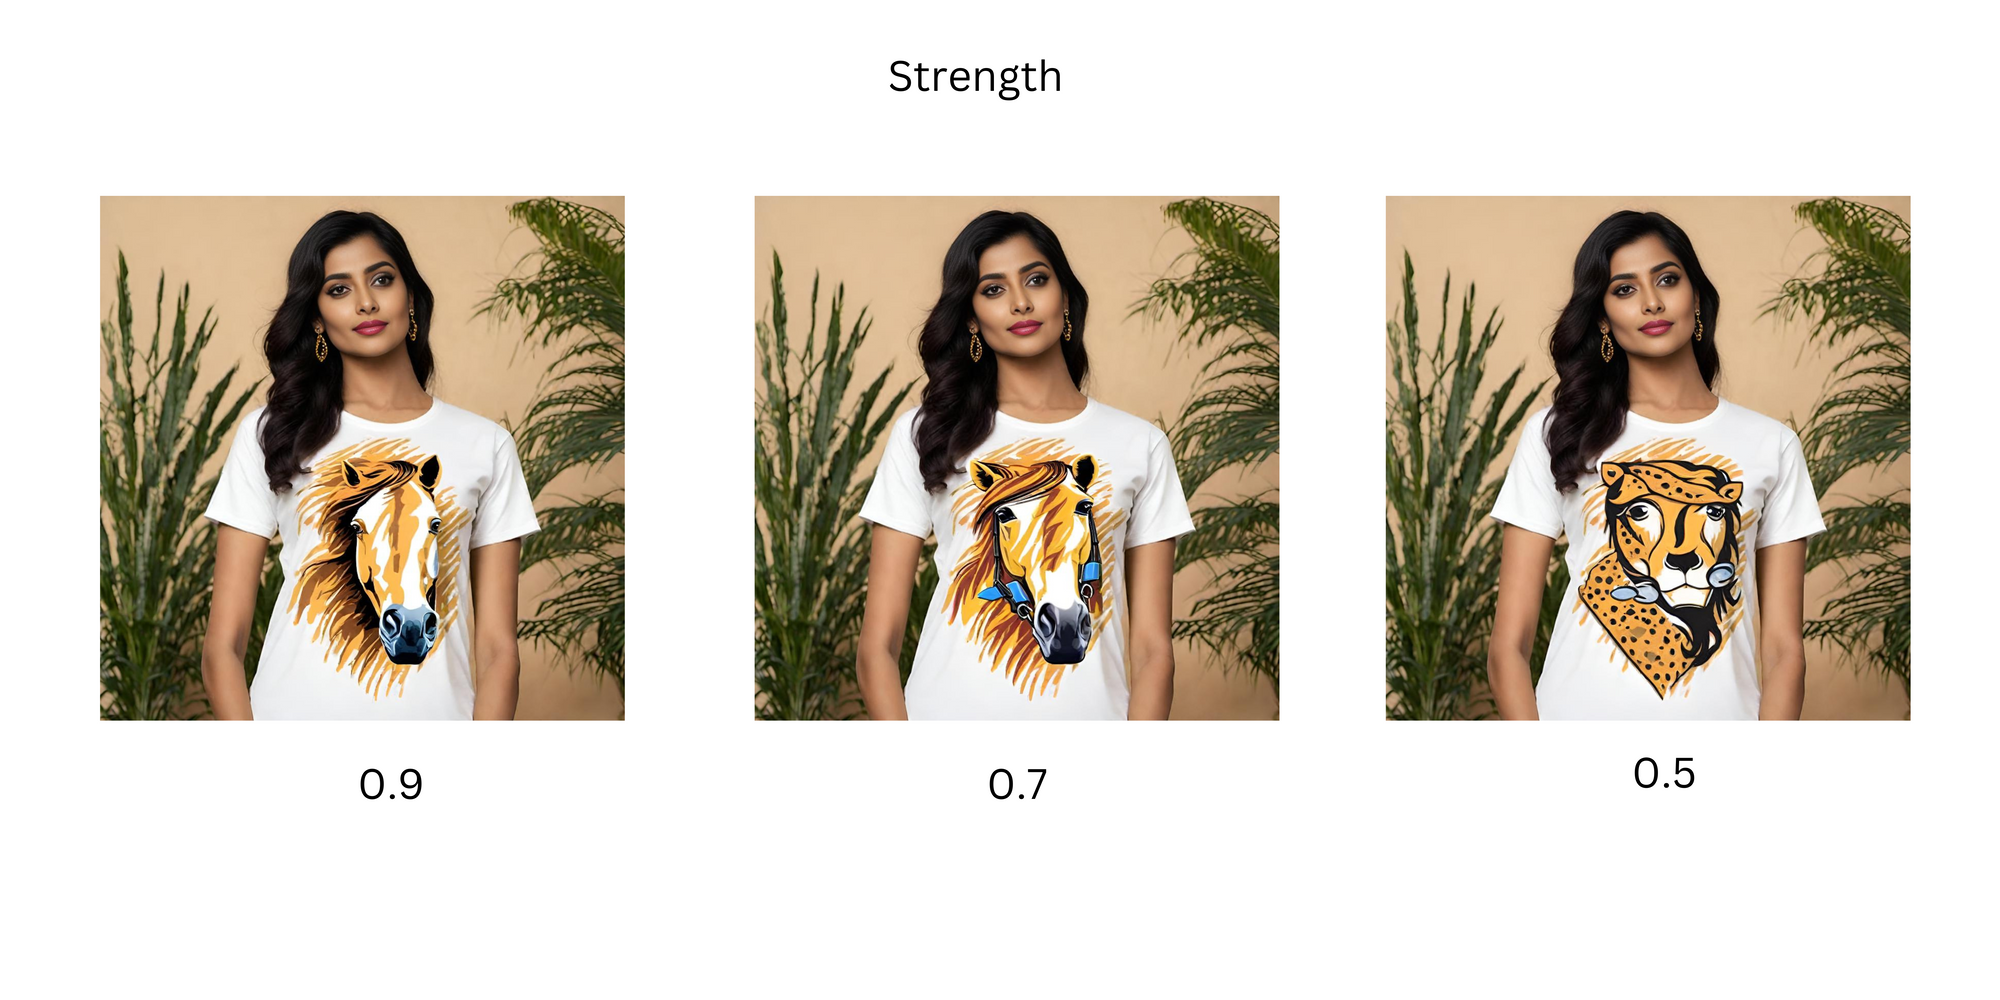
2.Strength
The strength parameter determines the amount of noise added to the base image. This influences how closely the output resembles the base image.
- A high
strengthvalue adds more noise, leading to a longer denoising process. The resulting image will be of higher quality and more distinct from the base image. - A low
strengthvalue adds less noise, resulting in a faster process but potentially lower image quality. The output will more closely resemble the base image.
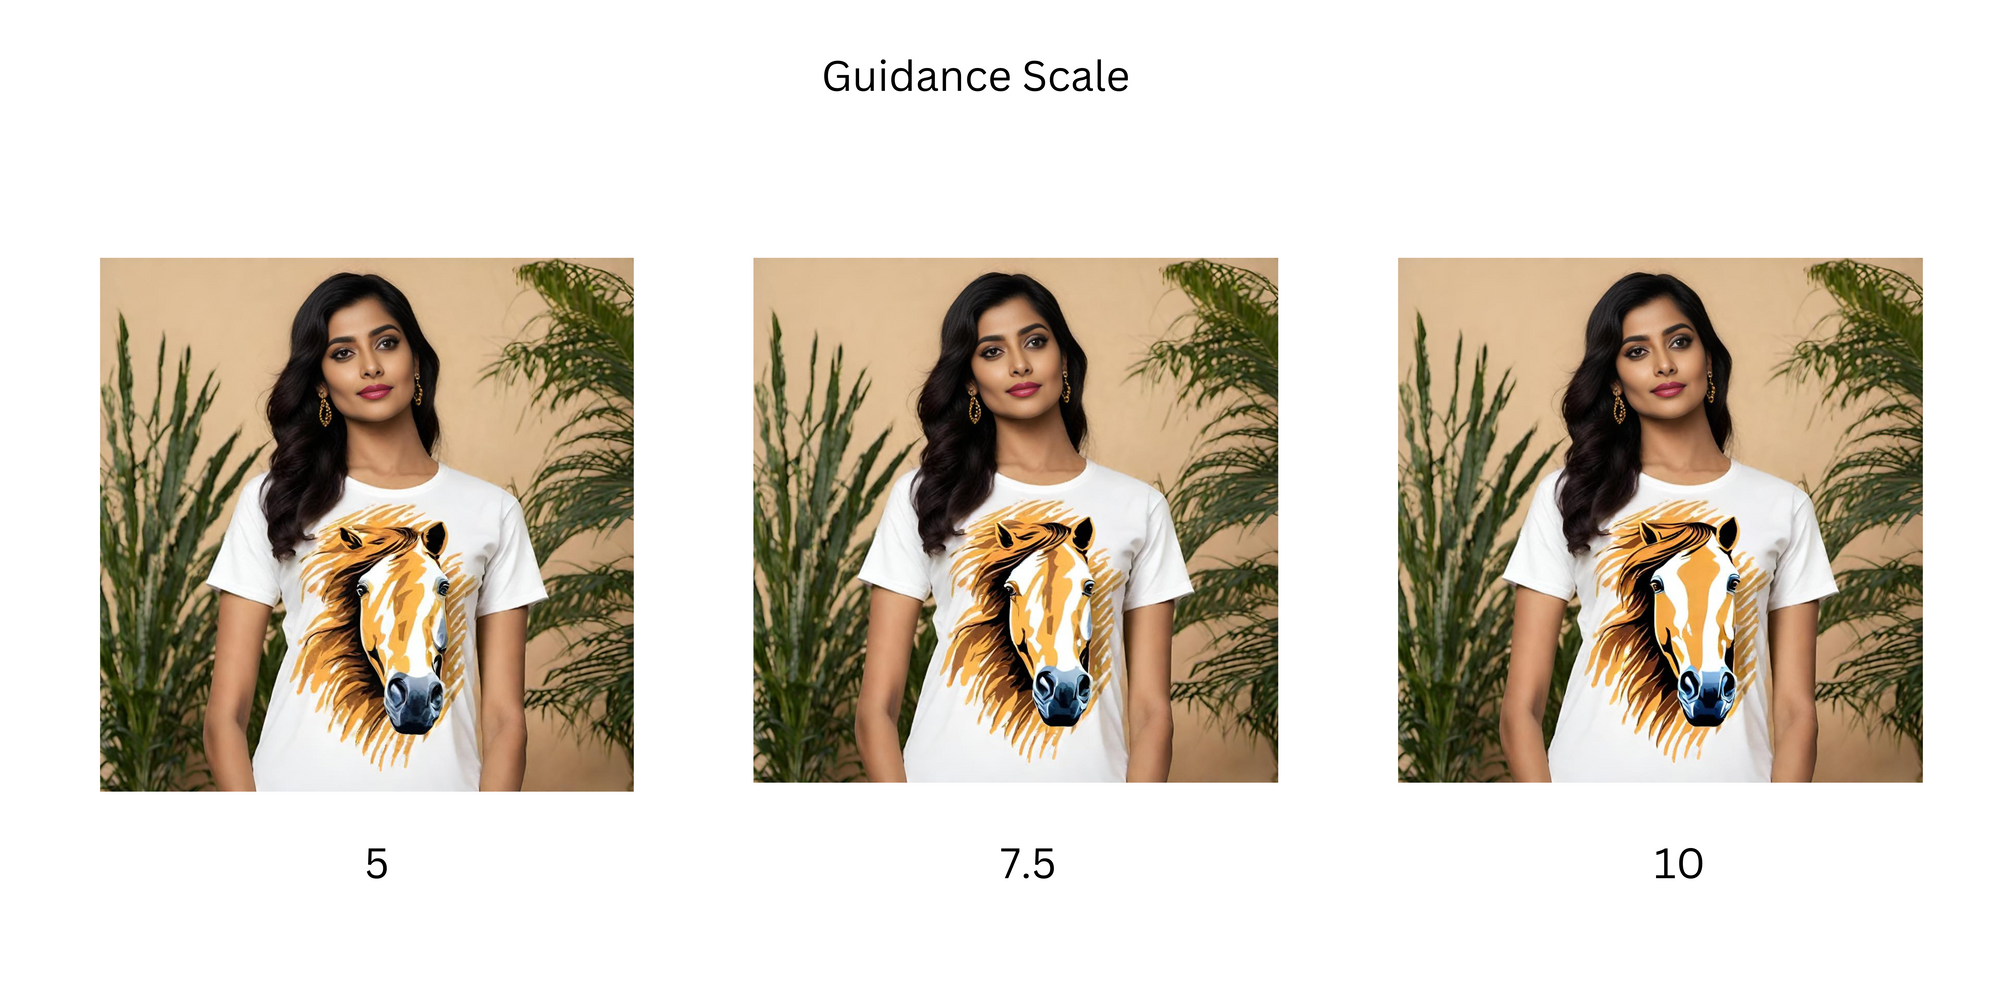
3.Guidance Scale
The guidance scale affects the alignment between the text prompt and the generated image.
- A high
guidance scalevalue ensures that the generated image closely follows the prompt, leading to a more accurate interpretation of the input. - A lower
guidance scalevalue allows for a looser interpretation, resulting in more varied outputs.
Additional Tips for SDXL Inpainting
Here are few additonal tips to get the most out of SDXL Inpainting.
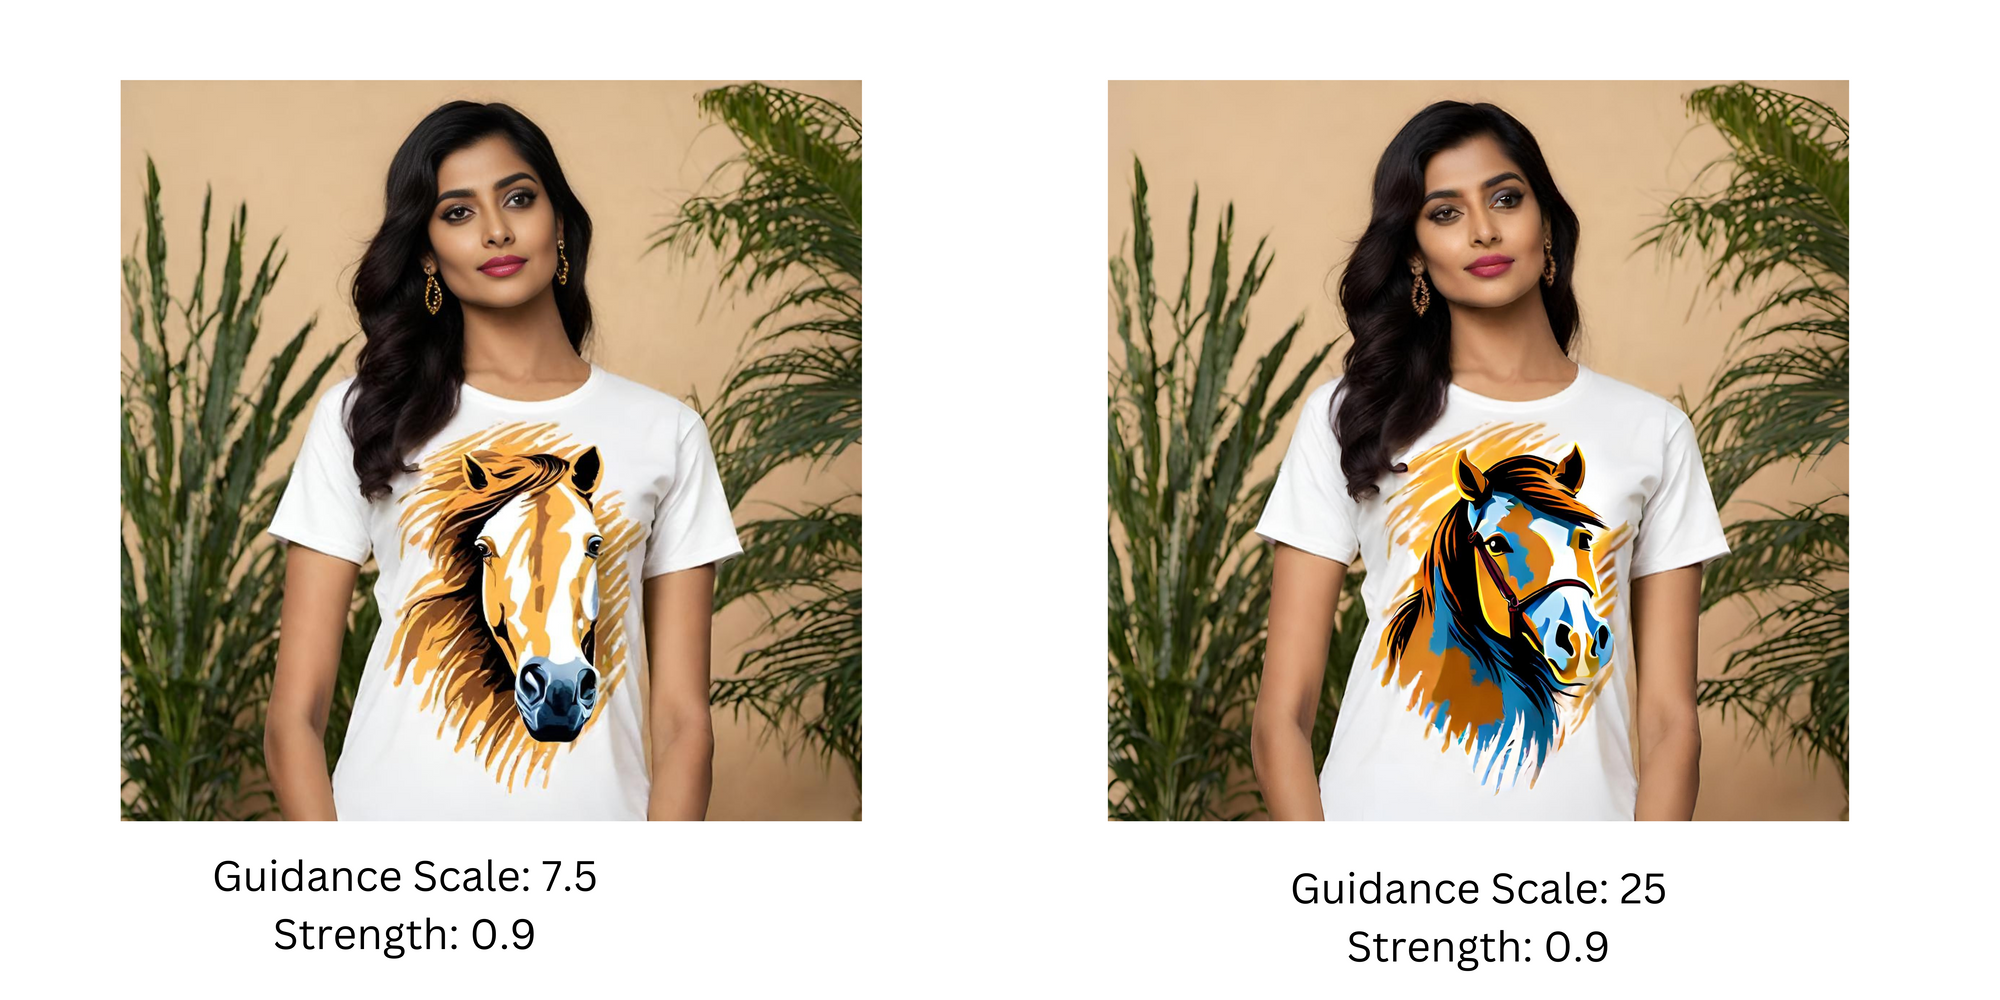
a. Balancing Strength and Guidance Scale
- The interplay between the strength and guidance scale parameters is key for fine-tuning the model's creative output.
- Setting both the strength and guidance scale to high values unlocks the model's full creative potential, resulting in outputs that are both unique and of high quality.
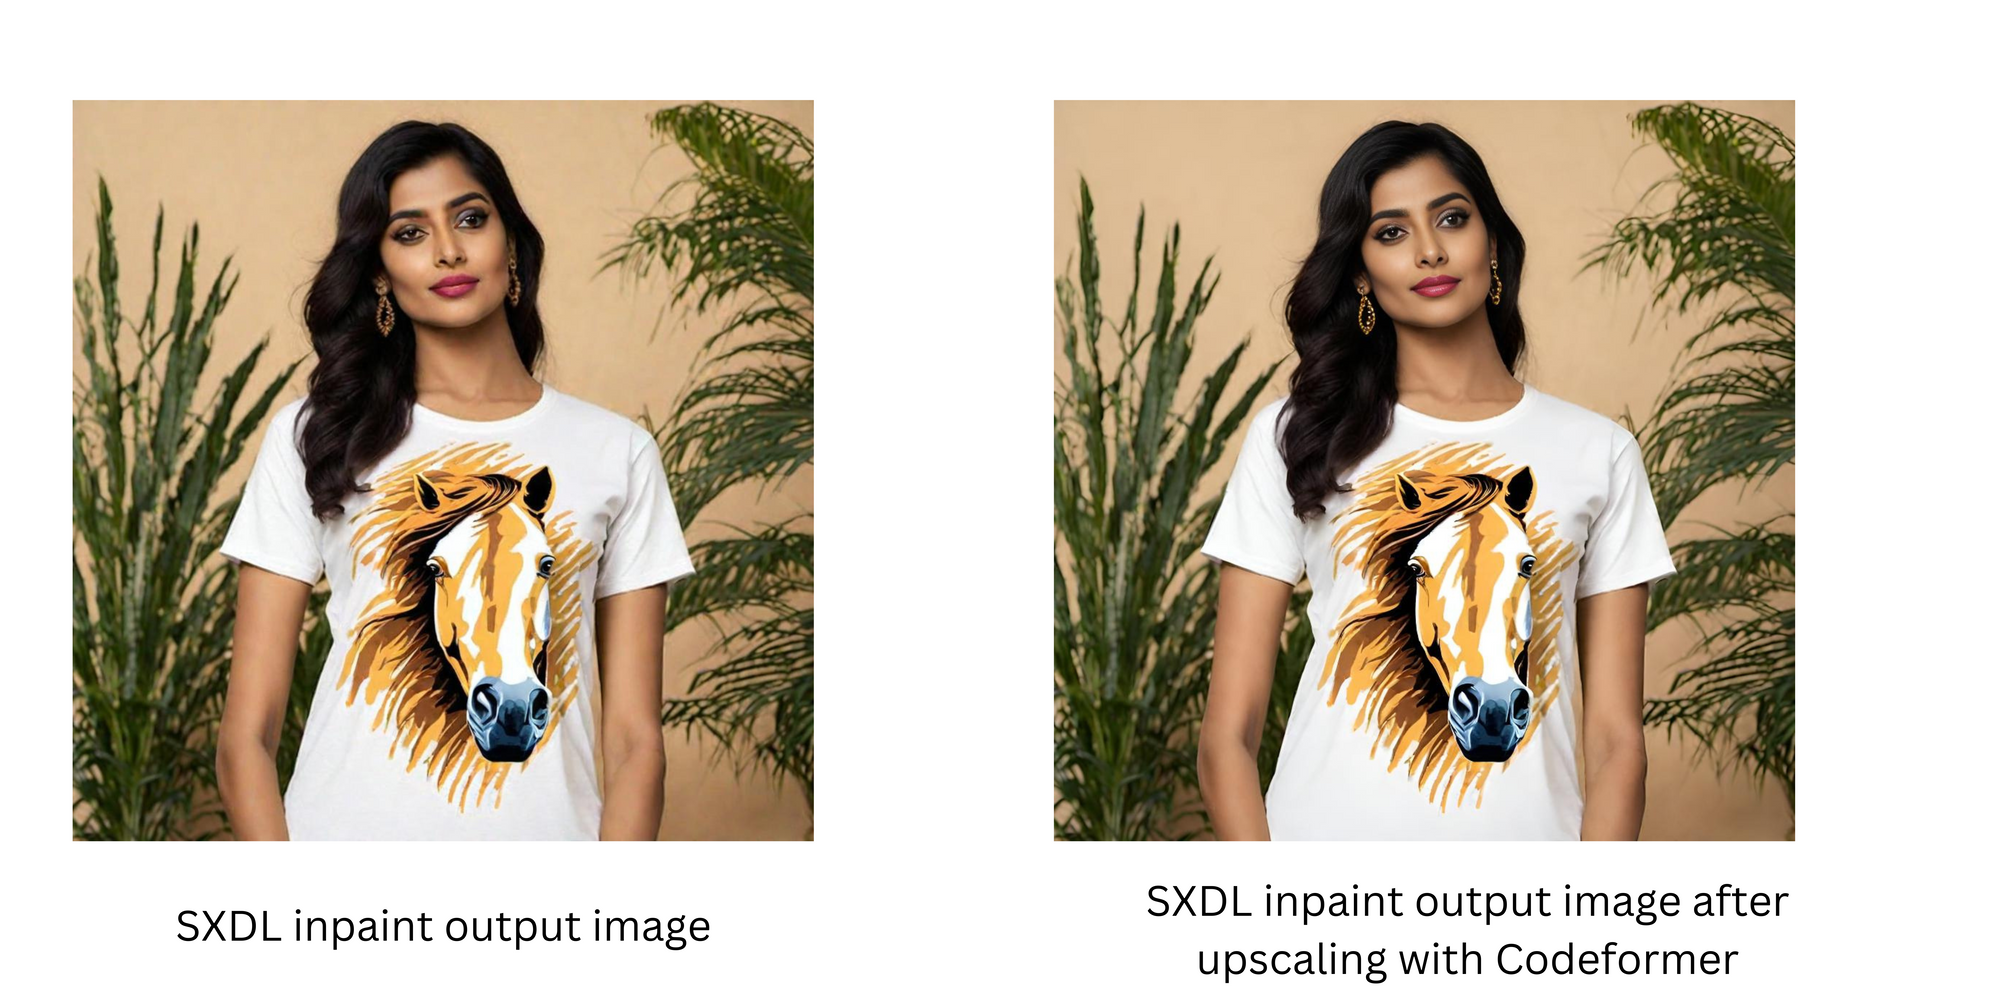
b. Upscaling Images
The image outputs from SDXL inpainting are generally not sharp. You may want to upscale the image using ESRGAN or Codeformer to significantly improve the image quality.
c. Employing Negative Prompts
- Negative prompts serve as a directional tool, steering the model away from incorporating specific elements into the image.
- This is invaluable for boosting the overall image quality and ensuring the exclusion of any undesired components from the final image.