Style & Composition Transfer with IP Adapter and ControlNet in Stable Diffusion
Discover the transformative power of style and composition transfer in Stable Diffusion. Learn how to give your images a new style and composition with IP-Adapter and ControlNet. All this and more in our comprehensive guide.

Style and composition transfer in Stable Diffusion is a way to change how an image looks and its layout, but still keep the important parts the same. Here’s an easy way to understand it:
- Style Transfer: Think of this like giving an image a new “outfit”. For example, if you have a picture of a cat and you want it to look like a Van Gogh painting. Style transfer would use the colors and brush strokes from a Van Gogh painting and put them on your cat picture.
- Composition Transfer: This is like changing the “pose” of an image. For instance, if you have a picture of someone waving their left hand, composition transfer could change the picture so it looks like they’re waving their right hand instead.
* Get $0.50 daily free credits on Segmind.
The IP-Adapter, also known as the Image Prompt adapter, is an extension to the Stable Diffusion that allows images to be used as prompts. The IP-Adapter and ControlNet play crucial roles in style and composition transfer. The IP-Adapter blends attributes from both an image prompt and a text prompt to create a new, modified image. This image is then merged with the input image, which has been pre-processed using ControlNet. ControlNet, working in tandem with the IP-Adapter, facilitates image prompting in Stable Diffusion. The process of style transfer, which can alter aspects such as layout, colors, or even faces in the picture, uses one picture to guide the appearance of another.
Important Parameters that influence the style and composition transfer:
- ControlNet Scale: This parameter determines the level of influence the ControlNet has on the pre-processing of the input image. A higher scale value means the ControlNet has more control over the image’s composition before style transfer. This can help retain more of the original image’s structure in the final output.
- IP Adapter Scale: This parameter controls the extent to which the IP Adapter influences the style transfer process. A higher scale value means the IP Adapter has a stronger influence on the style, color scheme, and other visual elements of the final image. This can help incorporate more of the style from the image prompt into the final output.
Both of these parameters are crucial in achieving a balance between retaining the original image’s composition and incorporating the style from the image prompt. Adjusting these scales can help you fine-tune the results of your style and composition transfer.
In this blog post we will be primarily looking at combining IP Adapter with ControlNets such as Canny and Depth to perform style and composition transfer.
Style Transfer with IP Adapter and ControlNet Canny workflows
The IP Adapter and the Canny edge preprocessor work together to make the SDXL model better by giving it more control and direction. The Canny edge preprocessor pulls out the outlines from the input image, which helps keep the original image’s layout. The IP Adapter lets the Stable Diffusion model use an image prompt along with a text prompt. It mixes features from both to make a new image, and keeps improving it based on the text prompt. This mix helps create detailed and meaningful images that cleverly blend parts from both the input image and the image prompt, guided by the text prompt.
Lets take a look at a few examples.
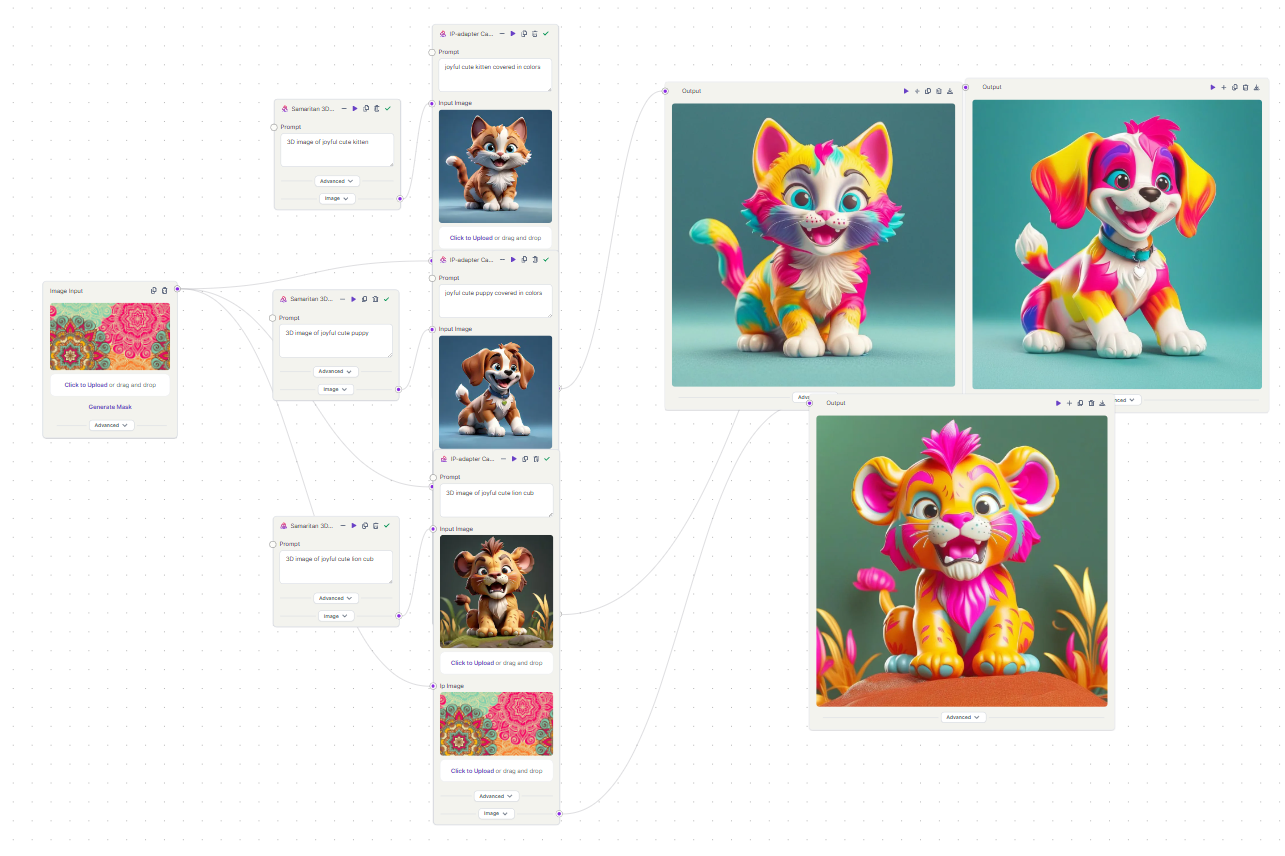
Example 1: Blending colors into Cartoon Animals
In this example, we’re adding colorful patterns to cartoon animals (a dog, cat, and lion). The Canny preprocessor finds the edges or outlines of the animals, which helps keep their original shapes. The IP Adapter then takes these outlines and fills them in with colorful patterns from the IP image. The result is cartoon animals filled with colorful patterns.
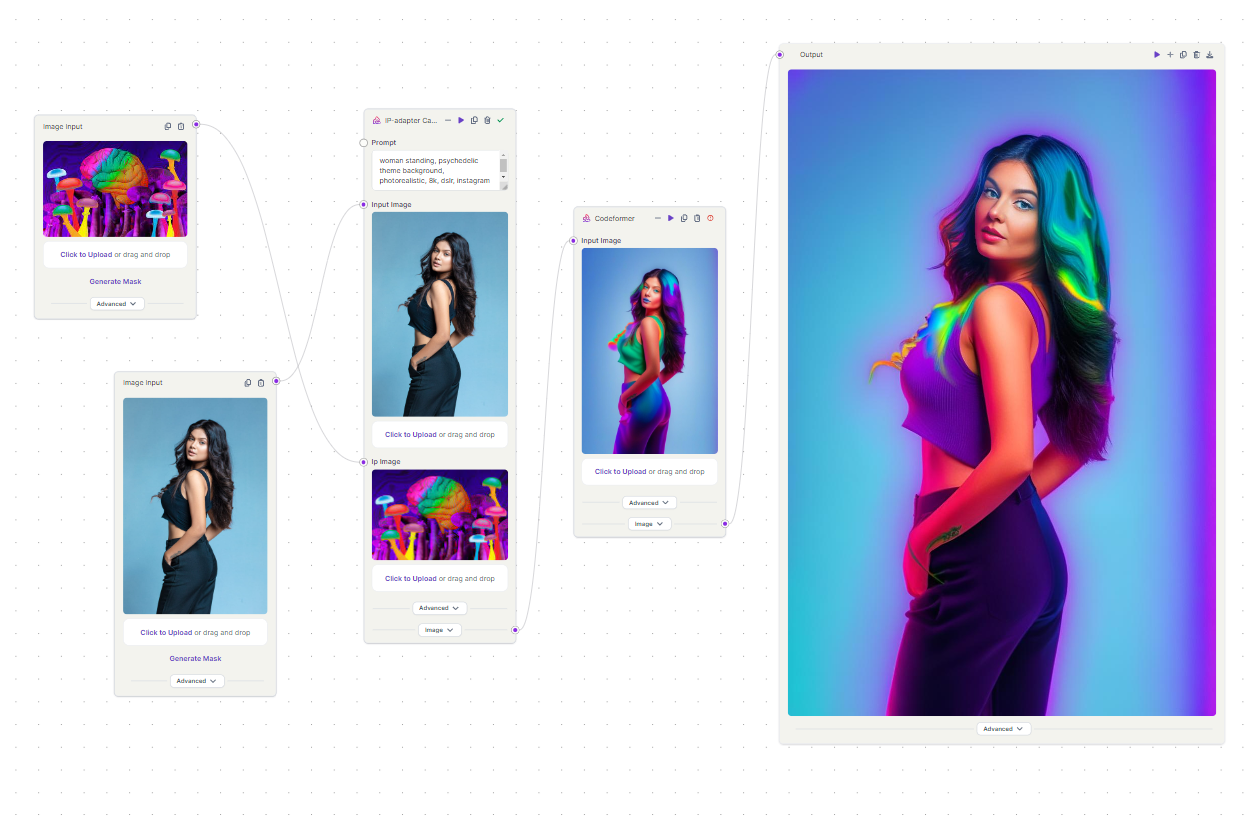
Example 2: Blending Colors into a Human Photo
In this example, we’re adding psychedelic colors to woman. The Canny preprocessor finds the edges or outlines of the woman, which helps keep original composition and pose. The IP Adapter then takes these outlines and fills them in with psychedelic colors from the IP image. The result is an image of woman blended with psychedelic colors.
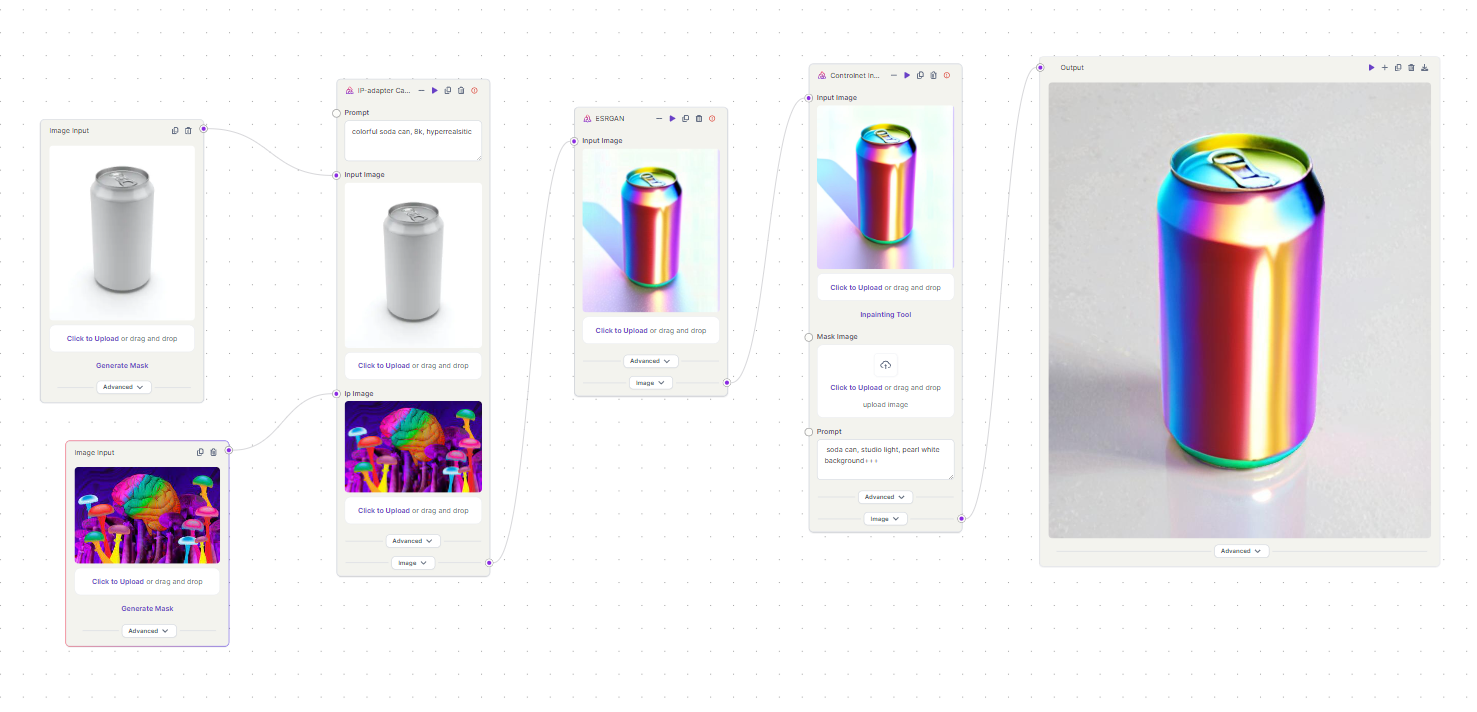
Example 3: Adding Color to an object
In this example, we’re adding mixed colors to soda can. The Canny preprocessor finds the edges or outlines of the soda can, which helps keep original composition. The IP Adapter then takes these outlines and fills them in with colors from the IP image. The result is an image of colorful soda can.
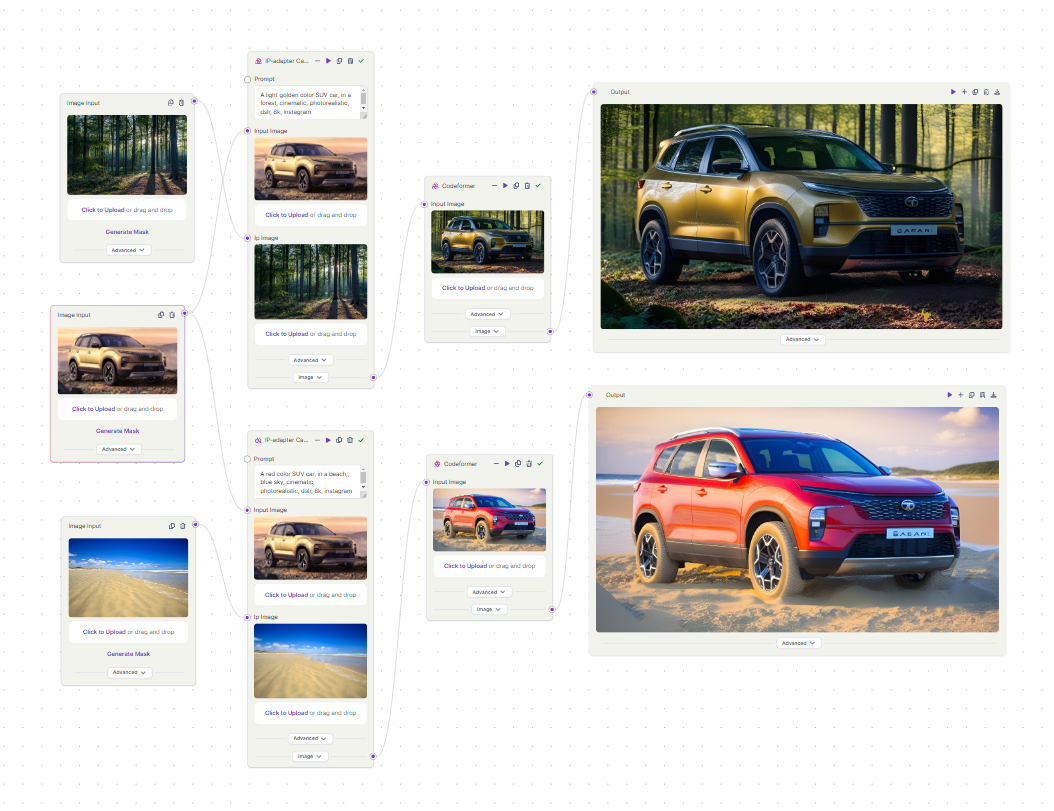
Example 4: Changing the background
In this example, we’re going to change the background of an SUV car. First, we’ll switch the background to a forest scene. Then, we’ll change the SUV’s color from golden brown to red, but this time with a beach scene as the background. The Canny preprocessor helps us by finding the edges or outlines of the SUV, which helps us keep its original shape. The IP Adapter then uses these outlines to replace the background with different scenes from IP images.
Composition Transfer with IP Adpater and ControlNet Depth Workflows
The IP Adapter lets Stable Diffusion use image prompts along with text prompts. The Depth Preprocessor is important because it looks at images and pulls out depth information. This helps it understand the space in the original scene better. Together, these models help create images by mixing elements from the original image and the image prompt, guided by the text prompt.
Lets take a look at a few examples.
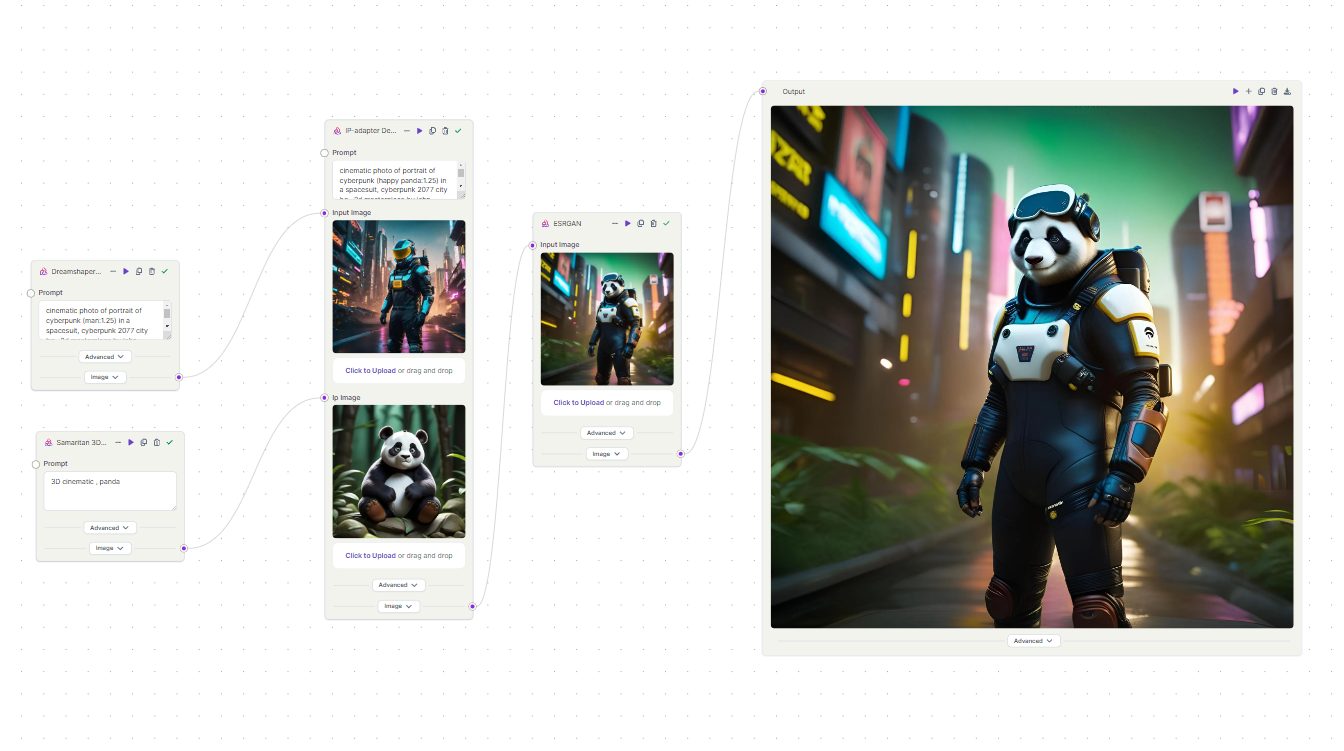
Example 1: Swapping Head
In this example, we’re changing the head of a cyberpunk man to a panda’s head. The Depth Preprocessor looks at the man and uses a depth map to figure out which parts of the image are close and which are far. The IP Adapter then uses this information to help put a panda’s head from the IP image of a panda in place of the man’s head. This way, the final image is cyberpunk panda.
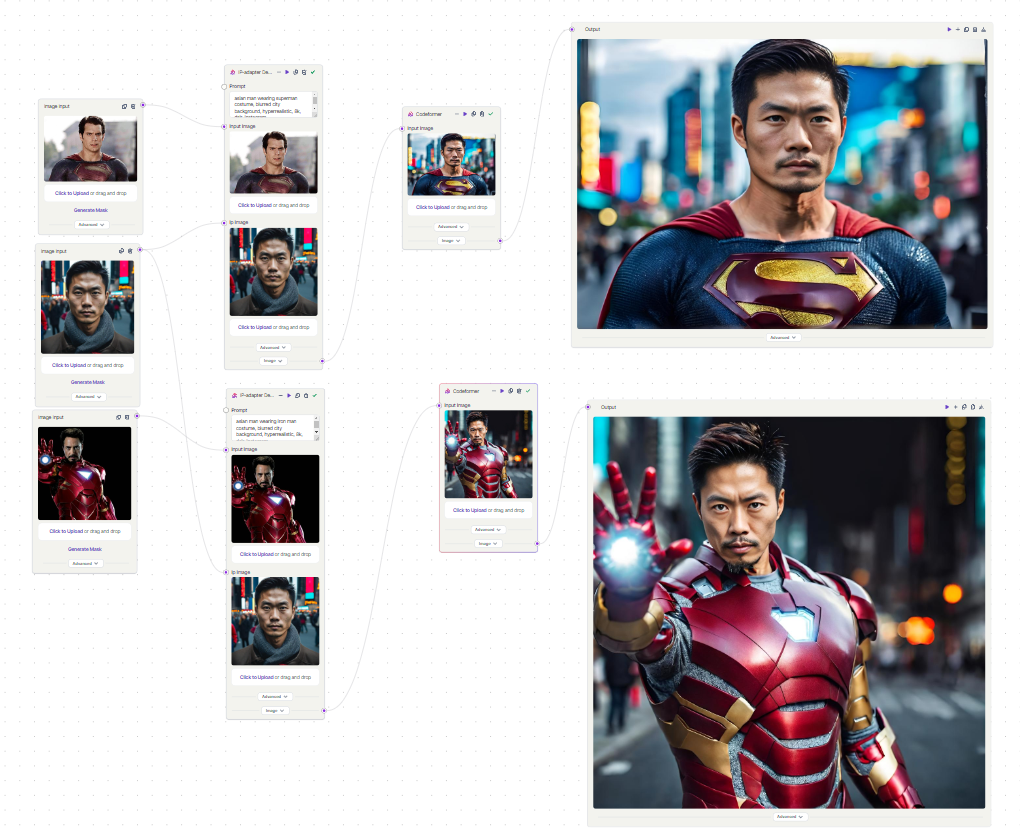
Example 2: Faceswap
In this example, we’re are swapping faces. We start with pictures of superheroes (Superman and Ironman). The Depth Preprocessor looks at these pictures and uses a depth map to figure out which parts of the image are close and which are far. The IP Adapter then uses this information to switch the superheroes’ faces with a man’s face from another picture. The end result is a picture of a man dressed up as Superman and Ironman.
You can access these workflow templates for free on Segmind’s Pixelflow, which is a no-code, cloud-based node interface tool where generative AI workflows can be effortlessly built.