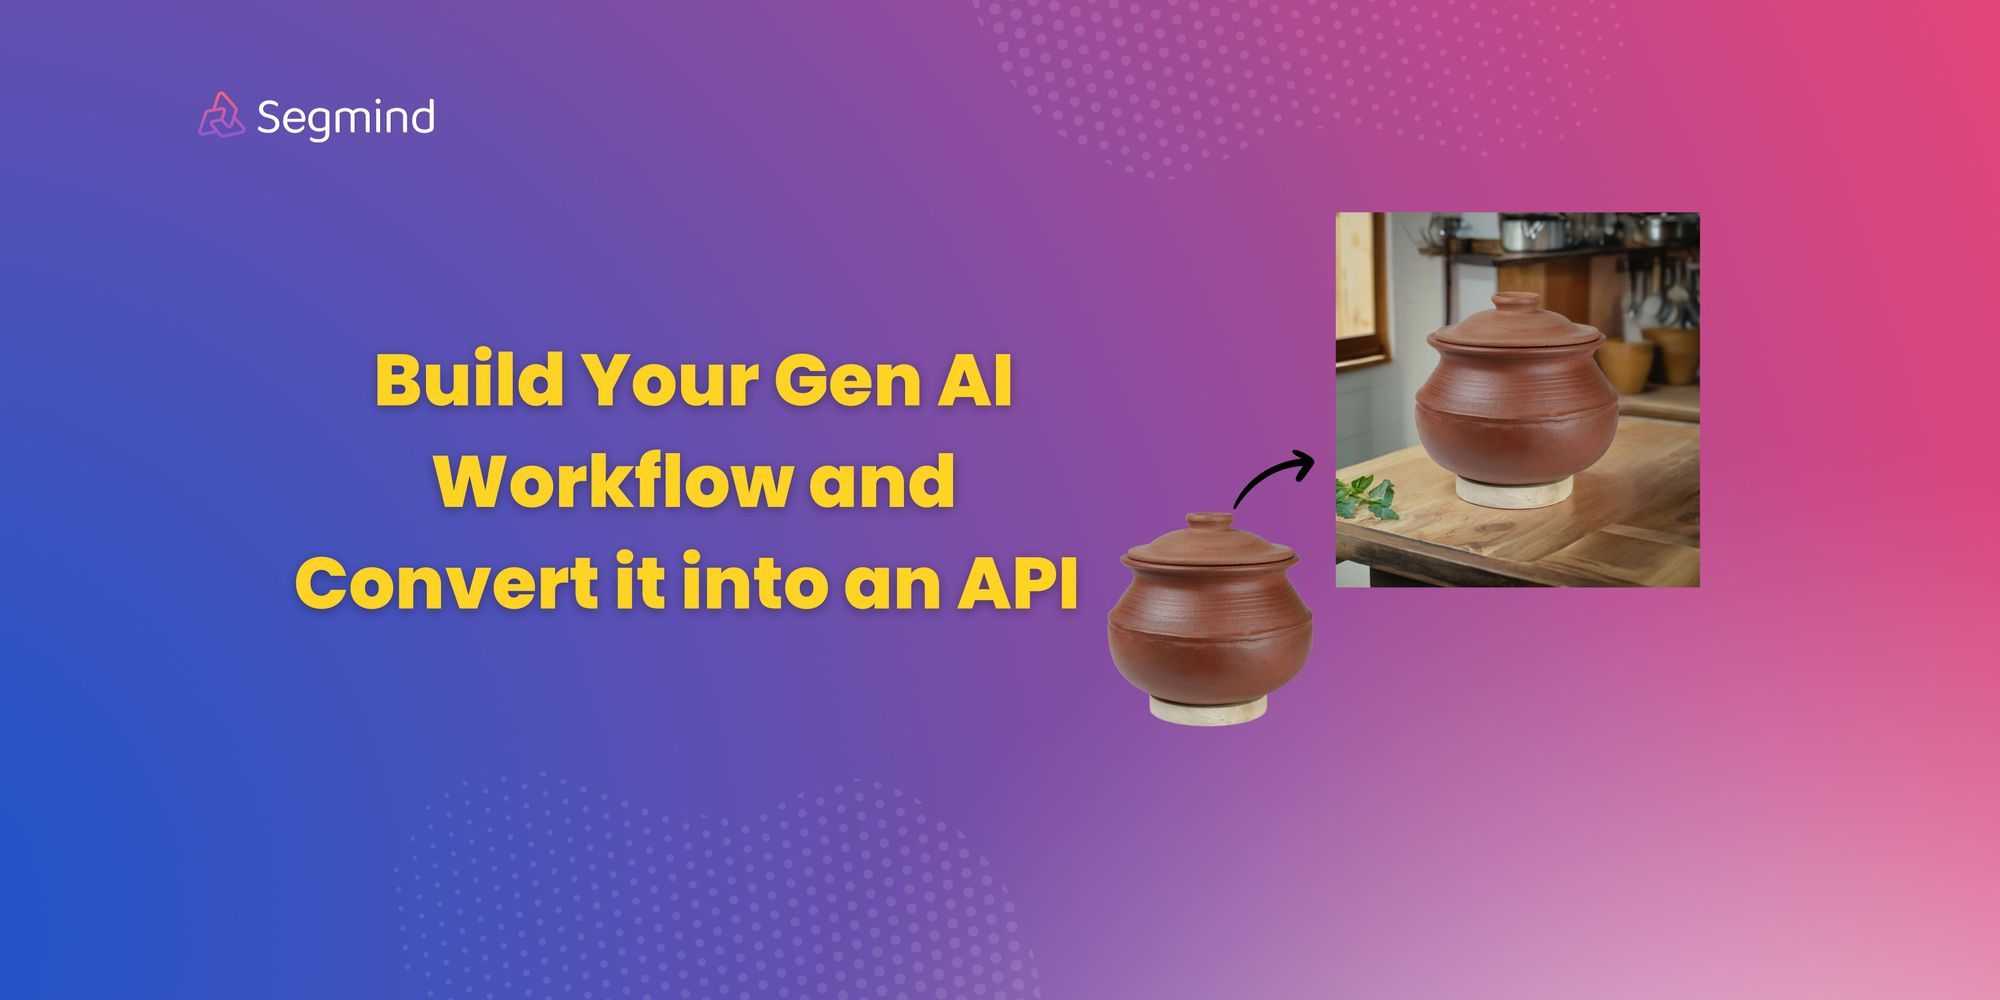
How to Build Your Own Gen AI Workflow and Convert it into an API
Workflows in Generative AI automate complex tasks by chaining models. Once fine-tuned, they can be API-fied, simplifying deployment. Learn how you can build your own workflow from scratch and turn it into an API on Pixelflow.

Workflows are a powerful tools in Generative AI. They allow us to combine multiple generative models in a single pipeline, which can be very useful for complex tasks that require multiple steps.
Creating Workflows and Converting them into APIs
For instance, for changing the background of a photo, workflows can indeed involve multiple models each performing a specific task. The first model could be responsible for inpainting, which is the process of filling in missing parts of images. The second model could handle outpainting, which involves expanding the borders of an image in a plausible way. Finally, an upscaling model like Codeformer could be used to enhance the resolution and quality of the final output image.
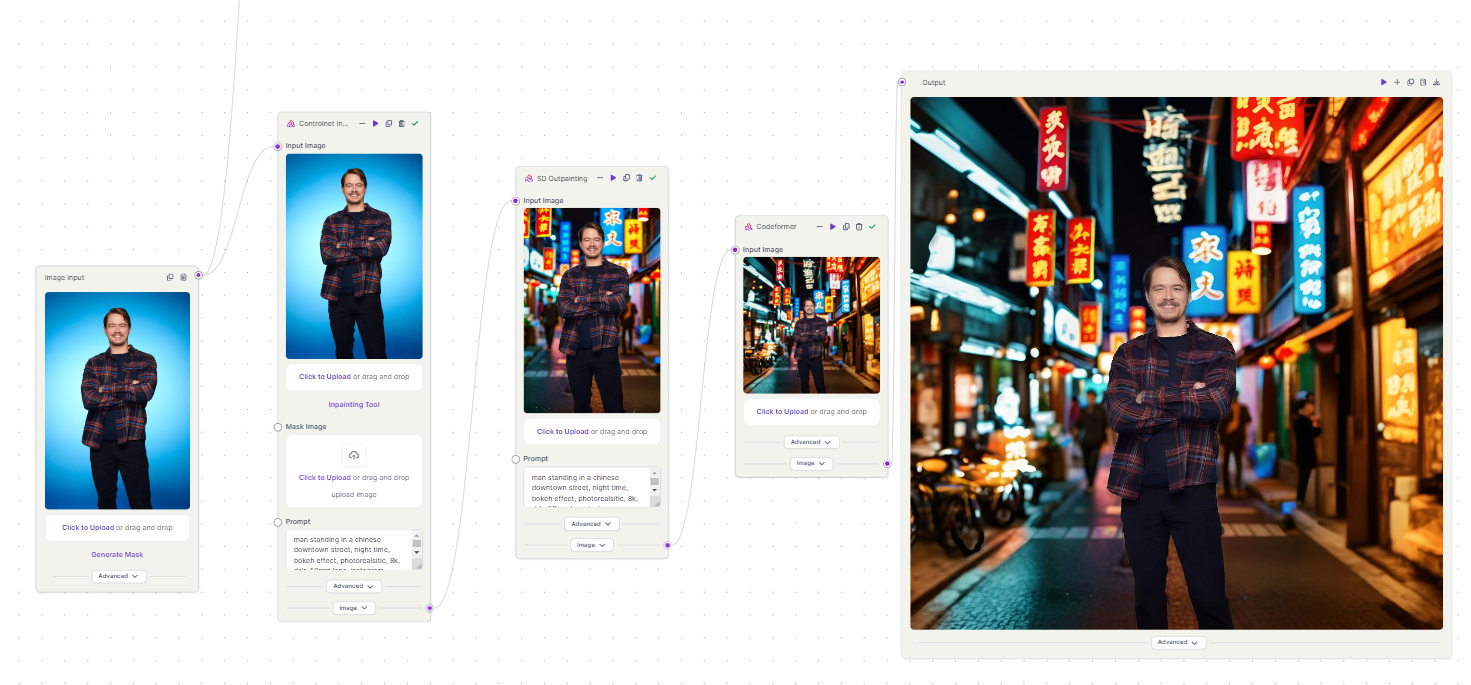
By chaining these models together in a workflow, we can automate the entire process and ensure consistency in the results. This is particularly useful when dealing with large volumes of inputs or when the process needs to be repeated multiple times.
Once the workflow is fine-tuned and produces consistent results, it can be exposed as an API. This allows other systems or services to leverage the power of the workflow without needing to understand the intricacies of the underlying models. This is a common practice in production environments, especially in the field of Generative AI, where models are often used for tasks like image generation or text generation.
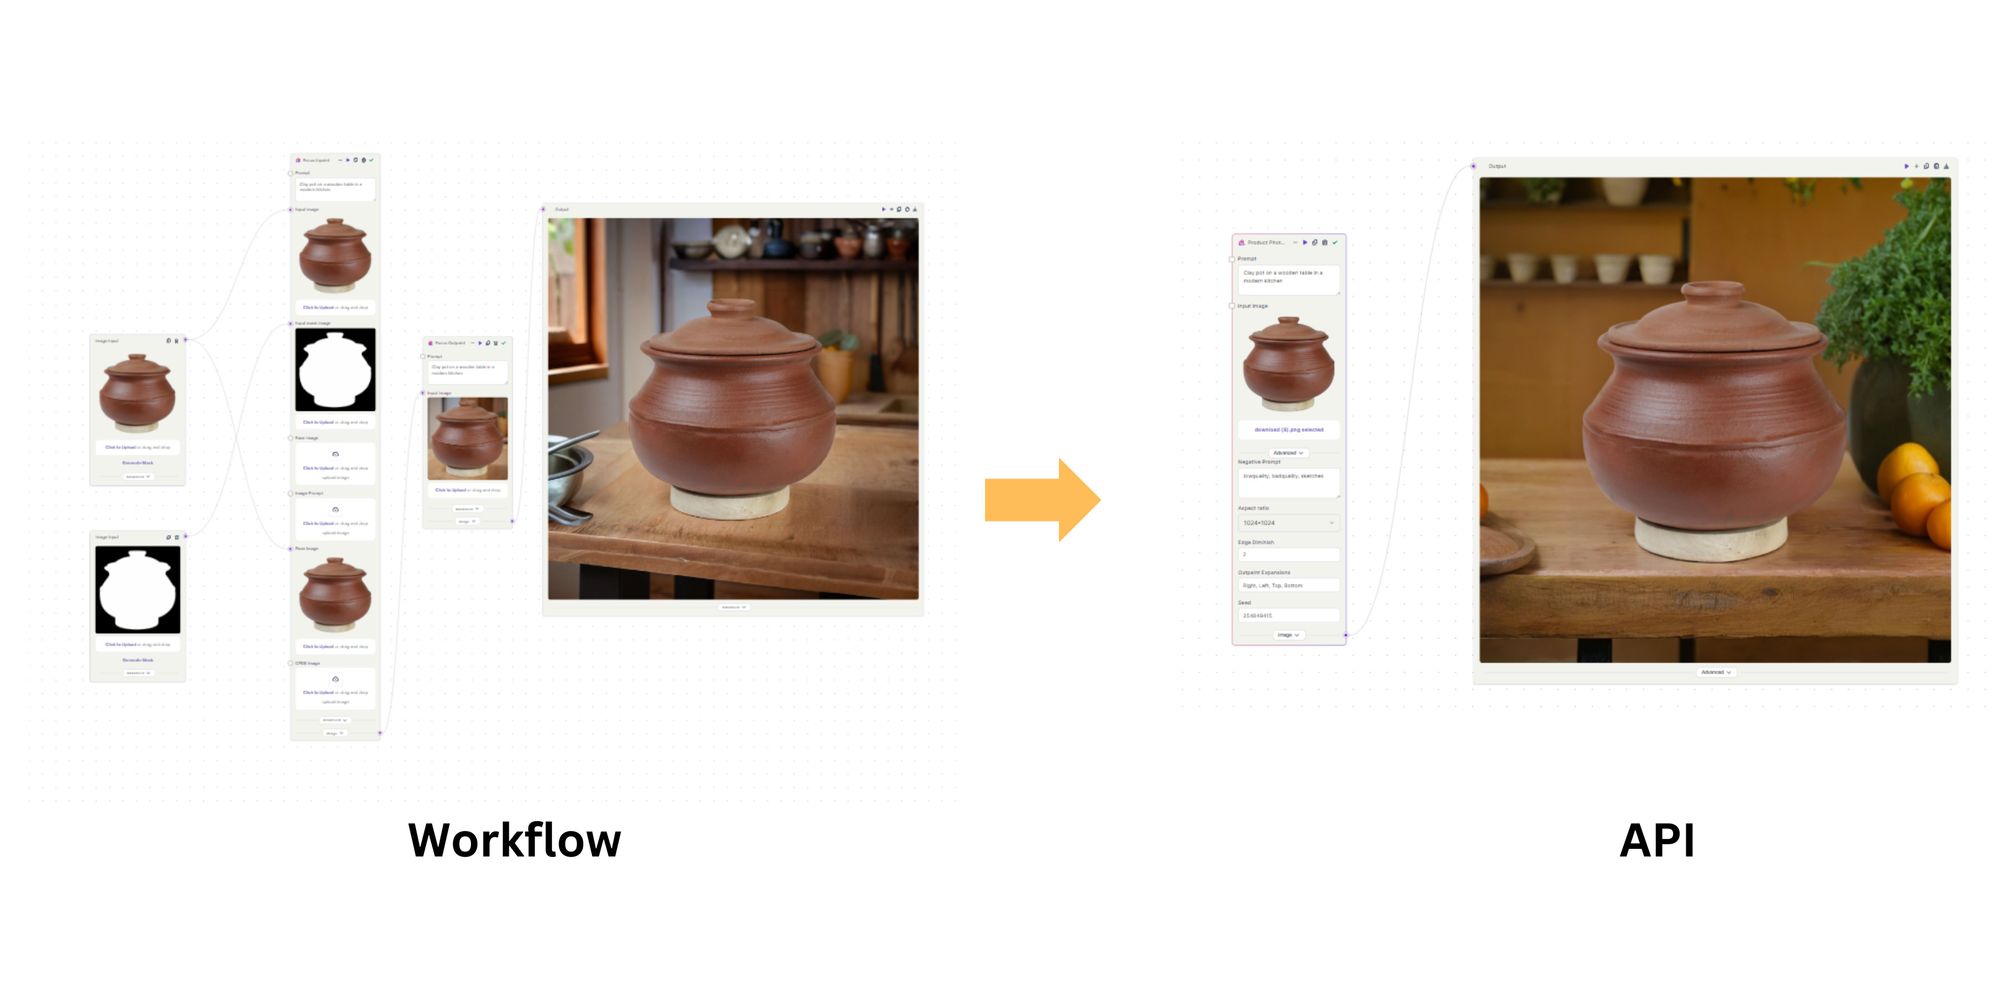
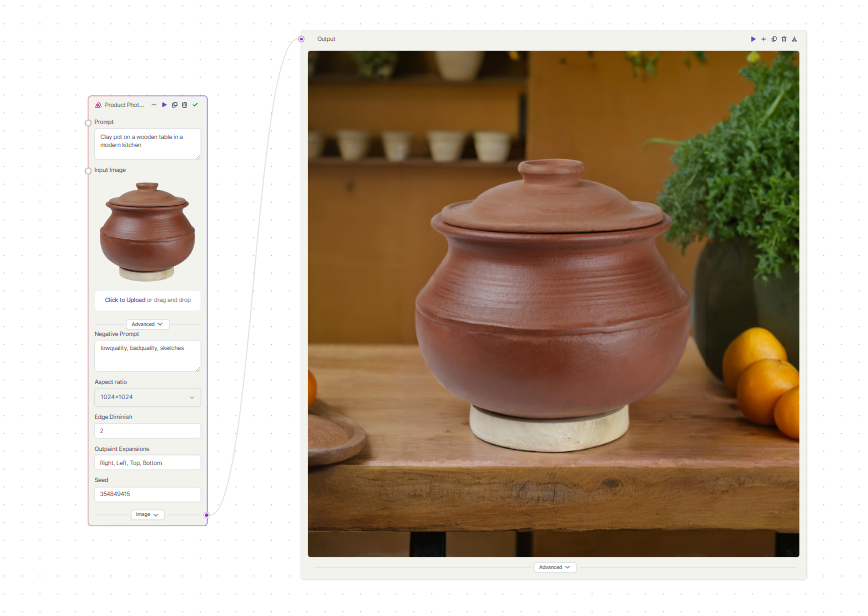
Lets take a look at an example, to walk you through how you can create your own Generative AI workflow and turn it into an API using Segmind Pixelflow effortlessly. We will build a workflow for Product Photography, which will take an image of an object and generates new backgrounds.
Step 1: Creating a Workflow (Background Generation)
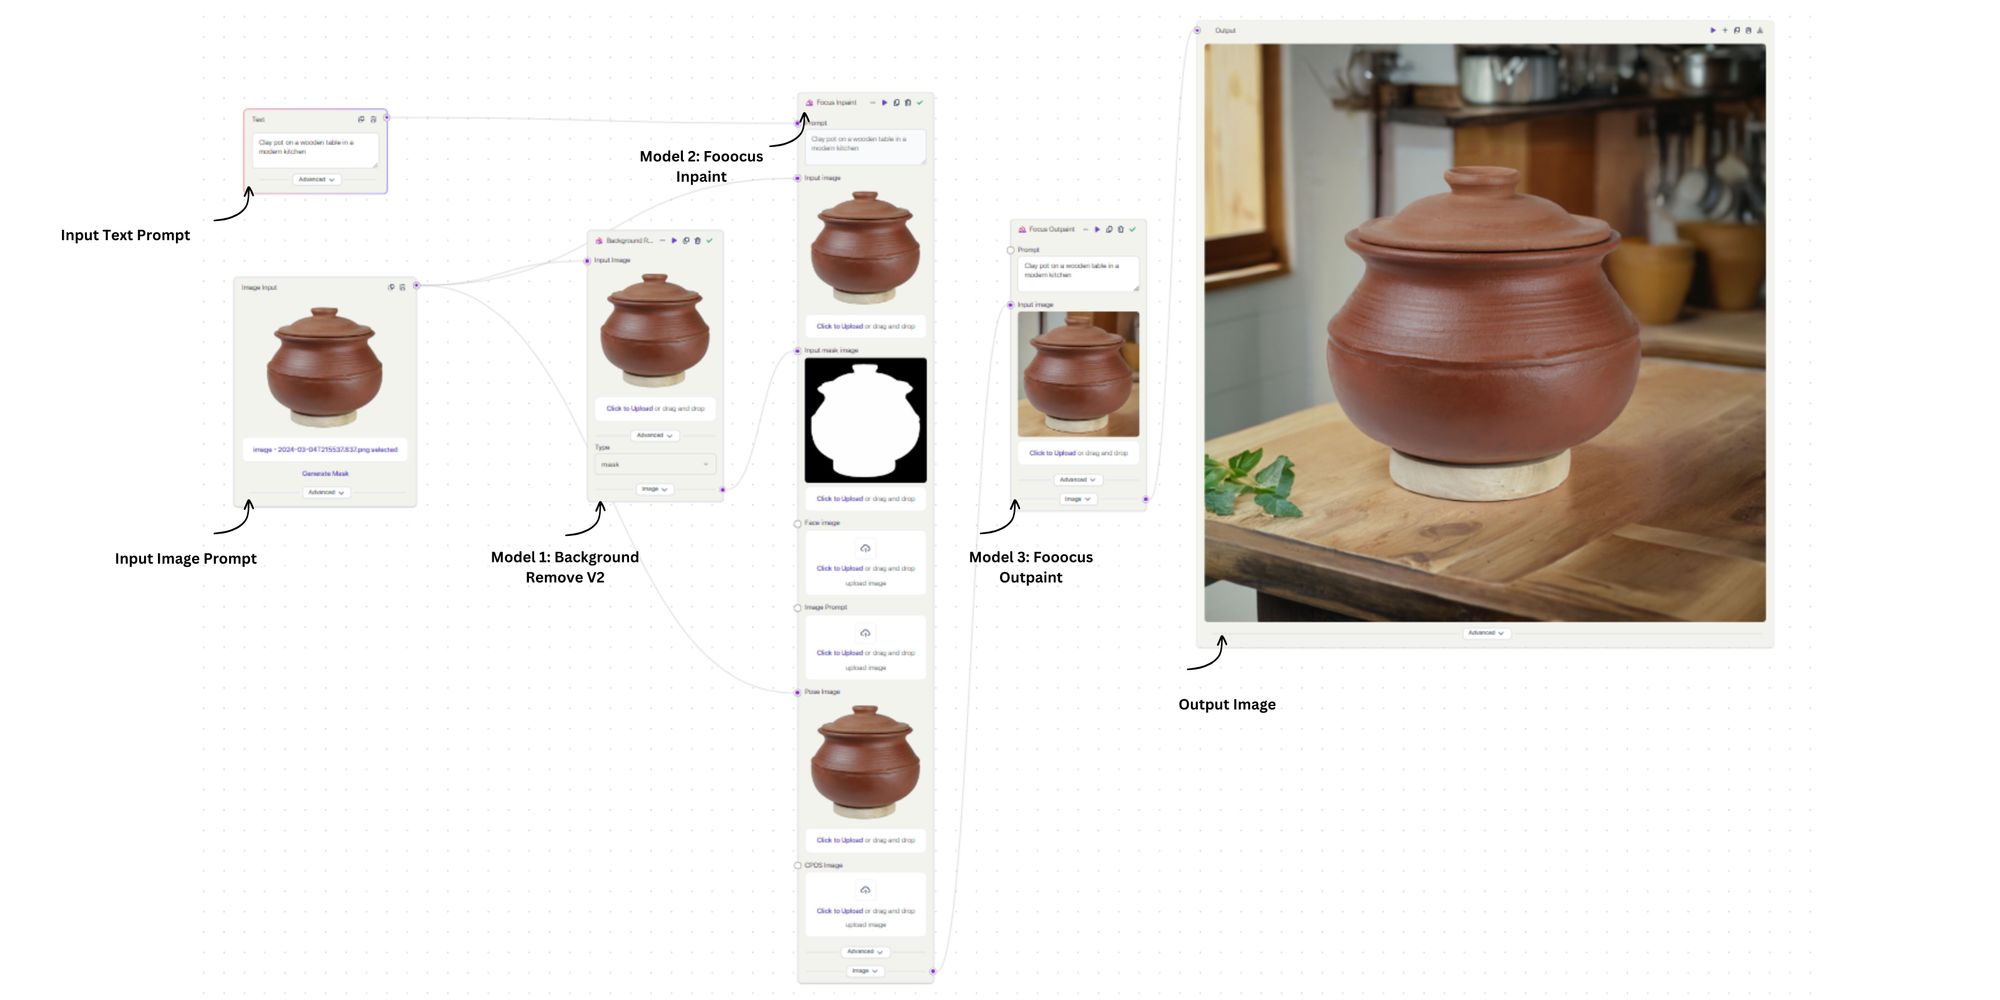
The first step would be to create a workflow that can generate backgrounds based on text prompts.
The models we will be using in the workflow are:
- Background Removal V2: This model will help in creating a mask for the input image. This mask will be used to separate the object from its background.
- Fooocus Inpainting: This model takes the input image of an object and the mask created in the previous step. It then fills the background with a new one based on the text prompts. We will then apply Pyracanny on the input image, which is equivalent to canny preprocessor. This helps in defining the edges of the object and preserve the object details.
- Fooocus Outpainting: This model expands the borders of the newly generated image with a new background. This helps in creating a more complete and immersive image.
Now that we have created our workflow, let’s fine-tune it so that it can generalize well for all objects. This is an important step before we can turn the workflow into an API. We tweak the parameters that can influence the quality of the image outputs, such as control settings like weight and stop for Pyracanny. The weight parameter controls the importance of edge information, while the stop parameter determines when the algorithm should stop iterating. In short, we experiment with different settings for these two parameters and come up with a sweet spot that can generalize well for all objects.
Step 2: Turning the Workflow into an API
Now that we have our workflow ready, which can be reused multiple times, let’s convert it into an API. We have two inputs (a text input for the text prompt and an image input for the object image) and one output, which is the image output. We will define these as parameters for the API.
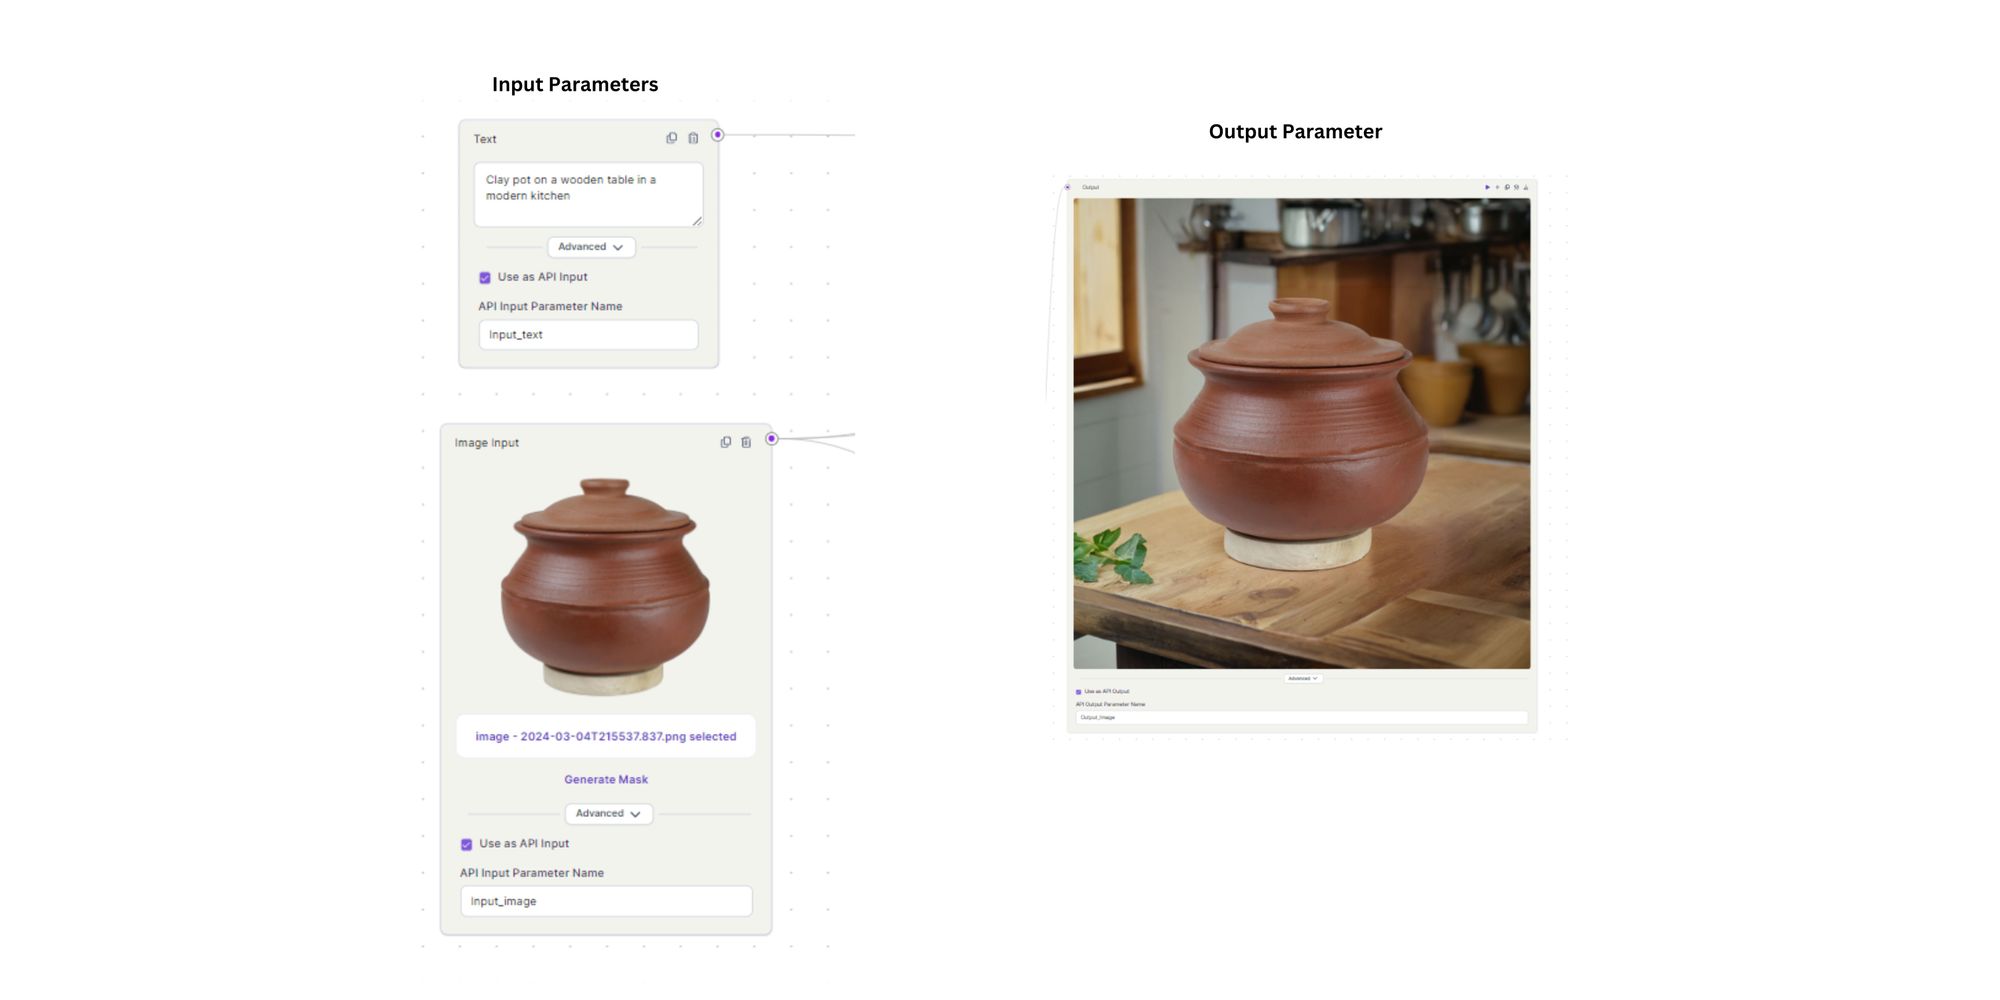
Define Input Parameters: In the advanced tab of the input nodes, check the ‘Use as API input name’ option for each input parameter. Enter the API input parameter name. Repeat this step for each input node if you have multiple inputs
Define Output Parameters: Similarly, for the output nodes, check the ‘Use as API output name’ option. Enter the API output parameter name.
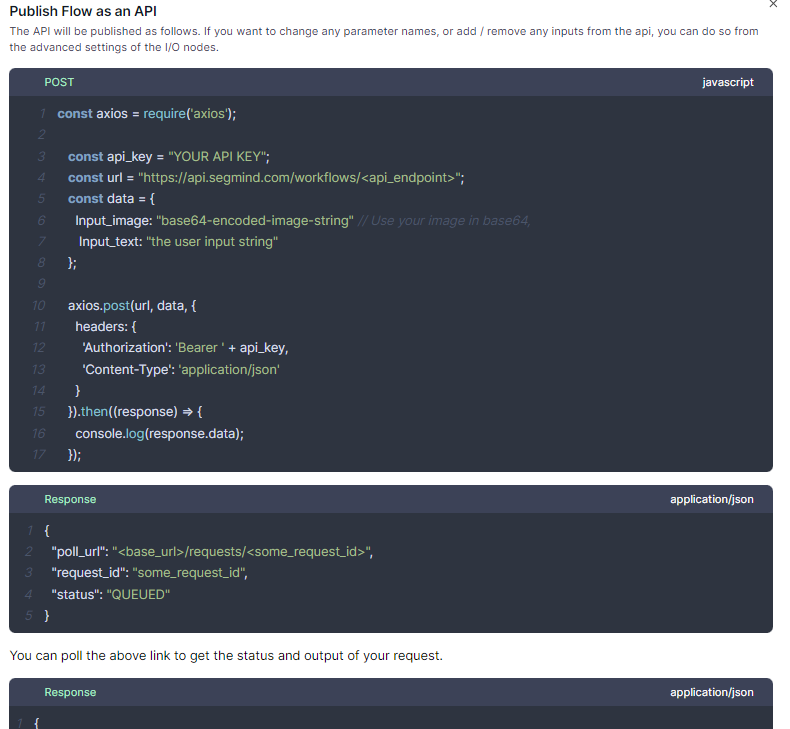
Publish Workflow as an API: After defining your input and output parameters, publish your workflow. You can see ‘API live” indicating your API available is ready for use.
Update Your API: If you need to make changes, you can update your API by modifying the workflow. Any changes will be reflected in the version change ( v1, v2 and so on) next to ‘API live’.
Viola we just created our first API. Here is how it looks.
If you have any cool workflows in mind, head over to Segmind Pixelflow and build your workflows and turn them into APIs in a few clicks.