How to Train Flux.1 to Generate Pictures of Yourself
Learn how to use Flux.1 to generate custom LinkedIn headshots, Instagram photos, and more. Discover the secrets to crafting visually stunning images that reflect your unique style.

This guide will walk you through the process of fine-tuning Flux.1 to generate personalized images of yourself, tailored to specific use cases like LinkedIn headshots, Instagram photos, or lifestyle shots. By leveraging Flux.1's capabilities and your own dataset, you can create unique and visually appealing images.
Preparing Your Dataset
- Image Collection: Gather a diverse set of 10 to 15 high-quality images that accurately represent your appearance. Include various angles, lighting conditions, and expressions.
- Data Organization: Organize your images into a ZIP file, for easy upload.
- Image Preprocessing: Consider preprocessing your images to improve quality and consistency, if necessary.

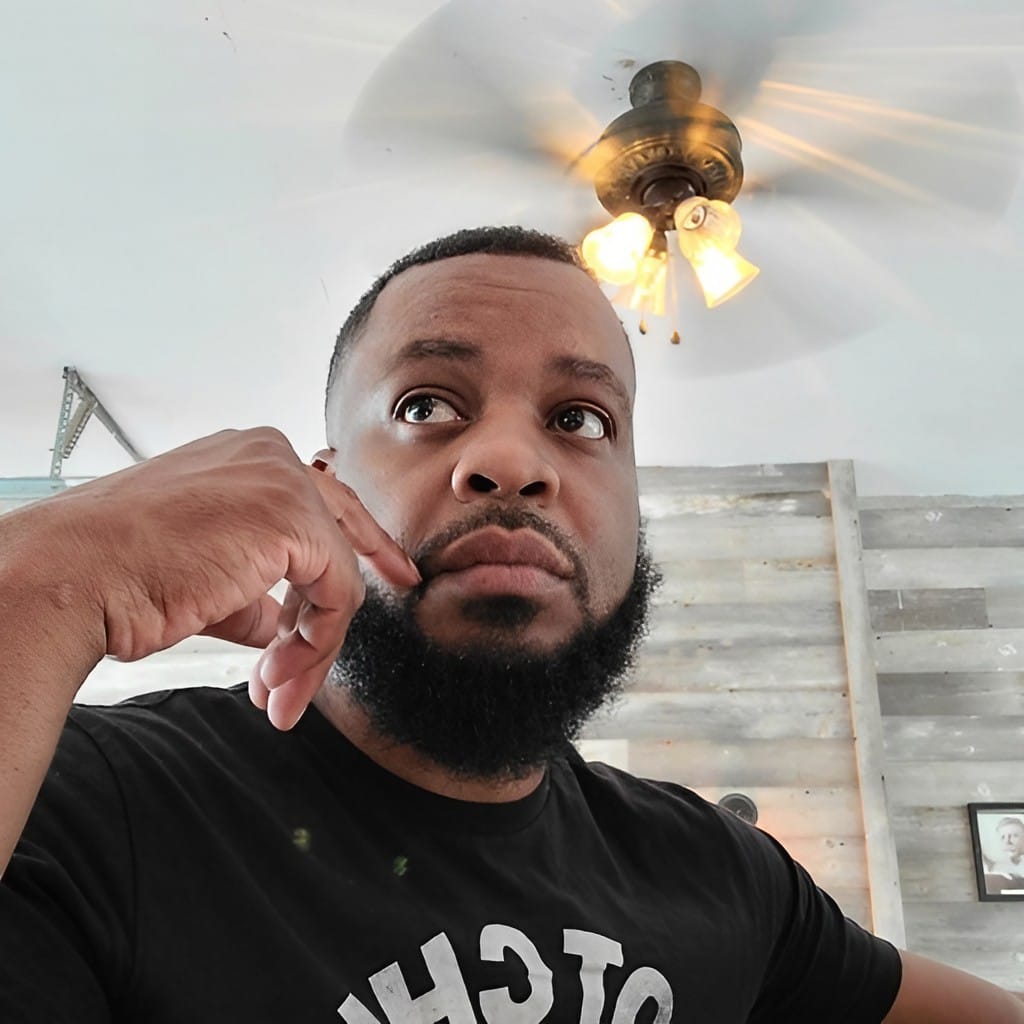
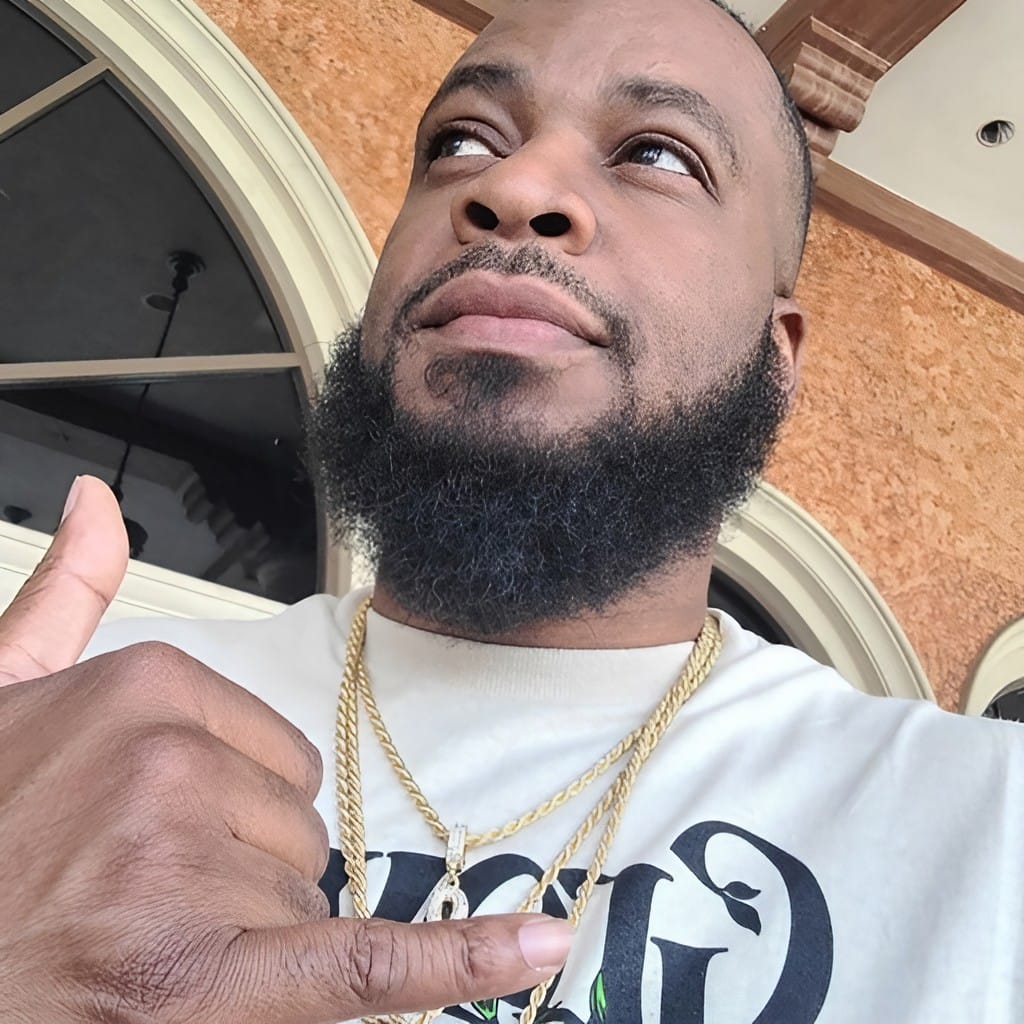

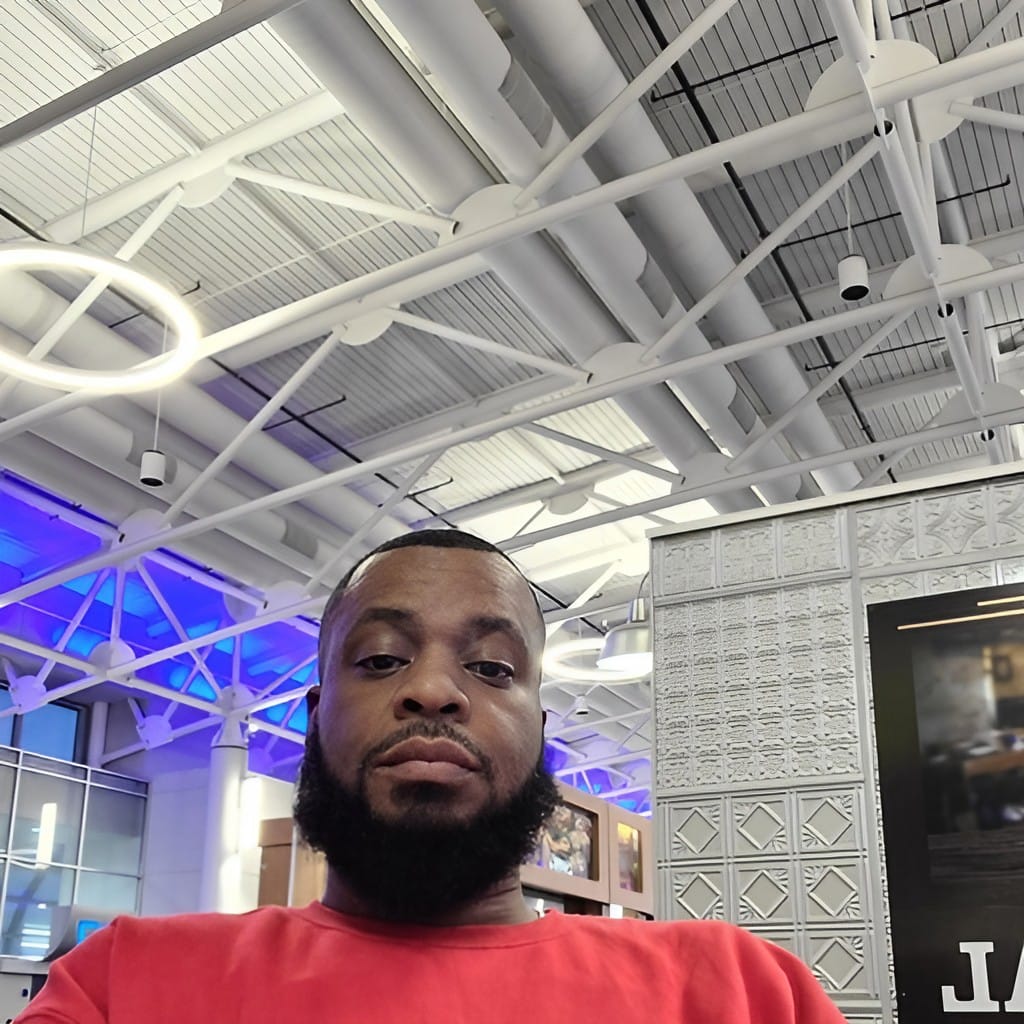

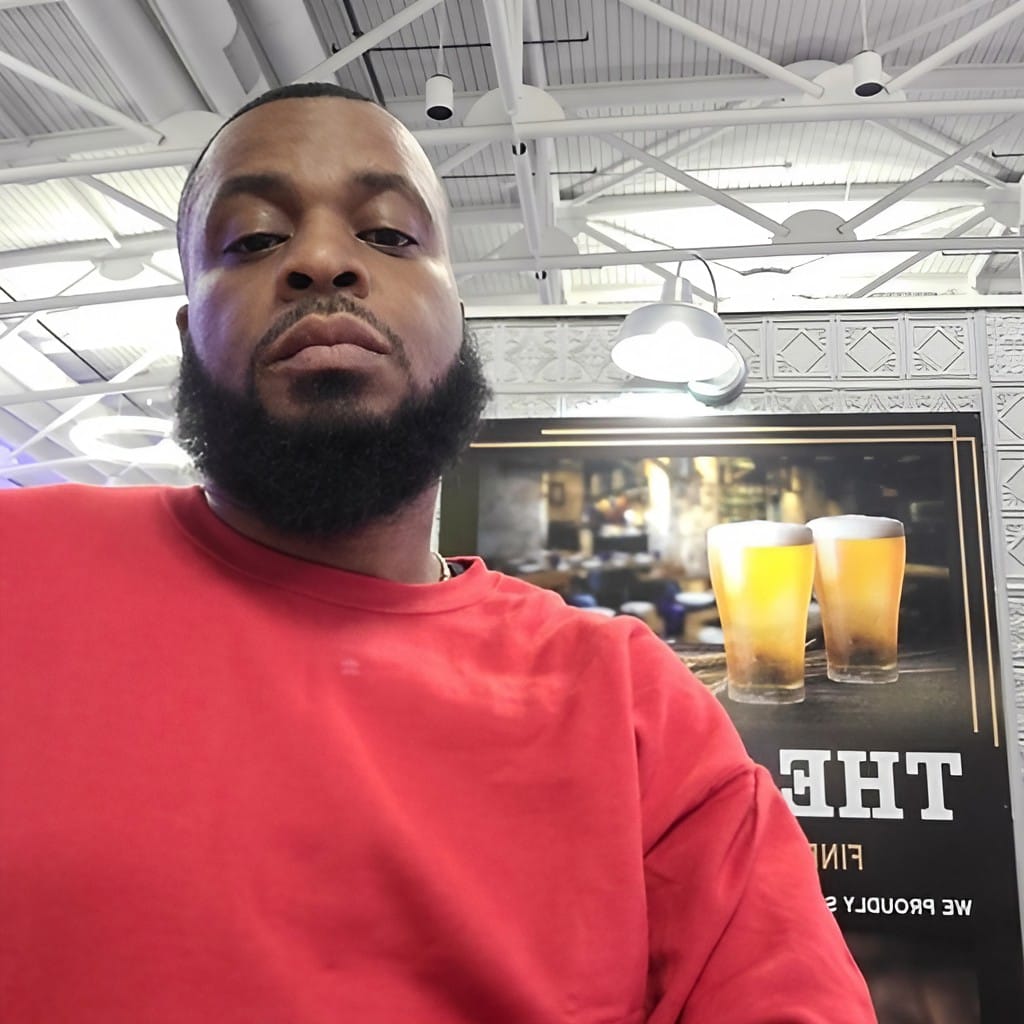
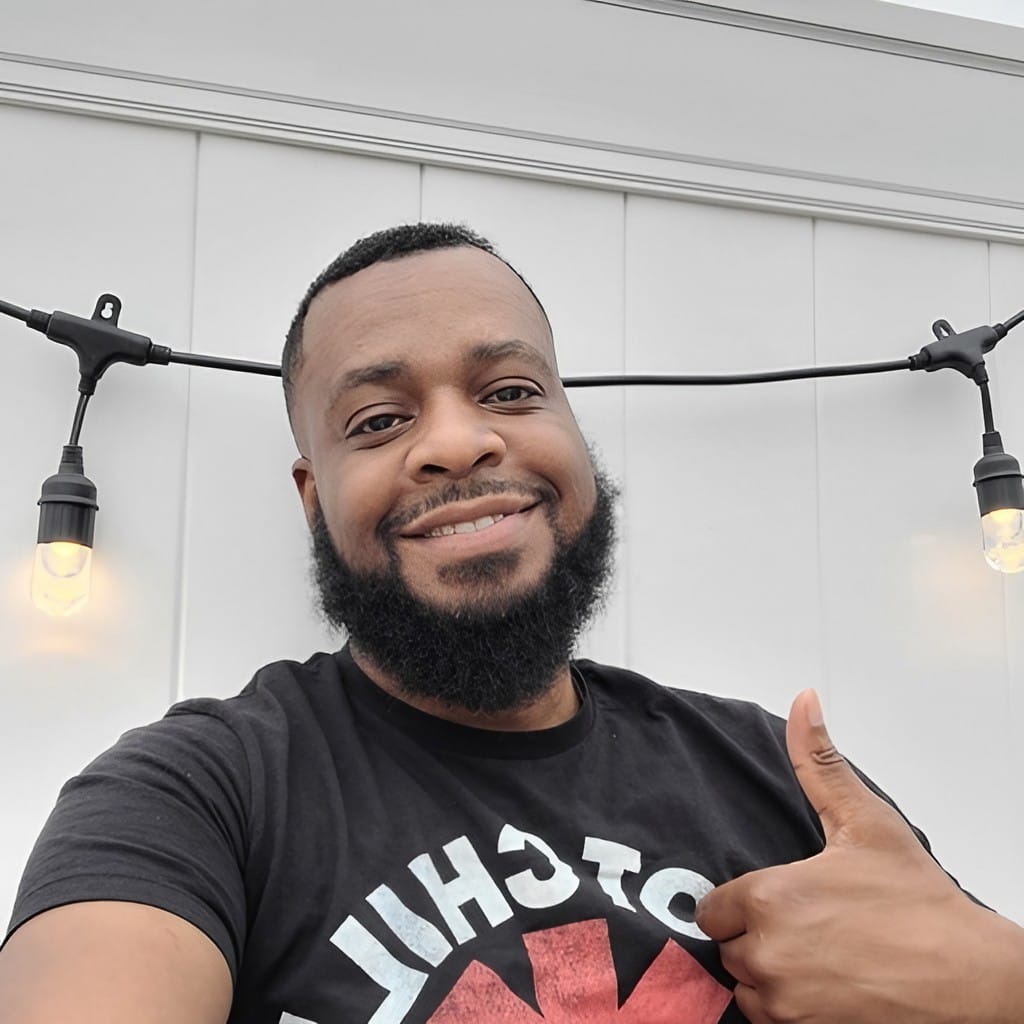

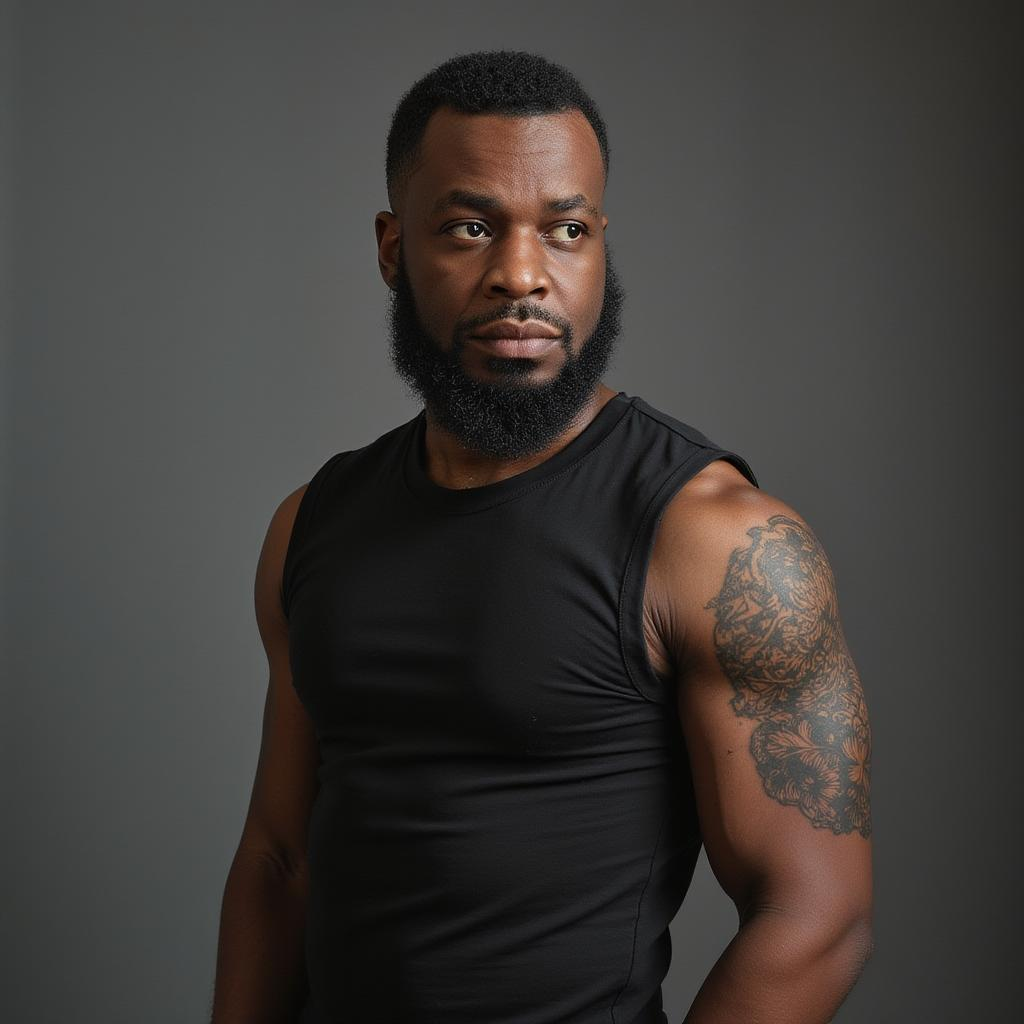
Images used for training Flux.1 Lora
Training Your Model
Go to model training on your dashboard, choose flux training and follow the below steps to train your own flux.1 model that generates personalized images of you.
Upload Training Dataset: Organize your training images into a ZIP file. Upload the ZIP file
Model Details: Choose a descriptive name that reflects the purpose of your fine-tuned model. Select a unique word as trigger words to activate your custom concept. This word will serve as a conditional input to the model. For example 'sks' is the trigger word, it should be used in your text prompt this way. 'sks man wearing a black suit'
Test Prompt: Create a prompt that you'll use to test your fine-tuned model on Segmind's playground.
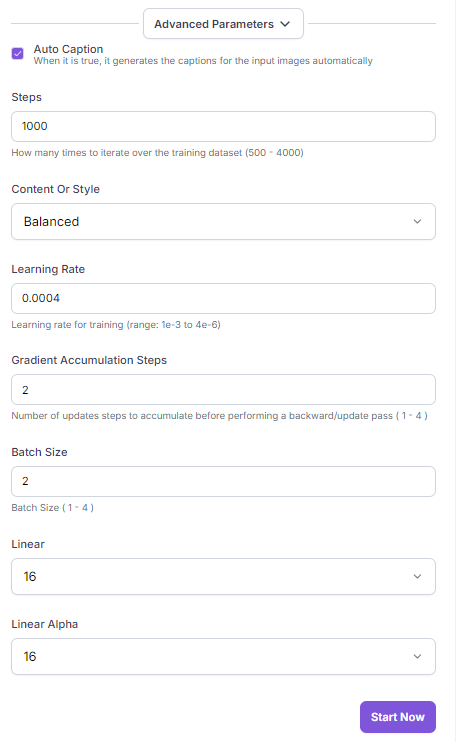
Training Parameters: Start with the default parameters for optimal results. But feel free to adjust parameters like learning rate and batch size to fine-tune performance.

Using Your model
Go to model hub to find your fine tuned model. Once your fine-tuned Flux model is deployed on Segmind and ready for use, you can leverage the model playground to generate images based on your prompts.
To ensure optimal results, follow these guidelines:
1. Include the Trigger Word in your text prompt
Always include the trigger word you specified during the fine-tuning process in your prompts. This activates the fine-tuned model and ensures accurate image generation based on the learned concepts.
Example: If the trigger word is "sks", Prompt: "sks, wearing a black suit and standing against a grey background".
2. Recommended Settings:
- Steps: Experiment with different step values, but we found that 25 to 30 steps is the optimal balance between quality and generation speed.
- Lora Strength: Start with a Lora scale between 1 and 1.3. Higher values can increase the impact of the fine-tuning, but be cautious as it may introduce artifacts.
- Scheduler: The Simple scheduler is often a good starting point. Other schedulers like Karras or DPM2 can also be explored.
- Sampler: Euler is a popular sampler known for its balance of quality and speed. Consider trying other samplers like DPM2 or LMS if you encounter issues.
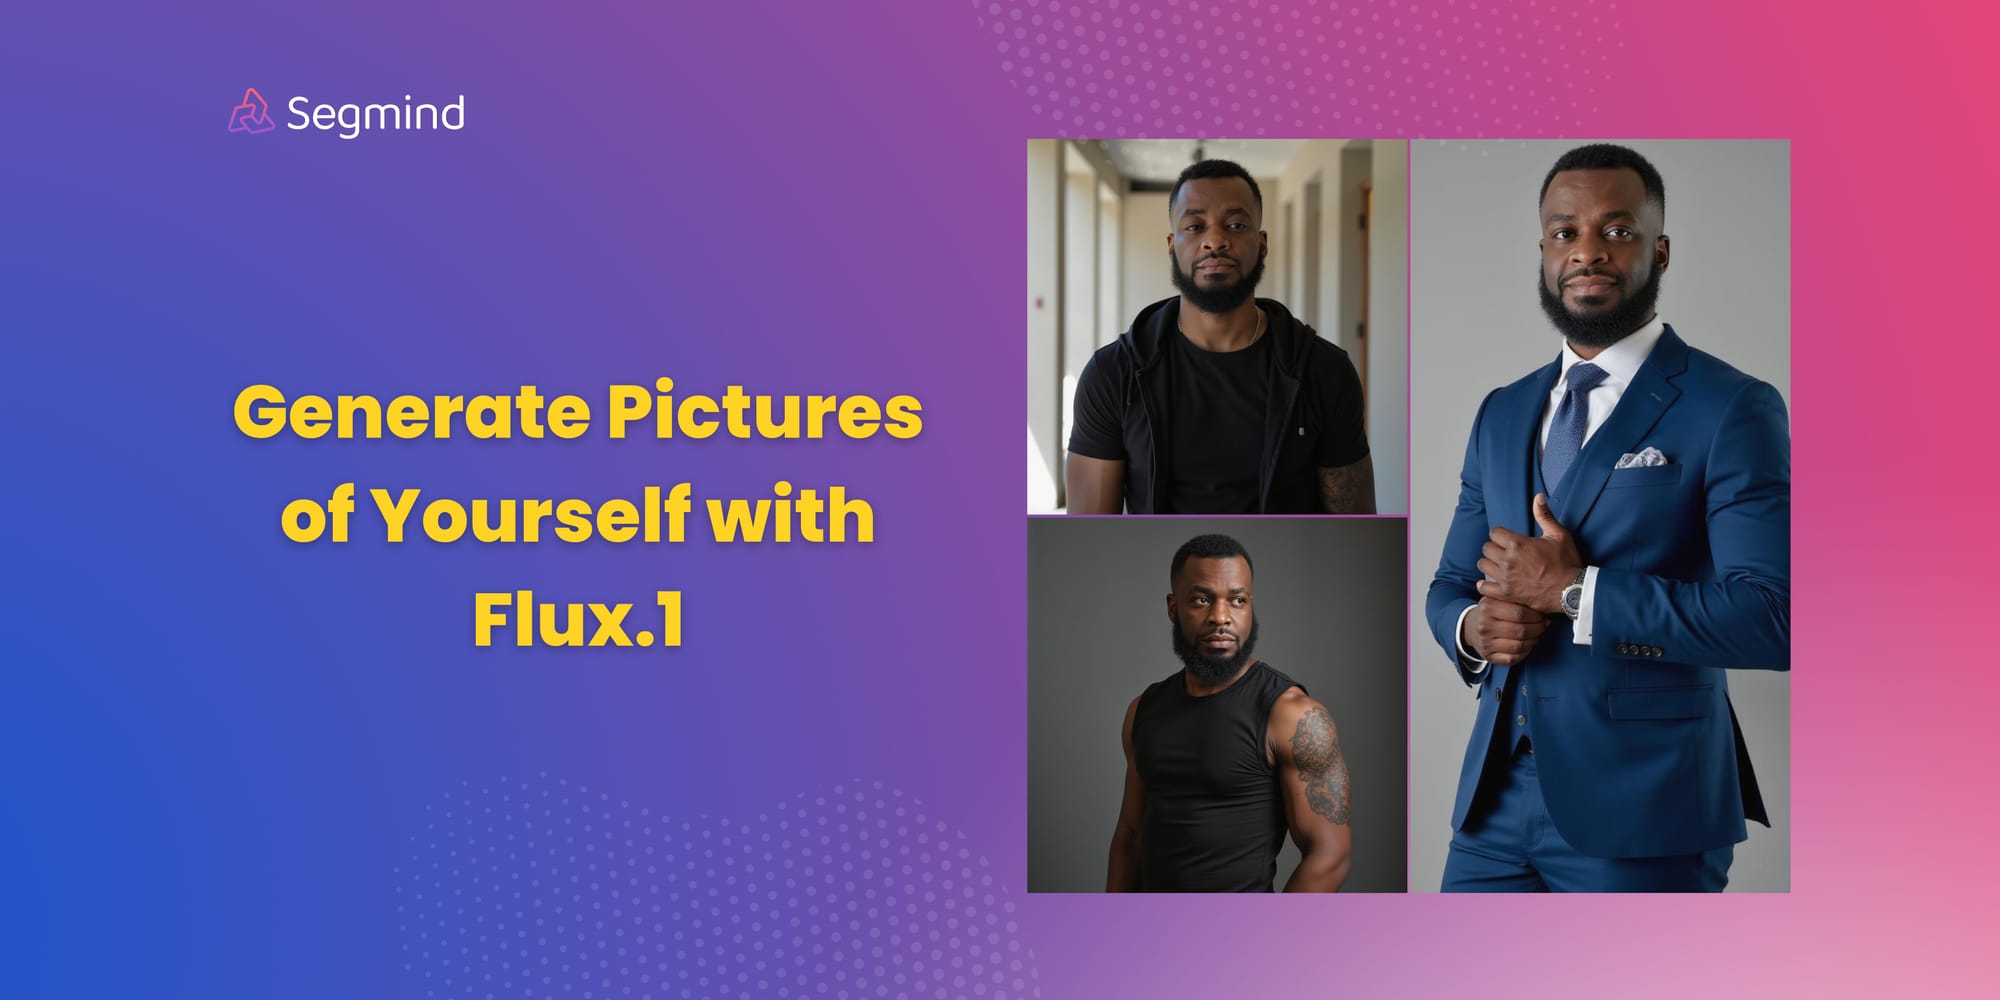
Here are some of the image generated with the fine tuned model. You can generate images of your self in different scenes and settings, be it a LinkedIn headshot, Instagram photo and so on.
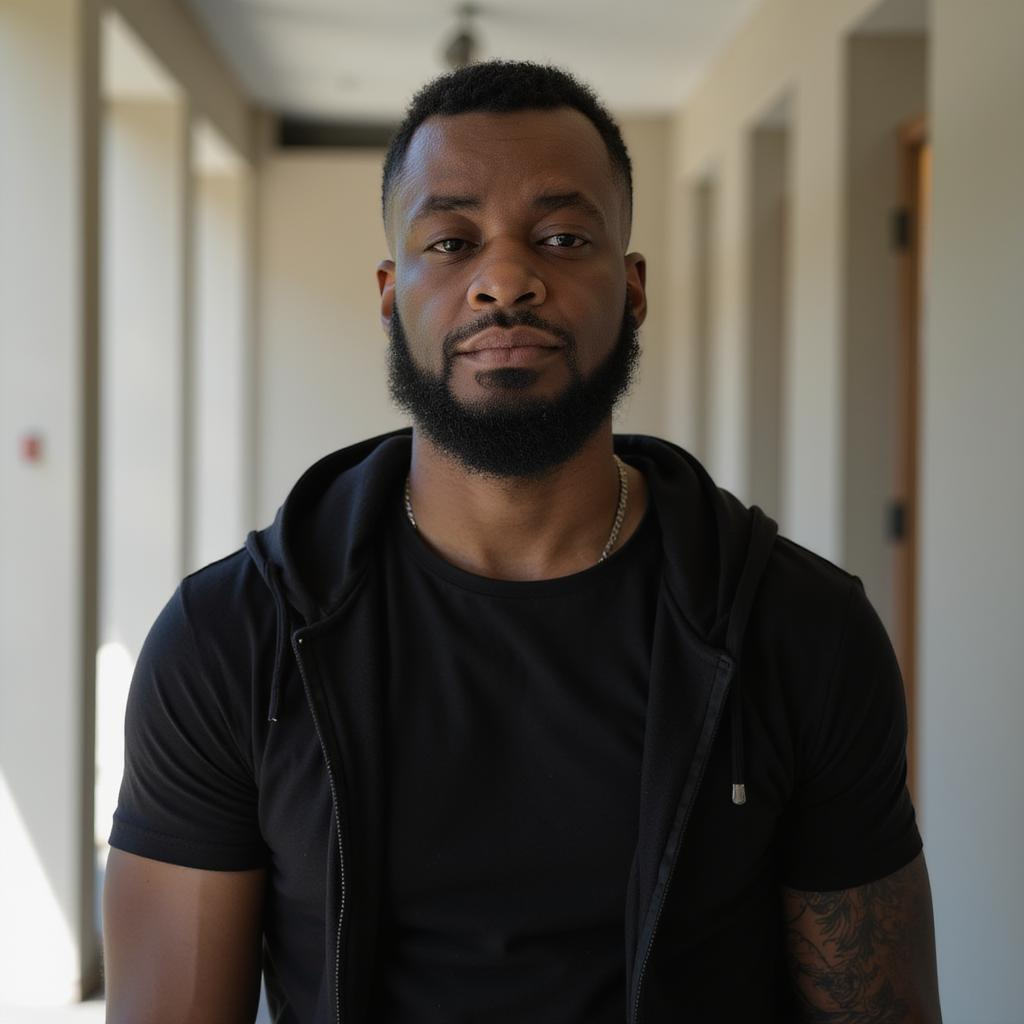

Images generated with fine-tuned flux.1 model