ComfyUI Workflow for Style Transfer with IP Adapter Plus
Explore the power of ComfyUI and Pixelflow in our latest blog post on style transfer. Learn how we seamlessly add artistic styles to images while preserving the important parts of the image.

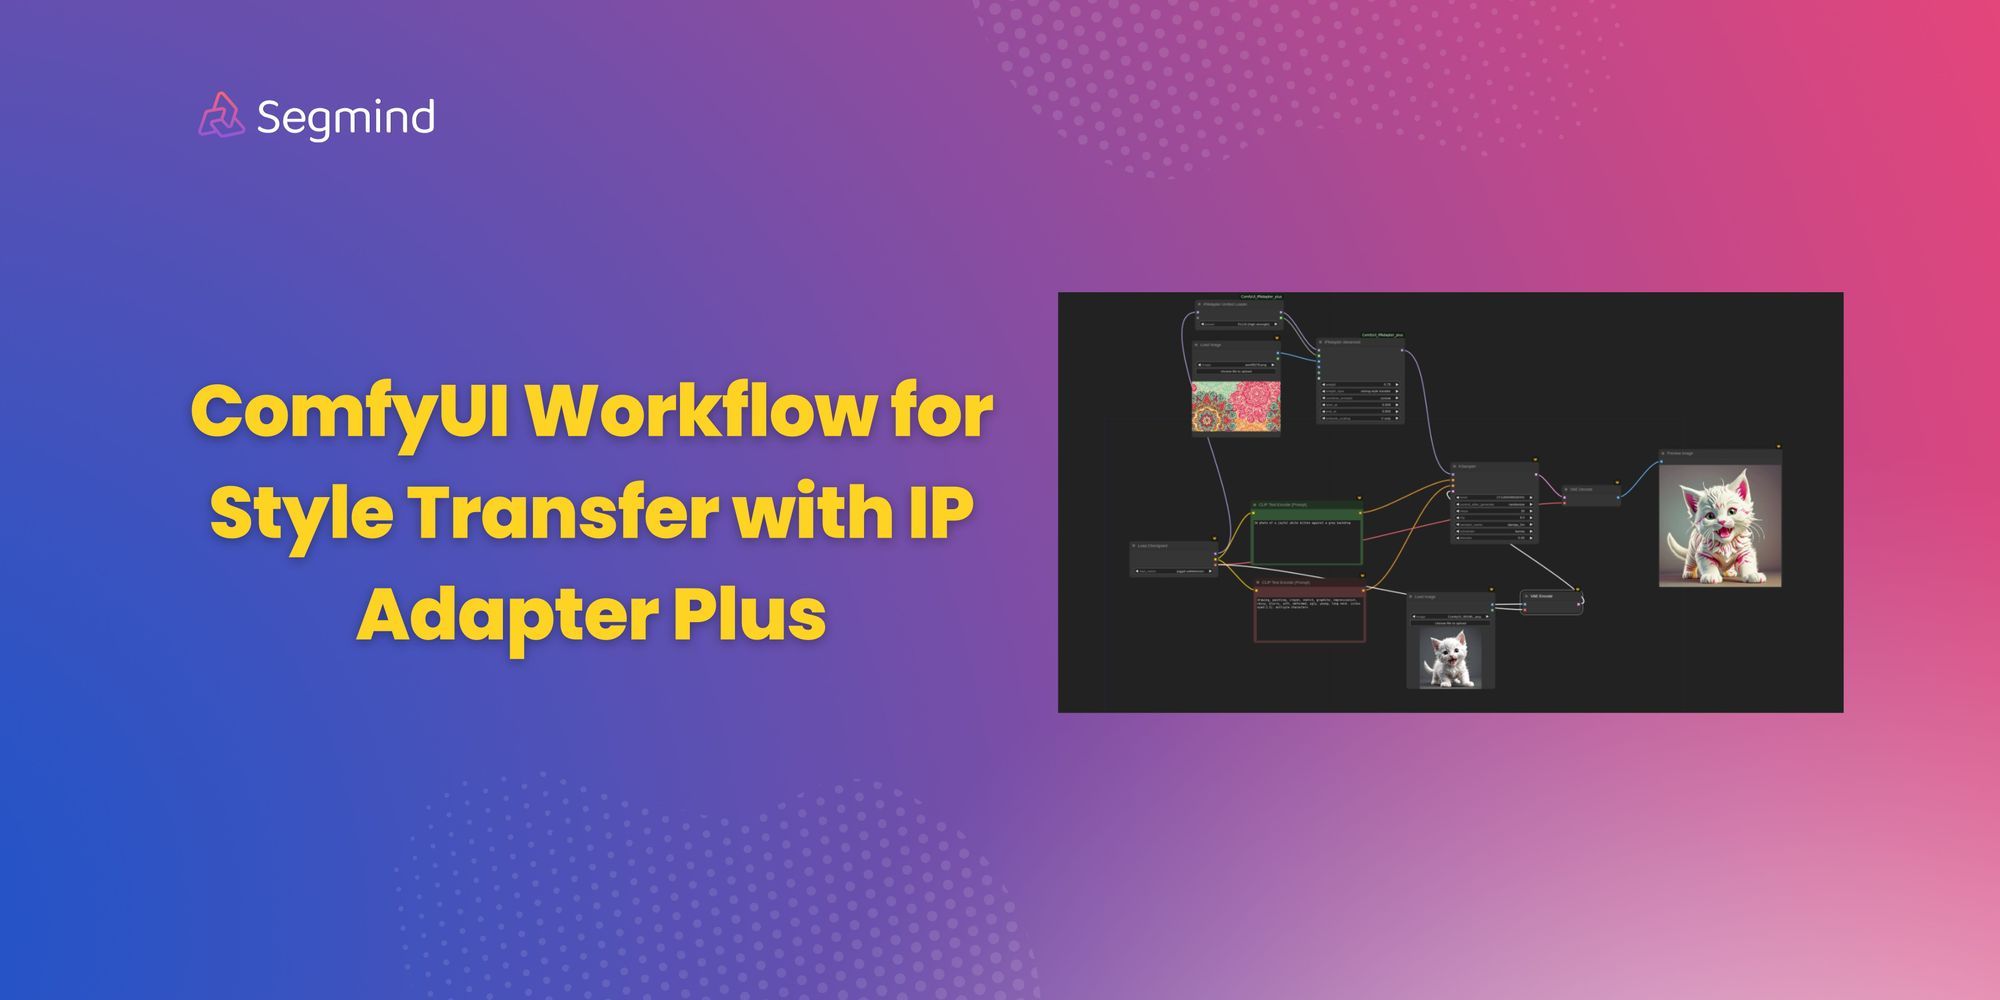
Style transfer, a powerful image manipulation technique, allows you to infuse the essence of one artistic style (think Van Gogh's swirling brush strokes) into another image. In this blog post, will guide you through a step-by-step breakdown of style transfer in both ComfyUI and Pixelflow.
Style Transfer workflow in ComfyUI
To unlock style transfer in ComfyUI, you'll need to install specific pre-trained models – IPAdapter model along with their corresponding nodes. IPAdapter models is a image prompting model which help us achieve the style transfer.
Let’s look at the nodes we need for this workflow in ComfyUI:
| Node Name | Functionality |
|---|---|
| Load Checkpoint | Loads a Stable Diffusion model for image generation. |
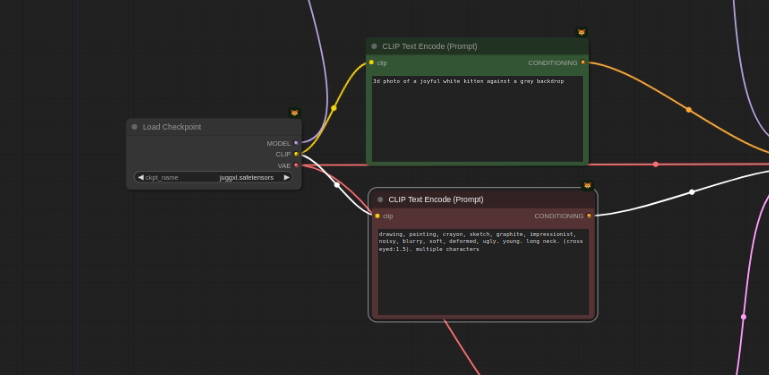
| Clip Text Encode | Encodes positive and negative text prompts to guide the image creation. |
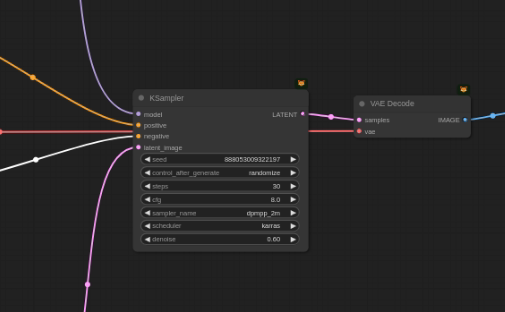
| K-Sampler | Core image generation node. Takes model, prompts, and latent image for iterative refinement. |
| VAE Decode | Decodes the latent image generated by K-Sampler into a final image. |
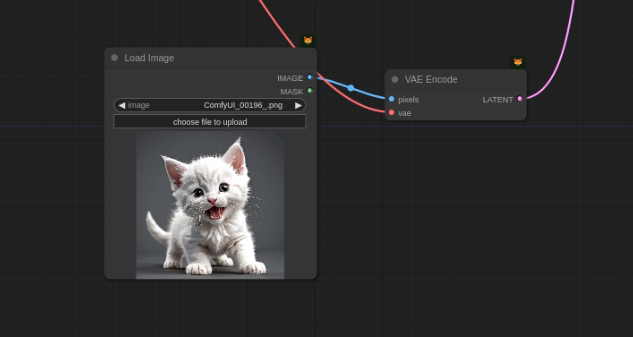
| VAE Encode | Encodes the image into latent space and connects to K-Sampler latent input. |
| Load Image | Loads a reference image to be used for style transfer. |
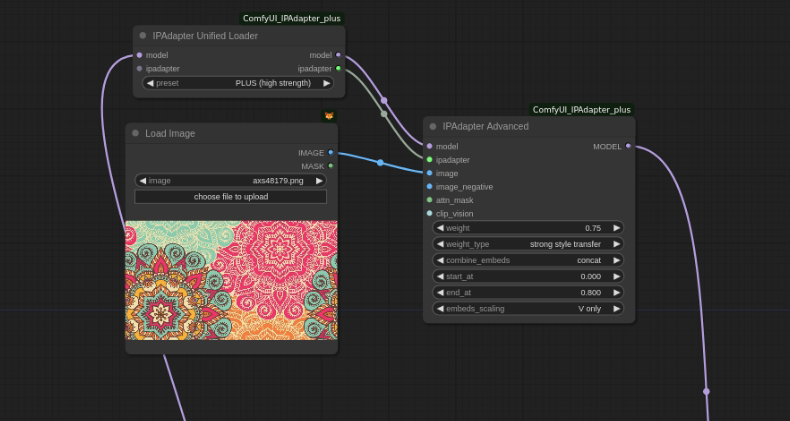
| IPAdapter Unified Loader | Special node to load both an IPAdapter model and Stable Diffusion model together (for style transfer). |
| IPAdapter Advance | Connects the Stable Diffusion model, IPAdapter model, and reference image for style transfer. |
Now let's look at how we will use this nodes in our workflow to achieve style transfer
We need to load the Stable Diffusion model. First, you can pick different open source models available using the Load Checkpoint node.
Then, we use the "Clip Text Encode" tool to describe exactly what you want to see in the image (positive prompt), and anything you don't want (negative prompt). With these instructions, you can guide the image generation process to match your vision!
Now let's use the KSampler node, This is where the magic happens! It takes the model, prompts, and a starting point (called a latent image) and iteratively refines it based on your instructions. It's like using a mould to shape the clay (image) bit by bit.
Once the K-Sampler has done its job, the "VAE Decode" node translates the refined latent image back into a real image you can see.
Now coming to the important part of the workflow
If you want a specific style for your image, you can use the "Load Image" node to introduce a reference image. This image acts as a style guide for the K-Sampler using IP adapter models in the workflow.
ComfyUI uses special nodes called "IPAdapter Unified Loader" and "IPAdapter Advance" to connect the reference image with the IPAdapter and Stable Diffusion model. These nodes act like translators, allowing the model to understand the style of your reference image.
Now to add the style transfer to the desired image
In ComfyUI we will use the "VAE Encode" node to convert the reference image into a latent space format, similar to the starting point for the main image. Additionally, the K-Sampler's "denoising value" might be adjusted to ensure the style is applied effectively.
By connecting these nodes in the order described and adjusting the prompts and reference image, you can create unique images with the desired style!
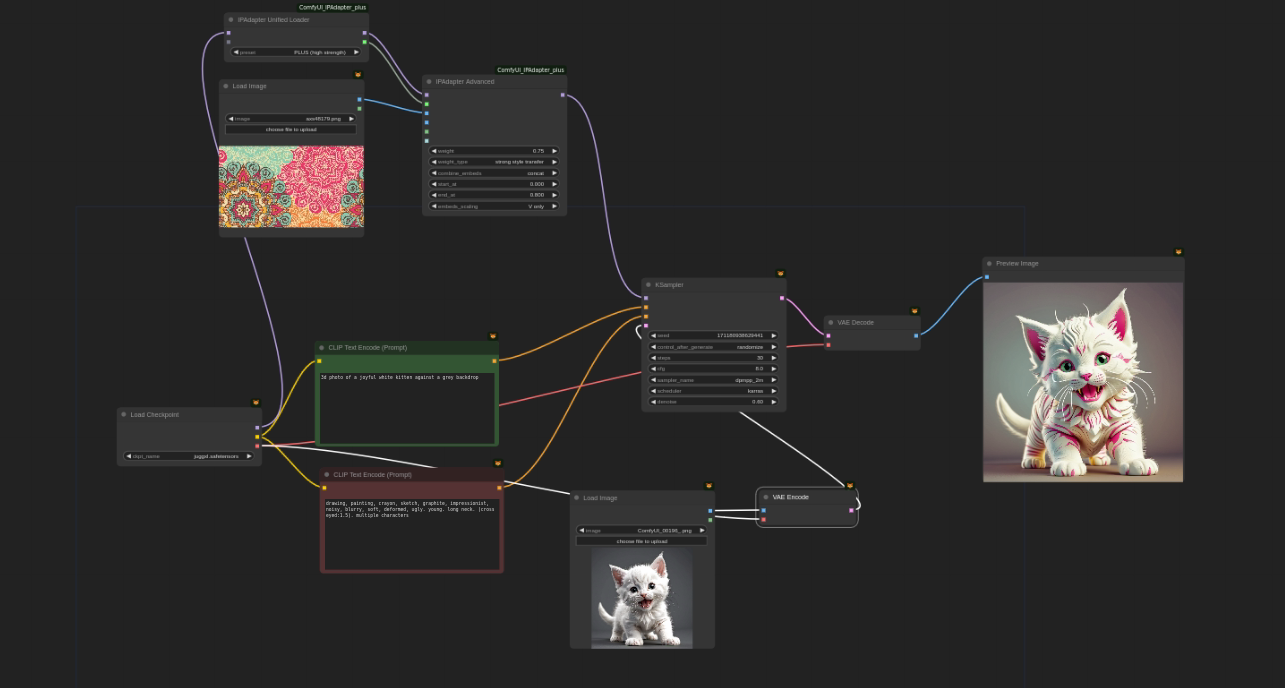
Within the IPAdapter nodes, you can control the weight and strength of the reference image's style on the final output. This allows you to find the perfect balance between your desired style and the core image concept.
*Remember: This is a simplified overview. ComfyUI offers many other nodes and functionalities for further customization and experimentation.
Style Transfer workflow in Pixelflow
Here's a breakdown of the Style Transfer workflow in Pixelflow, similar to the one explained for ComfyUI
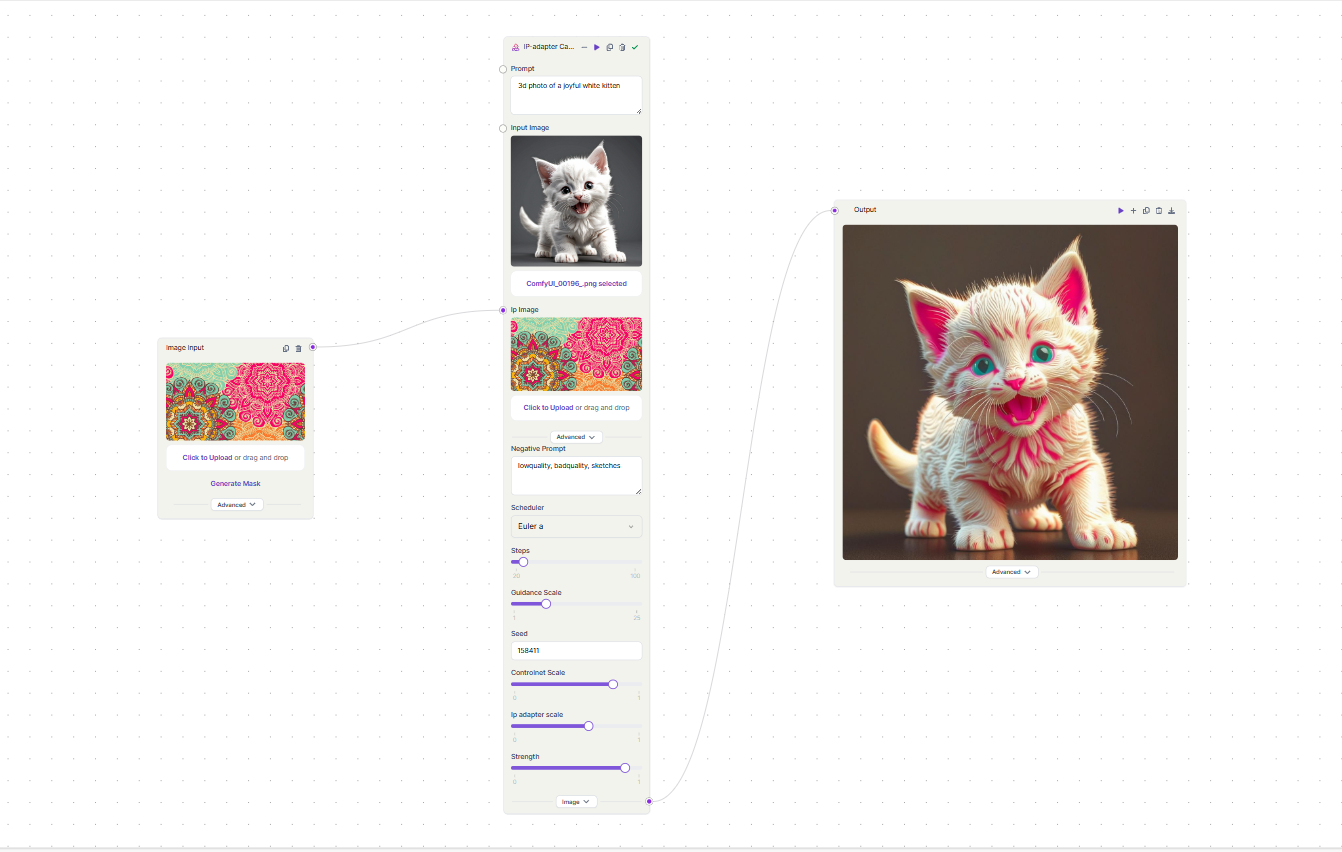
We will first use the Input image node to select the image that embodies the style you want to transfer. This will be the guide for your final image similar to ComfyUI
Next we add a powerful node that combines the functionalities of multiple ComfyUI nodes. It takes the reference image, positive and negative prompts, and a latent image as input. Internally, it utilizes pre-optimized Stable Diffusion models and IP-adapter models to infuse the desired style into the image.
In this node you can control the extent of style transfer:
- Using the IP adapter scale within the IP-adapter Canny Model Node allows you to control the intensity of the style transfer. Increase the scale for a stronger influence of the reference image's style on the final output.
- A good range to experiment with is between 0.5 and 0.6.
Once you've connected the nodes and adjusted the parameters, use the "Run" option or the play button on the IP-adapter Canny Model Node. This will trigger the style transfer process and generate your image. With the help of Image Output node simply download it for further use and unleash your artistic vision on the world!
Key Takeaways
The key to this workflow is using the IPAdapter and reference style image effectively. Pixelflow simplifies the style transfer process with just three nodes, using the IP-adapter Canny Model Node to automate complex tasks. Users can easily adjust the style transfer intensity via the IP-adapter scale.
Stay tuned for more tutorials and deep dives as we continue to explore the exciting world of image generation using ComfyUI and Pixelflow.