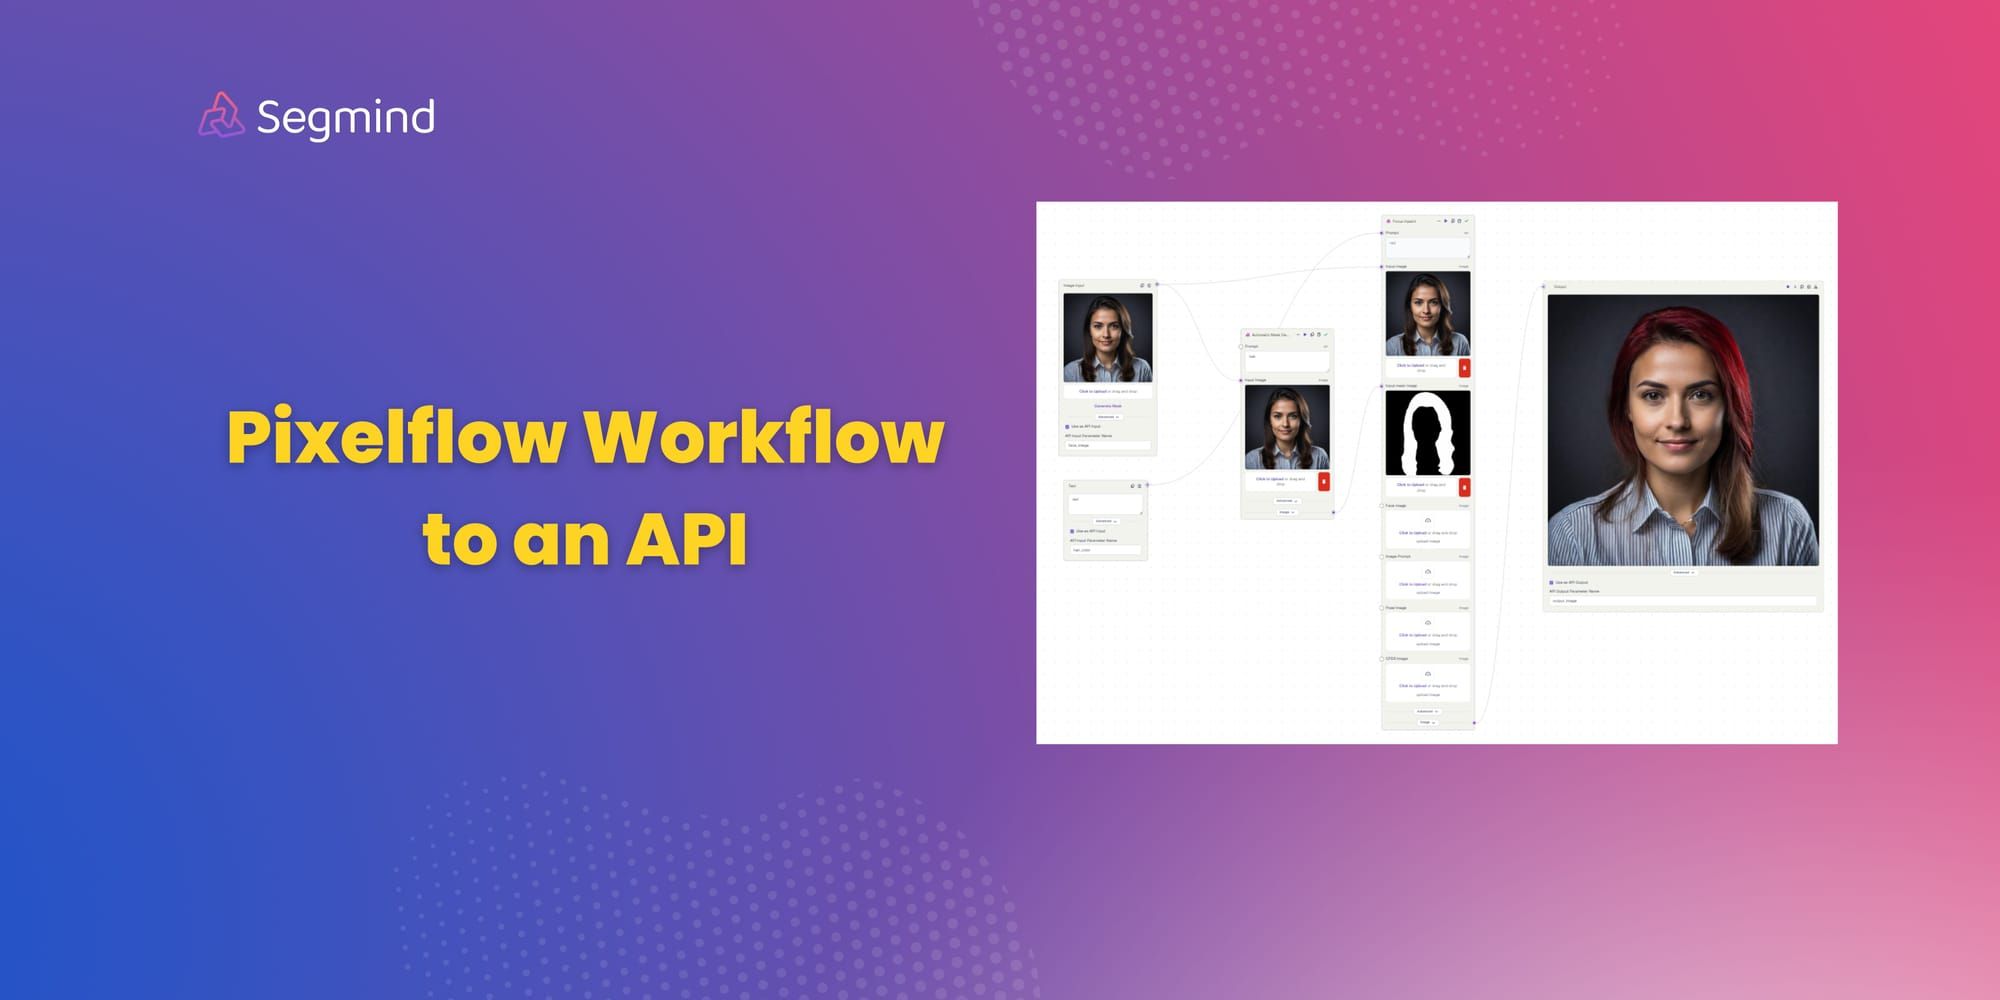
Convert Pixelflow Workflow into an API
Learn how to rapidly transform your Pixelflow workflows into APIs. In this guide, we will walk you through a step-by-step process to convert a AI workflow into a deployable API.

The ability to rapidly adapt Gen AI workflows into scalable APIs forms a crucial advantage for modern developers. Pixelflow emerges as a robust platform that integrates state-of-the-art machine learning models into intuitive, visual workflows. With Pixelflow, developers can construct complex Gen AI pipelines without diving deep into the intricacies of individual algorithms.
This blog post focuses on transforming a Pixelflow-designed workflow into a versatile and deployable API, enabling developers to seamlessly integrate advanced image manipulation functionalities into their projects. Specifically, we will walk through a practical example where a workflow designed to change hair color in a given image is converted into a fully functional API.
By the end of this article, you will have a solid understanding of:
- Designing a workflow on Pixelflow: Creating a an image processing pipeline.
- Publishing the workflow as an API: Utilizing Pixelflow’s built-in features to generate an API endpoint.
Such capabilities not only expedite the development process but also extend the flexibility and reusability of Gen AI workflows. Let's delve into the intricacies of transforming your Pixelflow workflows into powerful APIs and explore their potential in delivering efficient solutions.
Overview:
In this tutorial, we will walk through converting a Pixelflow workflow, as shown in the image, into an API. This API will allow users to input an image of a face and a hair color, and the output will be an image with the specified hair color applied.
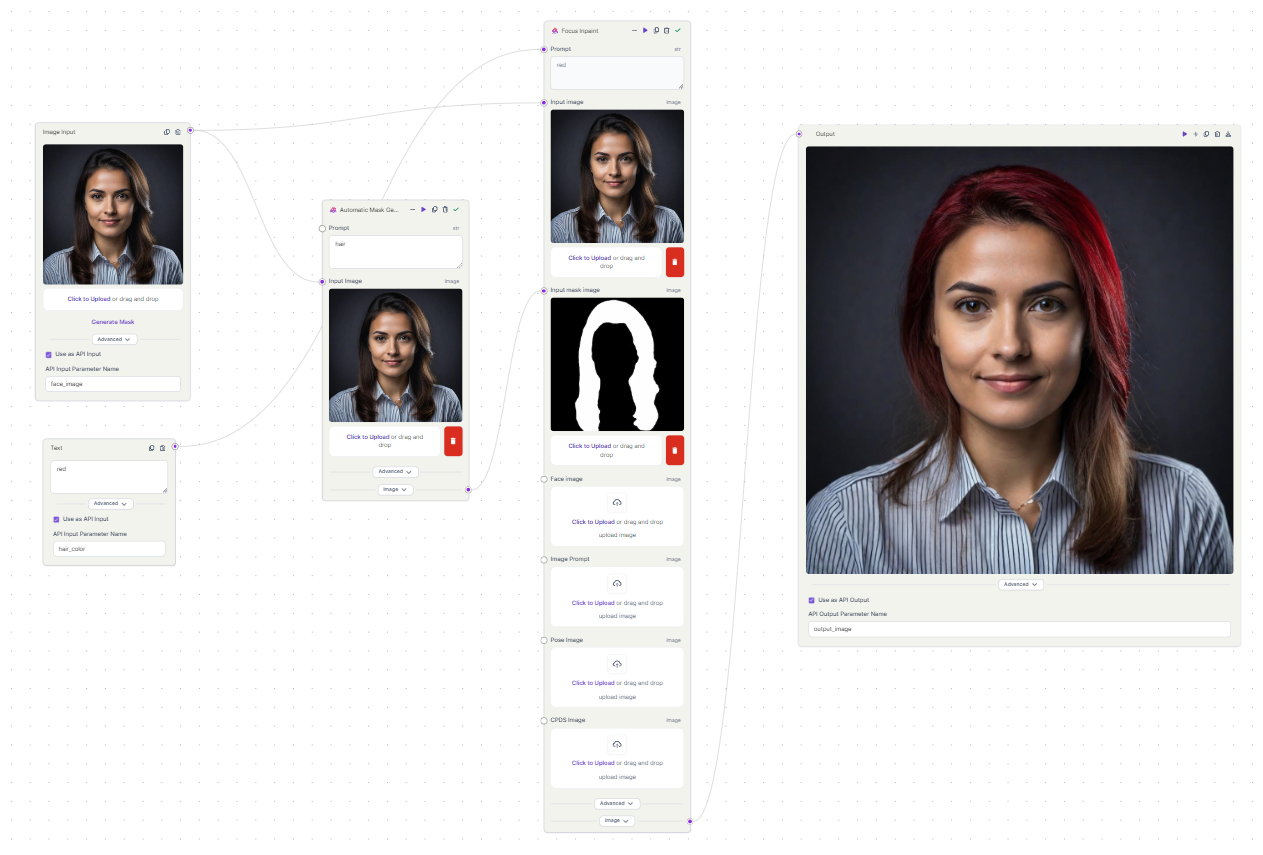
The workflow we are converting into an API consists of several interconnected nodes or components designed to change the hair color in an image:
Image Input Node : This block serves as the entry point for uploading the input image. Users can select a picture of a person's face.
Text Input Node: This block allows users to specify the desired hair color.
Automatic Mask Generation Node: Utilizes Grounded SAM to automatically generate a mask that identifies the hair region in the uploaded image. This mask is crucial for applying color changes accurately.
Inpaint Node: This block takes the hair mask and the specified hair color as inputs and performs the inpainting process using Fooocus Inpainting. It modifies the hair region in the image to reflect the new color while maintaining a natural appearance.
Output Node: Displays the final result, which is the original image with the updated hair color.
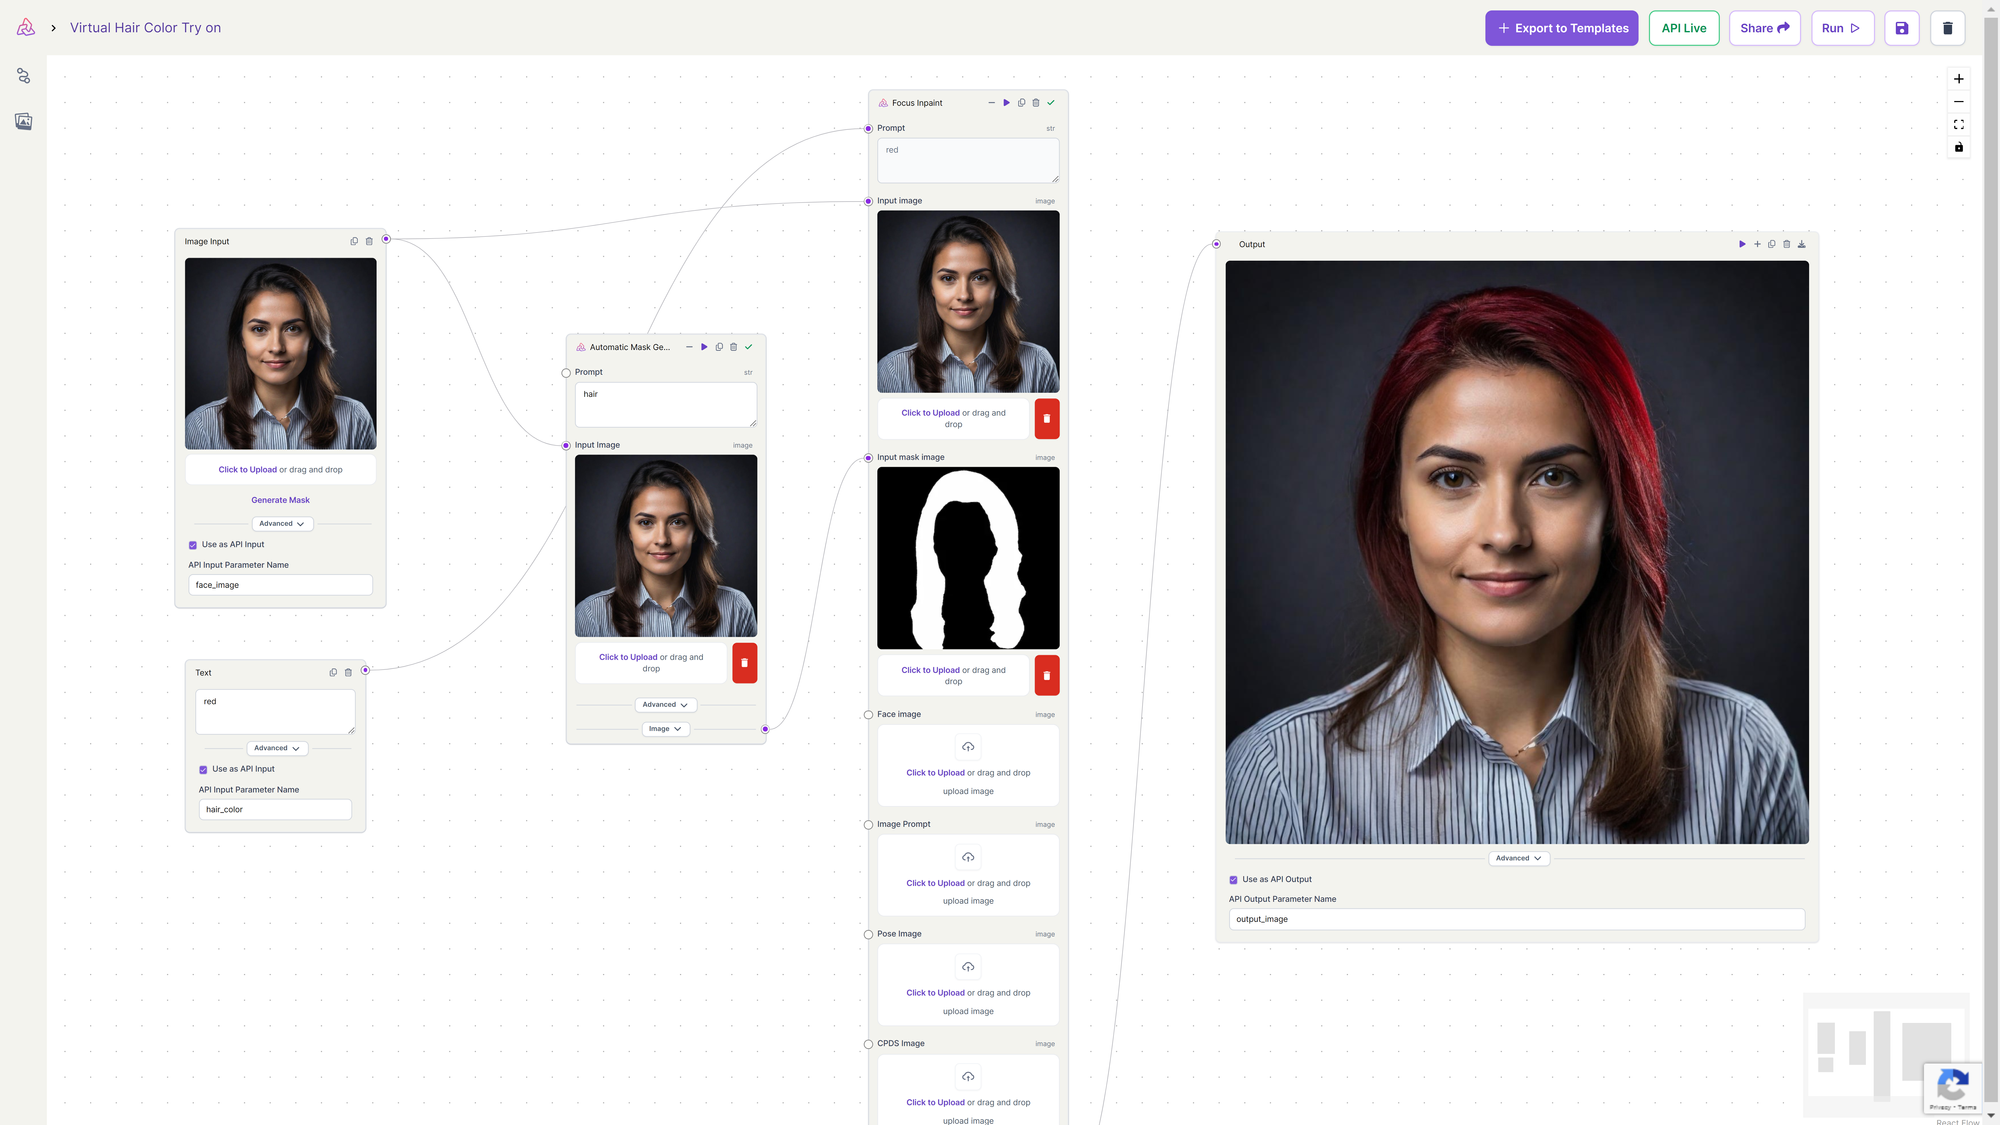
Step 1: Setup Your Pixelflow Workflow
Log in to your Segmind dashboard.
- Click on “Create Workflow” and name it appropriately (e.g., “Virtual Hair Try on”).
- Add an image input node to upload the face image. Enable “Use as API input” and set
API Input Parameter Nametoface_image. - Add a text input node to input the desired hair color. Enable “Use as API input” and set
API Input Parameter Nametohair_color. - Add Automatic Mask Generation node to generate a mask of the hair area. Add this inpaint block to apply the specified hair color. Connect the mask and hair color input to this block as shown in the workflow.
- Add an output node to display the final image. Enable “Use as API output” and set
API Output Parameter Nametooutput_image.
Step 2: Publish Your Workflow
Choose the option “Publish as API.” Pixelflow will generate an API endpoint URL for your workflow.
Step 3: Use the Generated API in Your Application
Get API Endpoint Details:
- Copy the API endpoint URL provided by Pixelflow.
Testing the API on Pixelflow:
You can easily test your API inside Pixelflow with just a few clicks.
Testing Workflow to API in Pixelflow
Testing the API Using Postman:
Alternatively, you can also test the API on postman.
- Open Postman or any other API testing tool.
- Create a new POST request.
- Enter the API endpoint URL.
- In the Body tab, select
form-dataand add the following parameters: face_image: (attach image file)hair_color: (text, e.g., “red”)- Click on “Send” to test the API.
- You should receive a response with the processed image URL or the image file itself.
Step 4: Integrate the API into Your Application
Example Code: Here is an example in Javascript:
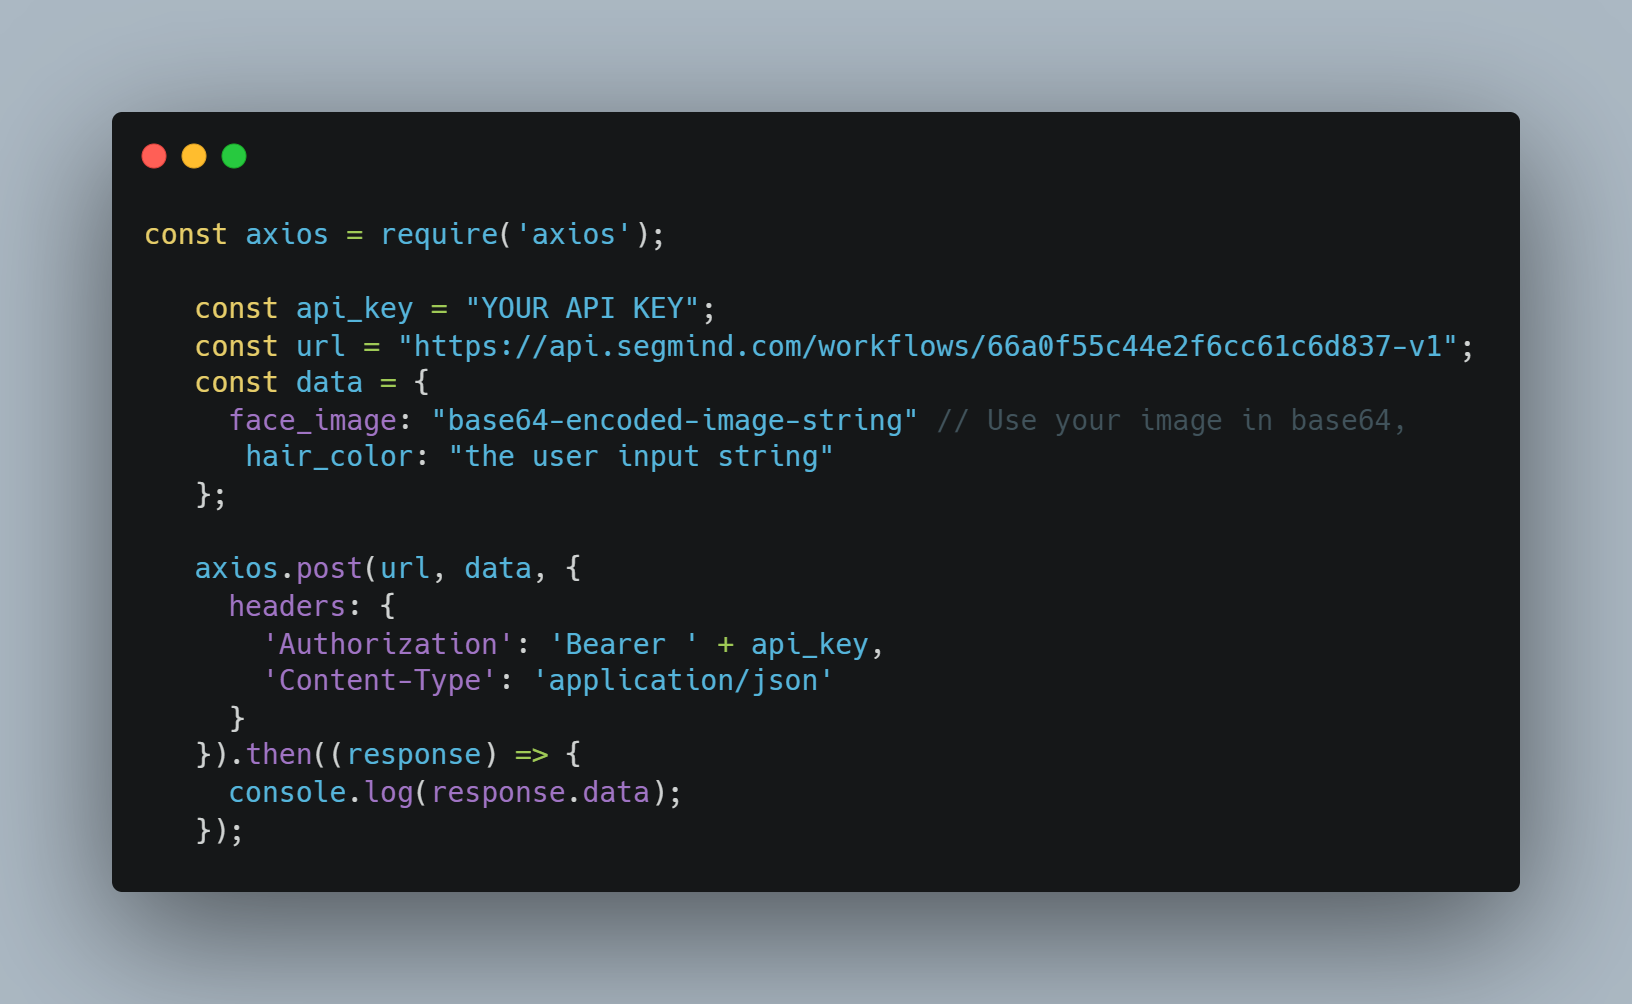
In this code:
- Replace
"YOUR API KEY"with your actual API key. - Replace
"base64-encoded-image-string"with the base64 representation of your image. - Replace
"the user input string"with the desired hair color input from the user.
This script sends a POST request to the Segmind API with the image and hair color as JSON data, along with the necessary headers for authorization and content type. It then checks the response status and prints the response data if successful, or prints an error message if the request fails.
Use the provided API within your web or mobile application, ensuring proper error handling and user input validation.
Conclusion
By following these steps, you have successfully converted your Pixelflow workflow into a usable API. This API can be further extended or modified based on specific requirements, allowing for versatile integration into various applications. You can refer to the Pixelflow documentation. for more details.