Flux.1 ControlNets: What Are They? All You Need To Know
Learn what Flux.1 ControlNets are, their types, and how they help in high-quality AI image generation. Explore the best practices and tips for using Flux.1 ControlNets.

Getting perfect AI-generated images takes time. You spend hours tweaking prompts, but the output still isn't quite right. The hands look odd, the poses are stiff, and the backgrounds lack detail. Flux.1 ControlNets fix these common issues.
These specialized AI models give you exact control over how your images turn out. They work seamlessly with Flux.1, letting you define particular aspects like poses, and depth. Let’s dive in and learn more about Flux.1 ControlNets.
What Are Flux.1 ControlNets?
Think of Flux.1 ControlNets as precision tools for AI image creation. They add specific rules to the image generation process, giving you control over how the final image looks. Each ControlNet handles a different aspect of image creation—from defining edges to managing depth.
The system works by processing your input conditions before generating the image. For example, when you want to create a character in a specific pose, the Pose ControlNet uses a skeleton structure to guide the generation. This ensures the character's position matches exactly what you need.
ControlNets excel at tasks that regular image generators struggle with. They can maintain consistent patterns across large images, perfect for creating seamless textures for game assets. They handle complex poses without distorting body parts—a common issue in standard AI image generation.
Here's what makes Flux.1 ControlNets stand out in practical use:
- Generation Speed: Creates high-quality 1024x1024 images in under 6 seconds
- Resolution Support: Handles images up to 2048x2048 pixels
- Input Flexibility: Works with sketches, depth maps, and pose data
- API Integration: Ready for both testing and production environments
These capabilities make Flux.1 ControlNets useful for particular tasks. Game developers use them to generate consistent textures and character poses. Graphic designers rely on them for creating precise layouts and architectural visualizations. Even fashion designers use them to test different clothing designs on consistent model poses.
The technical architecture of ControlNets ensures reliable results. When you input a condition—like a pose or outline—the ControlNet processes it through multiple layers. Each layer refines the condition, making sure it properly guides the final image generation. This layered approach helps avoid common AI art issues like distorted features or inconsistent styles.
Now that you know how Flux.1 ControlNets work, let’s explore more about their different types.
What Are The Types Of Flux.1 ControlNets?
Flux.1 ControlNets come in four main types. Each type handles specific aspects of image generation to help you create exactly what you need. Let's look at how each one works and what you can create with them.
1. Canny ControlNet
Canny ControlNet specializes in edge detection and structure definition. When you input a line drawing or sketch, it analyzes the edges and uses them as guidelines for generating the final image. Basic sketches work great—you can start with simple outlines and get detailed results.
For architectural designs, a basic building outline becomes a detailed render with proper perspective. The ControlNet maintains clean lines and structural accuracy while adding realistic details to windows, doors, and surface textures. When creating comic-style artwork, it keeps character outlines consistent and adds detail while preserving the original line art style.
2. Pose ControlNet

Pose ControlNet makes sure AI-generated characters match your intended poses exactly. It uses keypoints—markers for joints and body parts—to map out positions. Starting with simple stick figures or keypoint markers, you'll get characters with natural proportions and anatomically correct poses.
This works especially well for creating consistent character designs. Set up your keypoints once, and you can generate multiple images with the same pose but different styles, outfits, or backgrounds. For fashion designs, you can maintain a standard pose while testing different clothing options, ensuring accurate draping and fit.
3. Depth ControlNet

Depth ControlNet focuses on spatial relationships in your images. It uses depth maps—grayscale images where lighter areas appear closer and darker areas farther away. This creates realistic 3D space in your generated images, making them more immersive and dimensional.
In interior design projects, depth maps help define room layouts and furniture placement with proper perspective. When creating landscapes, you control exactly how far away mountains, trees, and other elements appear. The ControlNet maintains these spatial relationships throughout the generation process, ensuring everything stays properly positioned.
4. Tile ControlNet
Tile ControlNet creates seamless patterns and textures across large images. It ensures patterns continue smoothly without obvious breaks or repeats—essential for backgrounds and surface textures. You can generate extensive textures that maintain quality even at high resolutions.
This makes it perfect for creating game environments, where textures need to tile perfectly across large surfaces. When designing wallpapers or fabric patterns, you get consistent results that can scale to any size. The ControlNet maintains pattern details and color consistency across the entire image.
Understanding these different types is just the first step. Let's look at how you can start using them right away.
The Best Way To Use Flux.1 ControlNets: Segmind
Segmind brings Flux.1 ControlNets directly into your workflow with a simple interface. You get instant access to all ControlNet types without complex setup or coding. The platform handles the technical details so you can focus on creating.
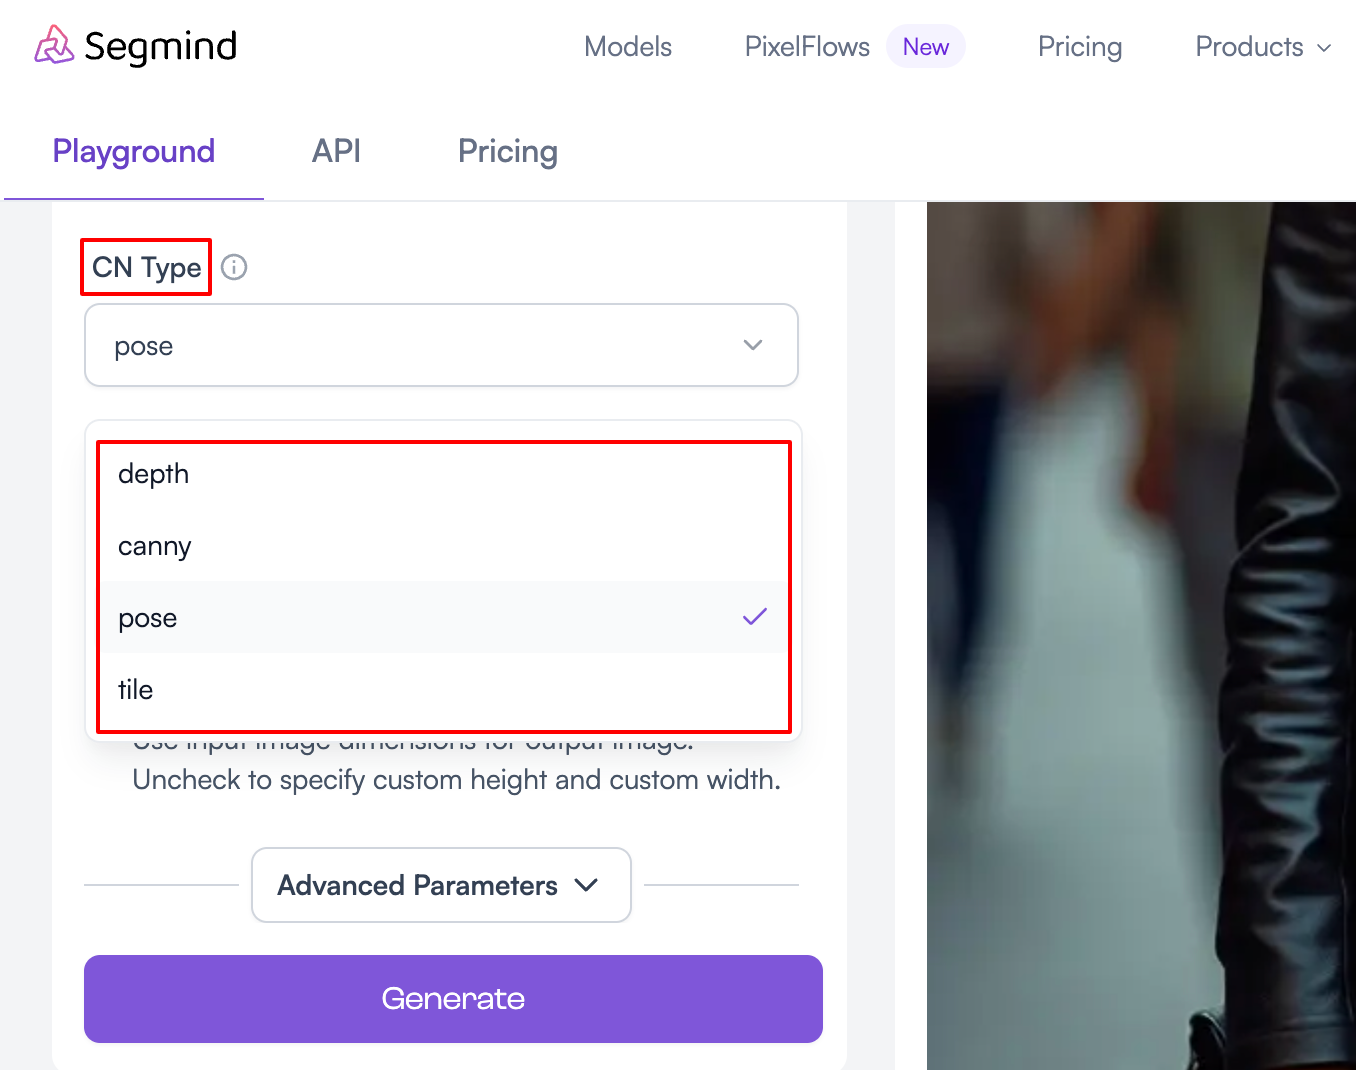
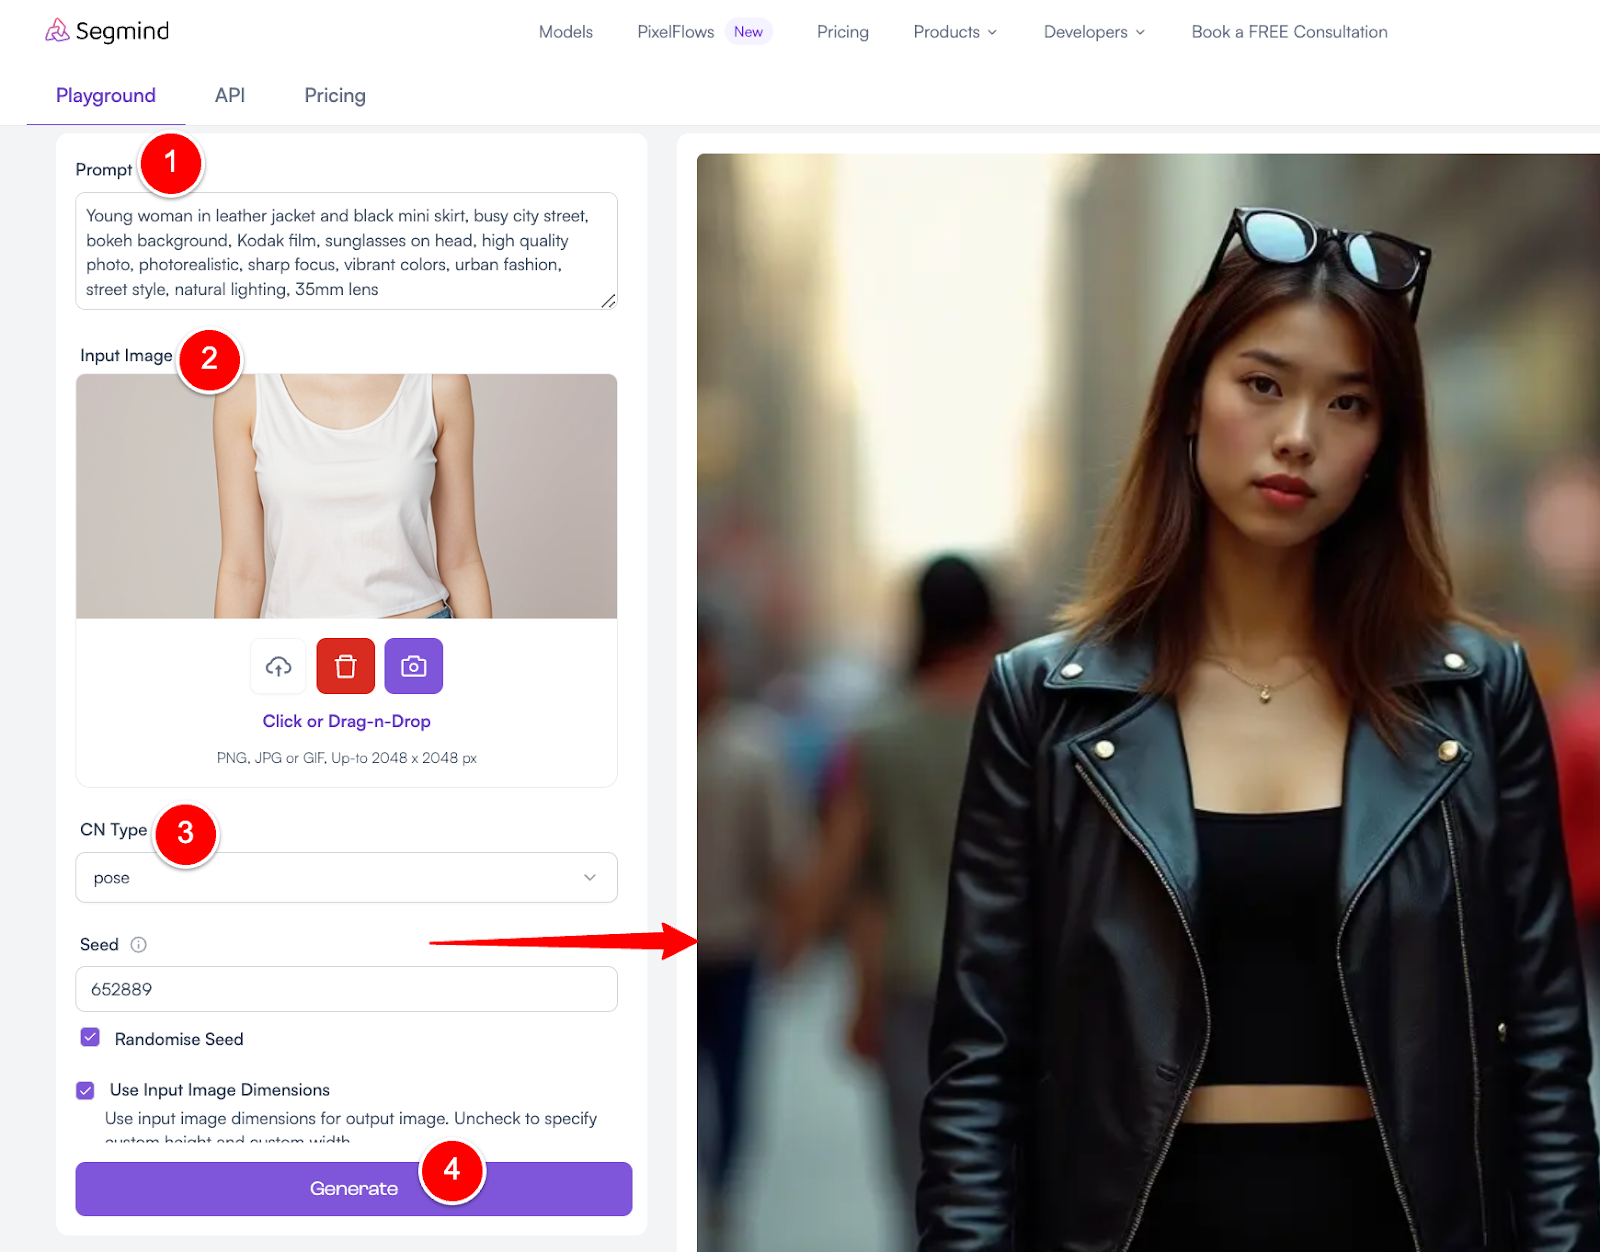
Getting started with Flux.1 ControlNets on Segmind takes just a few steps.
- First, enter your prompt to describe what you want to create.
- Upload your reference image.
- Then select your ControlNet type based on your needs—Canny for structures, Pose for characters, Depth for 3D effects, or Tile for patterns.
- Finally, click on the ‘Generate’ button. The system processes your inputs in just a few seconds and delivers high-quality output.
Speed matters in production workflows. Segmind's API lets you generate multiple images per minute. The system automatically handles load balancing and scaling, so your projects stay on schedule whether you're creating a few images or thousands. And the best part is you can easily integrate these capabilities directly into your applications with just a few lines of code.
Testing different options becomes much faster. The interface shows real-time previews as you adjust settings like ControlNet strength, guidance scale, and sampling steps. This means you can fine-tune your results without waiting for full generations between each change.
Now before diving into the best practices and tips, let’s take a quick look at why these tools are worth adding to your workflow. The benefits go beyond just better image quality.
Benefits Of Flux.1 ControlNets
Flux.1 ControlNets solve common AI image generation challenges in several ways. These benefits directly impact your workflow and output quality.
- Generates high-quality images fast, with most outputs ready in seconds.
- Matches your reference materials exactly, reducing the need for multiple attempts.
- Handles complex tasks like human poses and architectural designs without distortions.
- Creates detailed images at high resolutions while maintaining quality.
- Integrates easily with existing workflows through a simple API.
- Scales smoothly from single images to large batch processing.
With these benefits in mind, let’s explore how to get the most out of these tools.
Best Practices For Using Flux.1 ControlNets
Getting the most out of Flux.1 ControlNets requires the right approach. Your input quality directly affects your results. Clean, clear reference images and well-structured prompts make a big difference in the final output.
- Start with the right resolution—512x512 pixels works best for initial tests. This size processes quickly and lets you refine your approach before scaling up to larger dimensions.
- Set your ControlNet strength between 0.8 and 1.2. Values below 0.8 may not maintain enough control, while values above 1.2 can make results too rigid.
- Match your control image type to your ControlNet. Use clean line drawings for Canny, clear pose references for Pose ControlNet, and accurate depth maps for Depth ControlNet.
- Keep your Flux image prompts clear and detailed. Shorter usually works better. Include key details about style, lighting, and composition.
- Use negative prompts to avoid common issues. Terms like "distorted features," "missing limbs," or "blurry details" help prevent these problems.
- Combine ControlNets when needed. Running Pose ControlNet at 0.9 strength with Canny at 0.6 can give you precise poses while maintaining structural details.
- Save your successful configurations. Note down the settings that work well for specific types of images—you can reuse these combinations later.
Final Thoughts
Flux.1 ControlNets give you precise control over AI image generation. From architectural visualization to character design, these tools help create exactly what you need. The combination of different ControlNet types lets you handle any image generation task with accuracy and speed.
Getting started takes minutes, not hours. The straightforward interface and pre-configured settings help you create high-quality images right away. As you get more familiar with the controls, you can fine-tune every aspect of the generation process.
Segmind provides easy access to Flux.1 ControlNets. The platform's ready-to-use PixelFlow workflow templates and API integration help you start creating right away, whether you need one or multiple images at once.