AI Face Swap with Multiple Faces
Learn how to perform multi-person face swaps on photos and videos. This guide explains the complex process behind swapping multiple faces simultaneously, providing step-by-step instructions and tips for achieving realistic results. Master the art of multi-face swapping today.

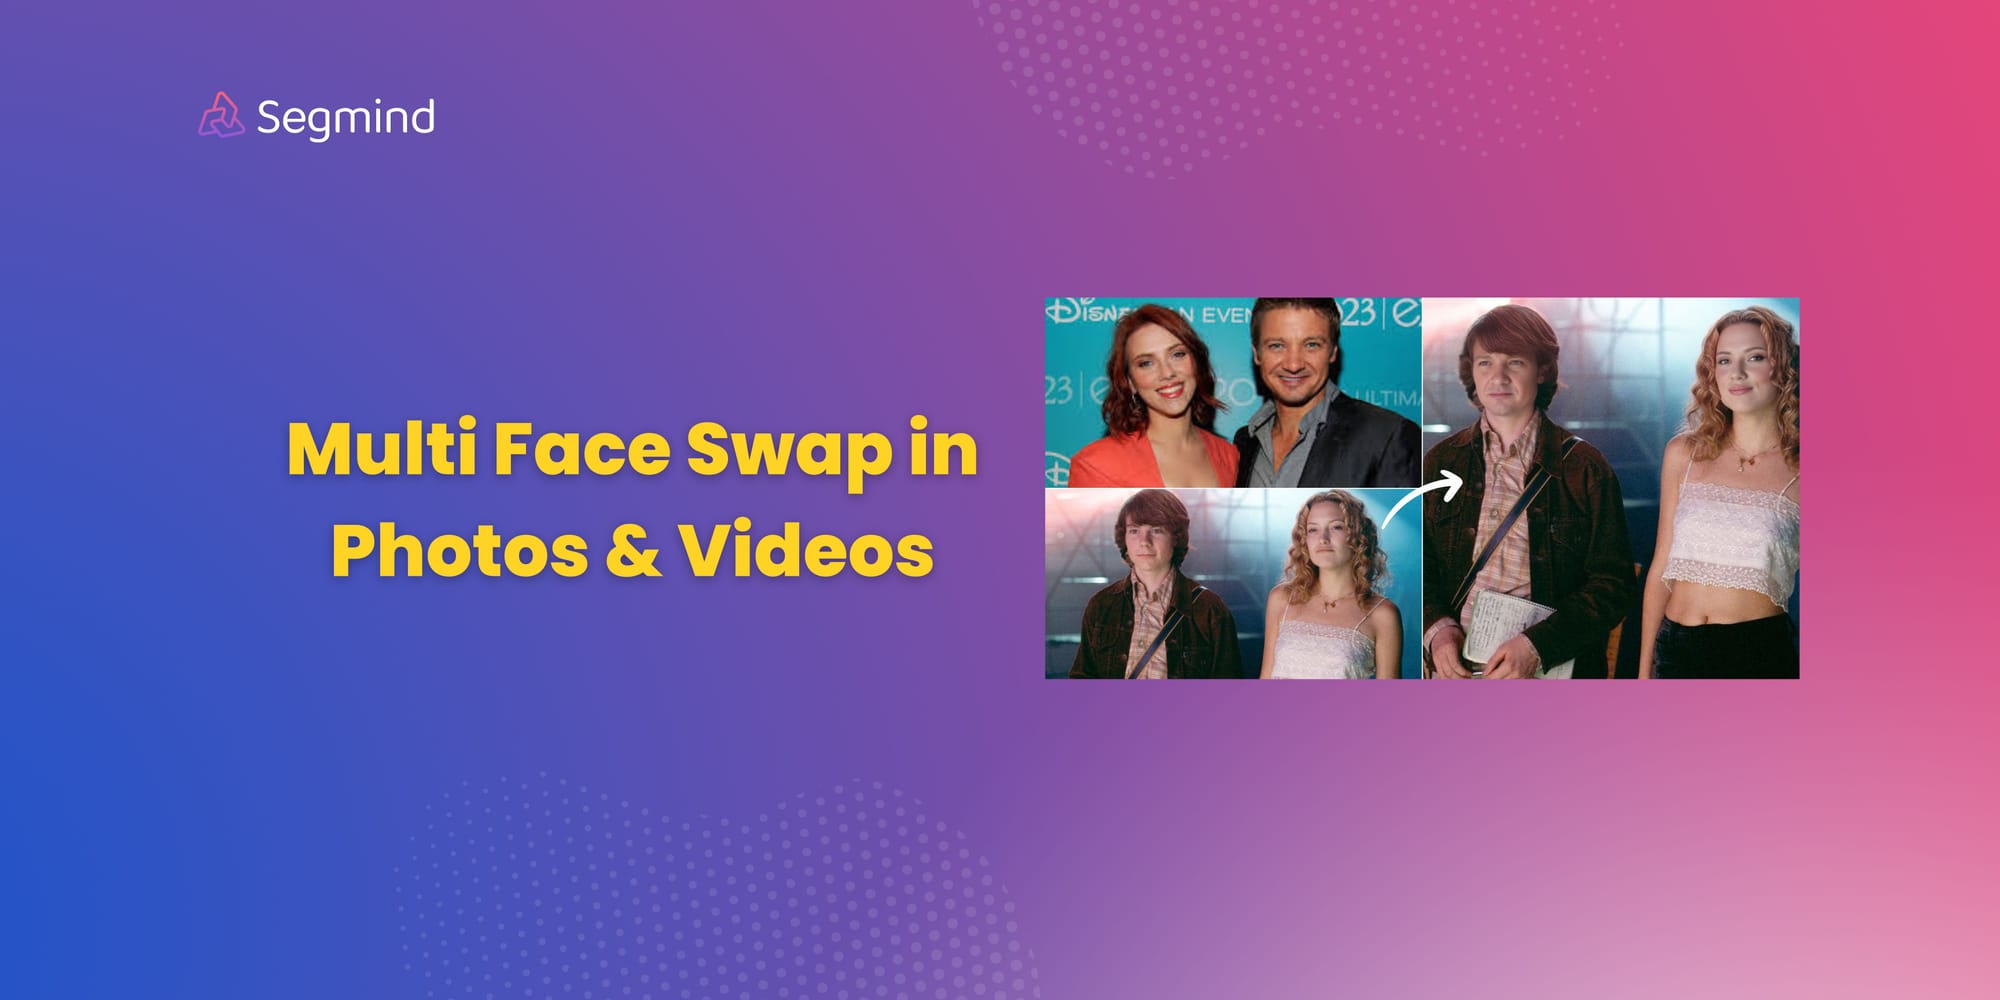
Face swapping used to be a one-to-one deal. You picked two faces, and bam, they switched places. But technology has caught up, and now we can swap multiple faces in a single photo or video.
Multi-person face swapping is a complex process that involves replacing multiple faces within a single image or video with others. This advanced technique builds upon traditional face swapping by handling multiple subjects simultaneously.
This guide will delve practical insights into how to perform multi-person face swaps on both photos and videos.
Multi Face Swap in Photos & Videos
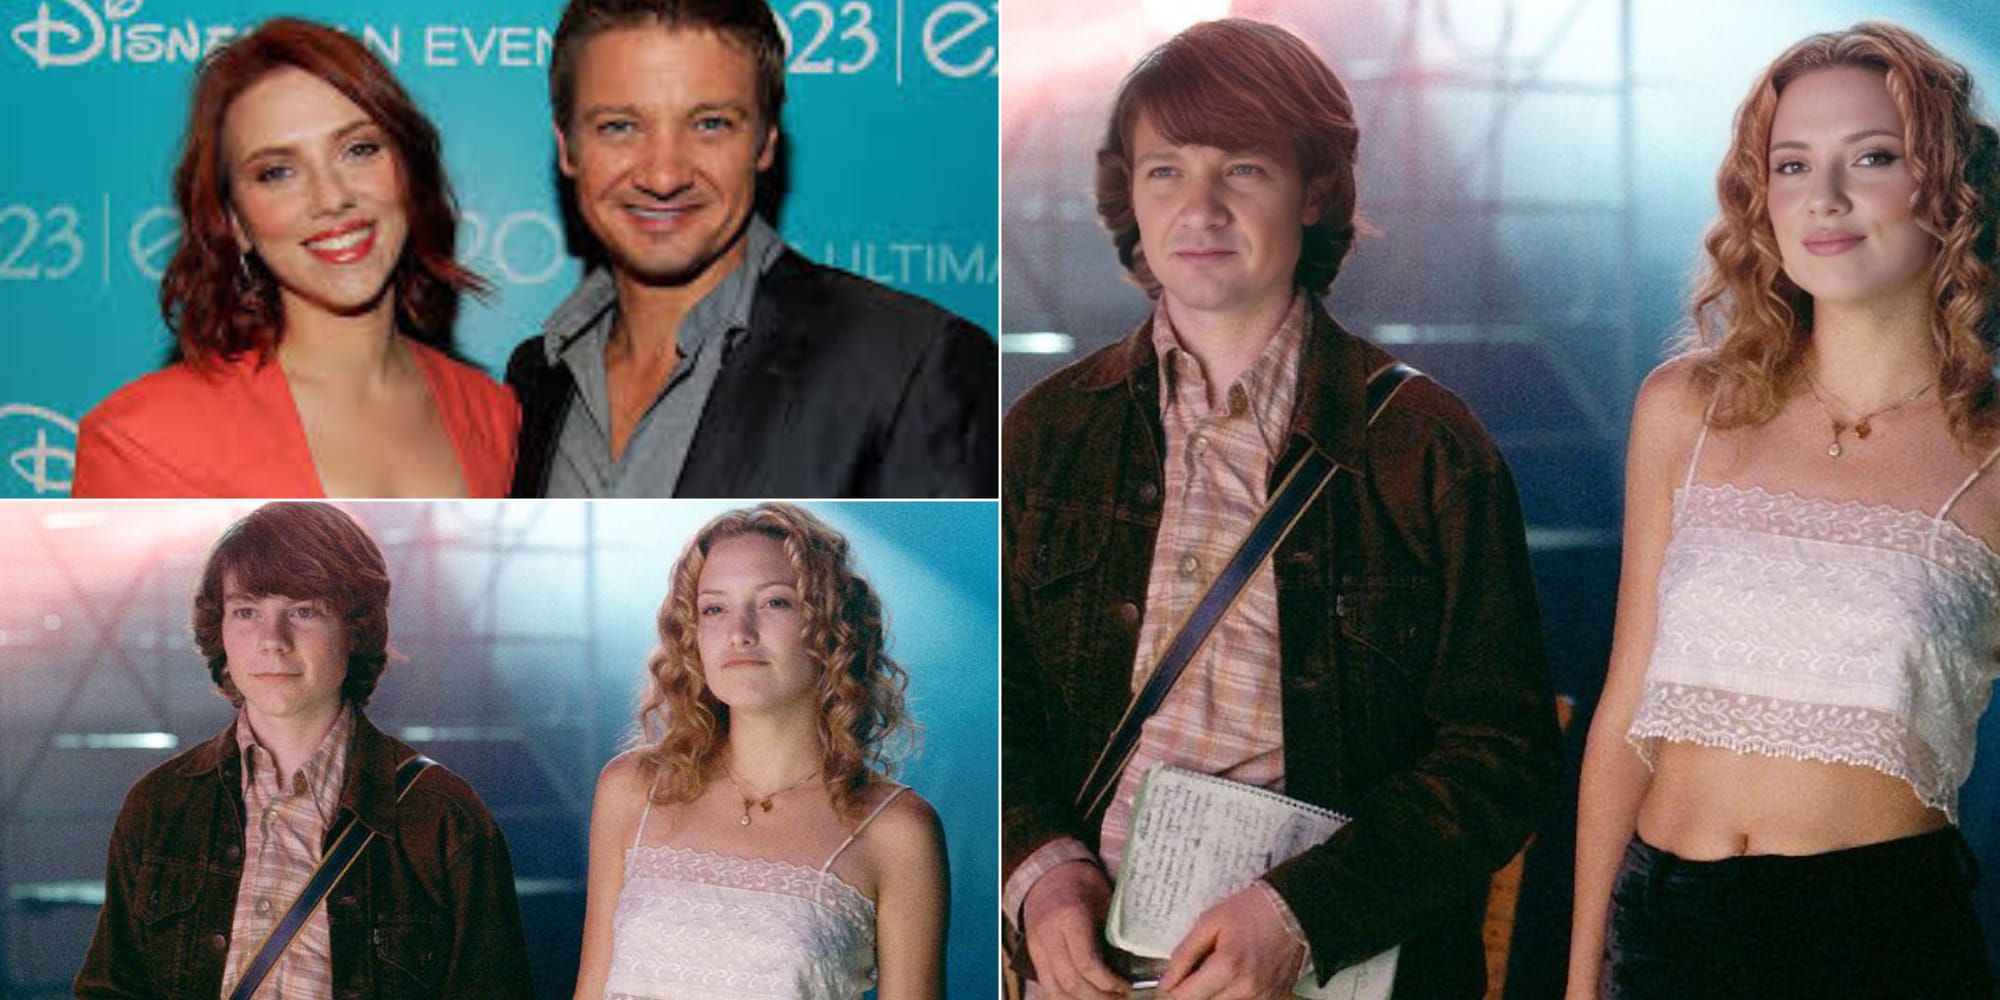
Multi Face Swap in photos & videos is a fun and easy way to see how different faces would look in different contexts or bring humor to group photos. Here’s a detailed guide on how to use the model, including the use of face indexes.
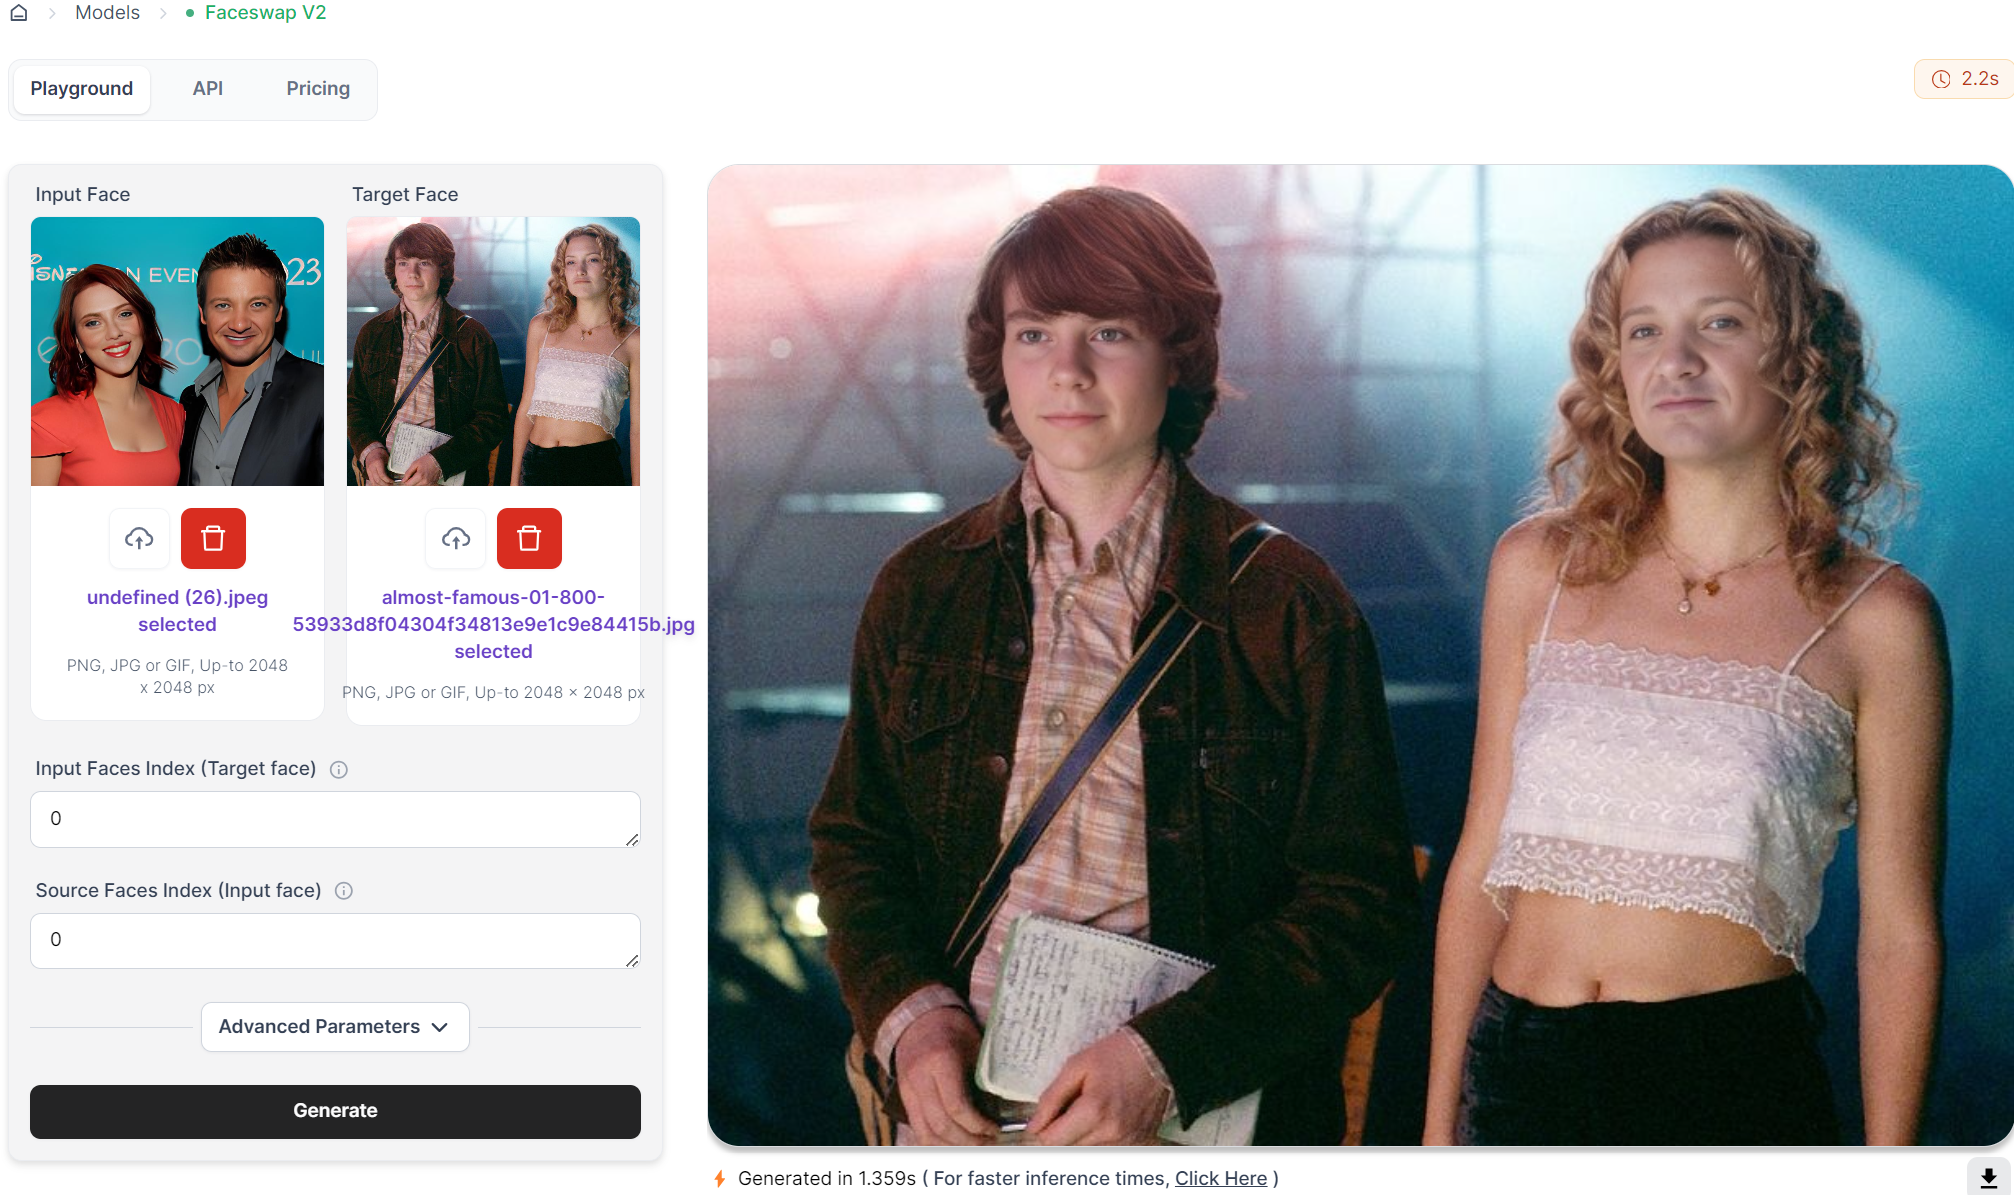
Input Face
Start by uploading the image/video containing the face or faces you want to use as the source. Click the "Click or Drag-n-Drop" area under "Input Face" to select your image/video.
Target Face
Next, upload the image/video that will receive the new faces. This is the "Target Face" image/video. Again, click the "Click or Drag-n-Drop" area under “Target Face” to choose your photo/video.
Face Indexes
Face indexes help identify which faces in the photos you want to swap. The tool uses 'Input Faces Index' (Target Face) and 'Source Faces Index' (Input face) fields.
Index Start: Indexes generally start at 0, so the first face in an image is indexed as 0, the second as 1, the third as 2, and so forth.
Ordering: The indices in the Source Faces Index and Target Faces Index should correspond to each other in the desired order of swaps.
- Example: If you're swapping one face, set both indexes to '0'. For multiple faces, identify and index each face in the order they appear in the image. For example, if you want to swap the first face in the Input Face with the second face in the Target Face, you would set Input Faces Index to '1' and Source Faces Index to '0'.
Here are some examples of different combinations of face indexes between the source and target images to help you understand various swapping possibilities.
Example 1: One-to-One Face Swap
Scenario: Swap the first face from the Source image with the first face in the Target image.
- Source Face Index: 0
- Target Face Index: 0
Example 2: One-to-Many Face Swap
Scenario: Swap a single face from the Source image with multiple faces in the Target image.
- Source Face Index: 0
- Target Face Index: 0, 1
Here, the first face of the Source image replaces the first, and second faces of the Target image.

Example 3: Many-to-Many Face Swap
Scenario: Swap multiple faces in the Source image with multiple faces in the Target image.
- Source Face Index: 0, 1, 2
- Target Face Index: 2, 0, 1
The first face of the Source image swaps with the third face of the Target image. The second face of the Source image swaps with the first face of the Target image. The third face of the Source image swaps with the second face of the Target image.

Example 4: Mixed Indexing
Scenario: Swap non-sequential faces between the Source and Target images.
- Source Face Index: 1, 3
- Target Face Index: 2, 0
The second face of the Source image swaps with the third face of the Target image. The fourth face of the Source image swaps with the first face of the Target image.